Initia network is enhancing blockchain technology through the integration of MoveVM and the Cosmos Inter-Blockchain Communication (IBC) protocol, ensuring seamless interoperability between its L1 and L2 layers. This innovative approach provides developers with the flexibility to use various virtual machines, such as EVM, WasmVM, and MoveVM, enabling the creation of scalable and autonomous systems.
Initia has raised $7.5M from Delphi Digital, Nascent, and most importantly, Binance Labs, whose investment amount has not yet been disclosed.
Now they launched official public testnet. It periodically lags due to the influx of people. So be patient or do it later in the night. I noticed that at this time it is quite stable.
Important! You must feed your Jennie, otherwise it will starve to death and you won’t be able to complete the 8 weeks of testnet.
This campaign will run for 8 weeks, so I don’t recommend skipping these relatively easy activities.
Install Initia Wallet
- Download Initia Wallet and install it;
- Open the wallet and choose one of the authorization methods (I recommend via email);
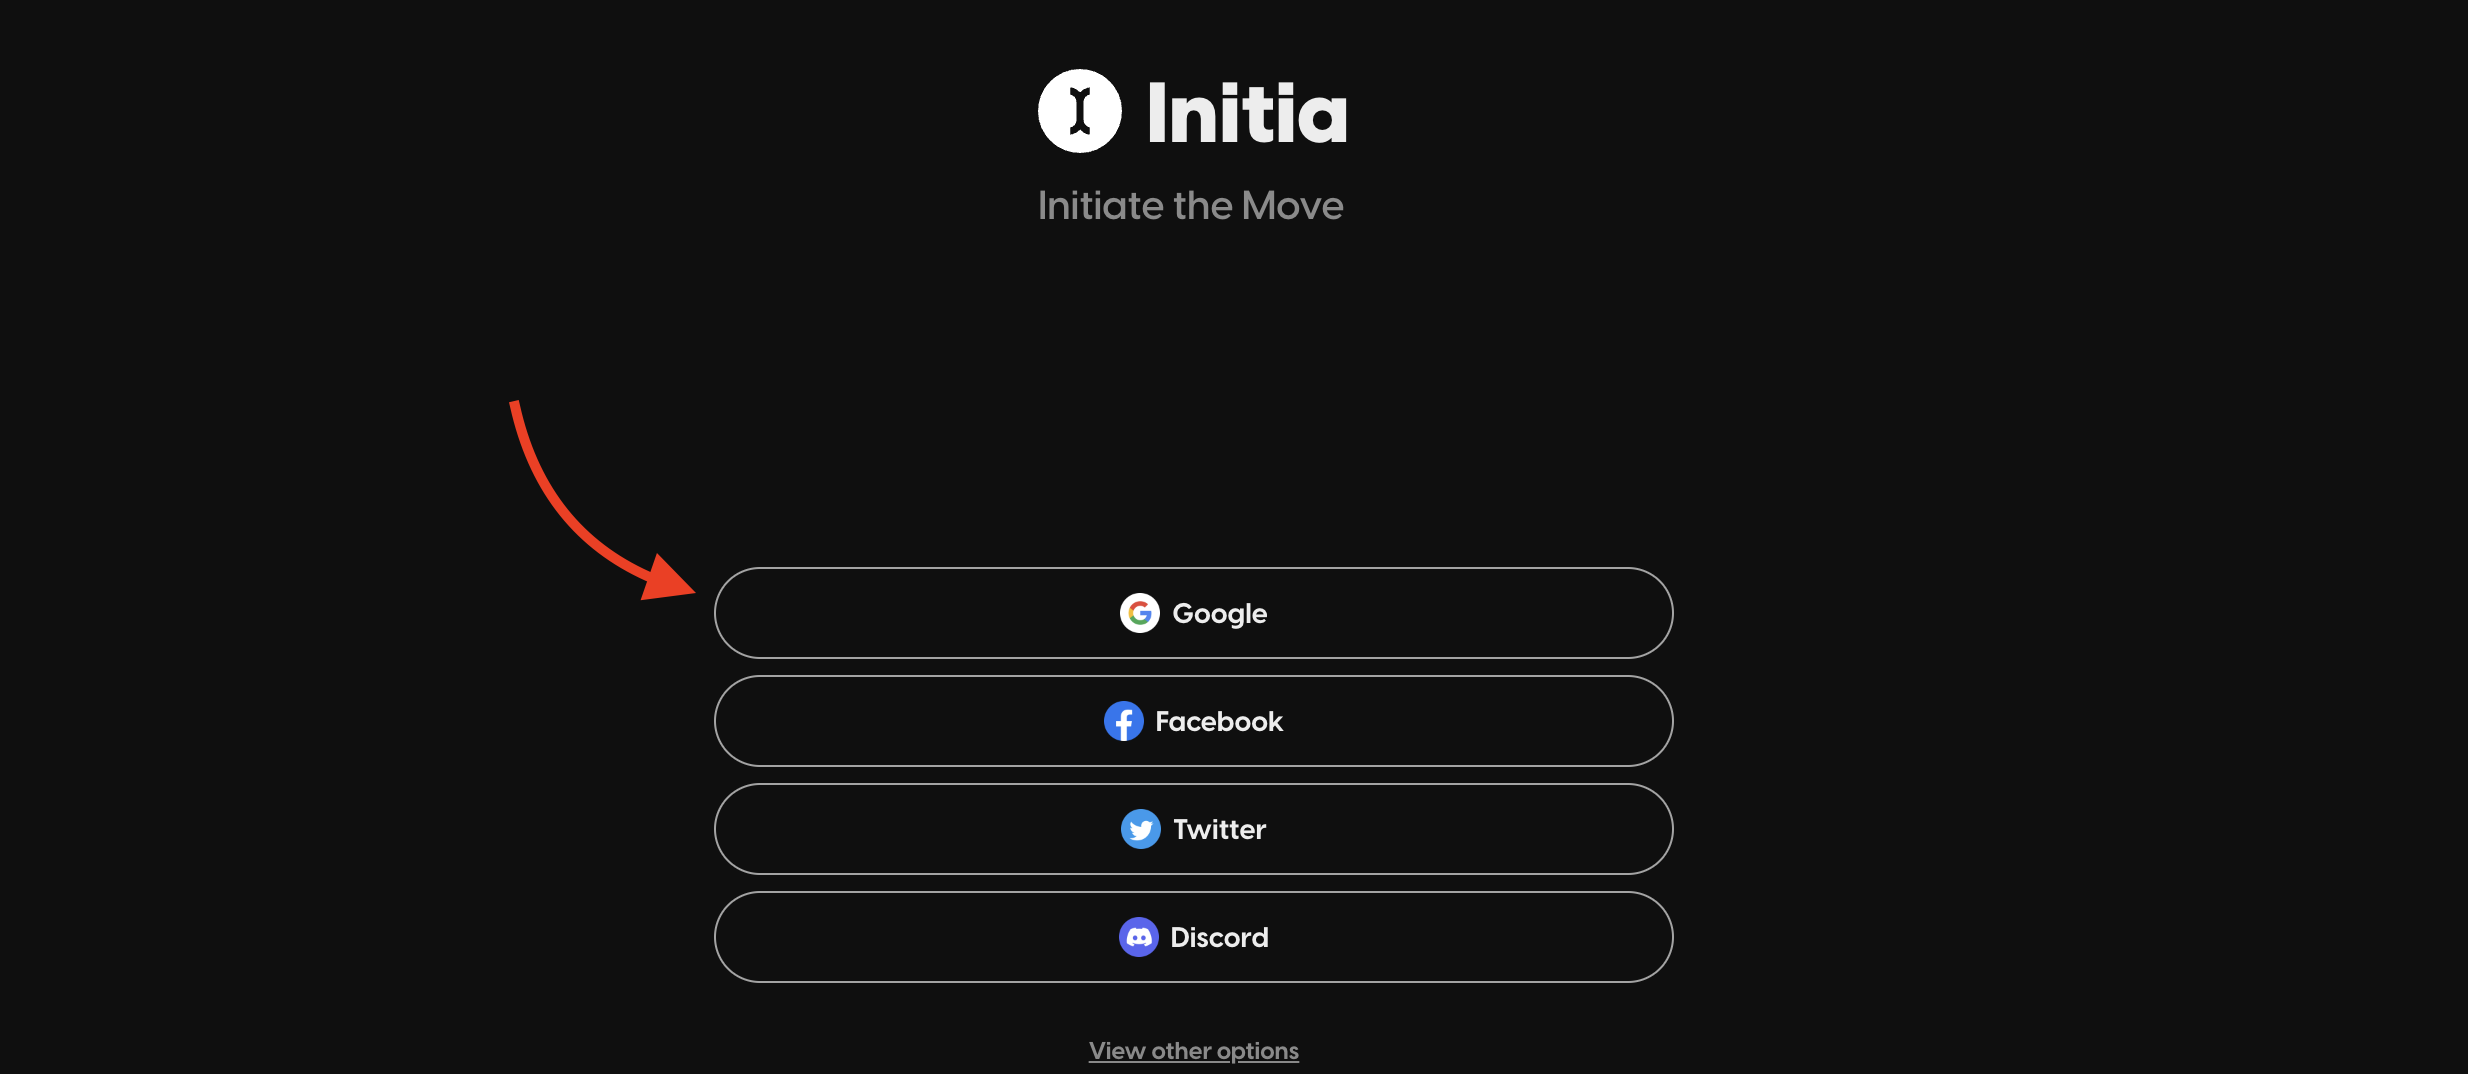
- Enter [Password] and [Confirm password] to secure wallet and click [Next];

- And in opened window click on your email which you want to use for authorization.
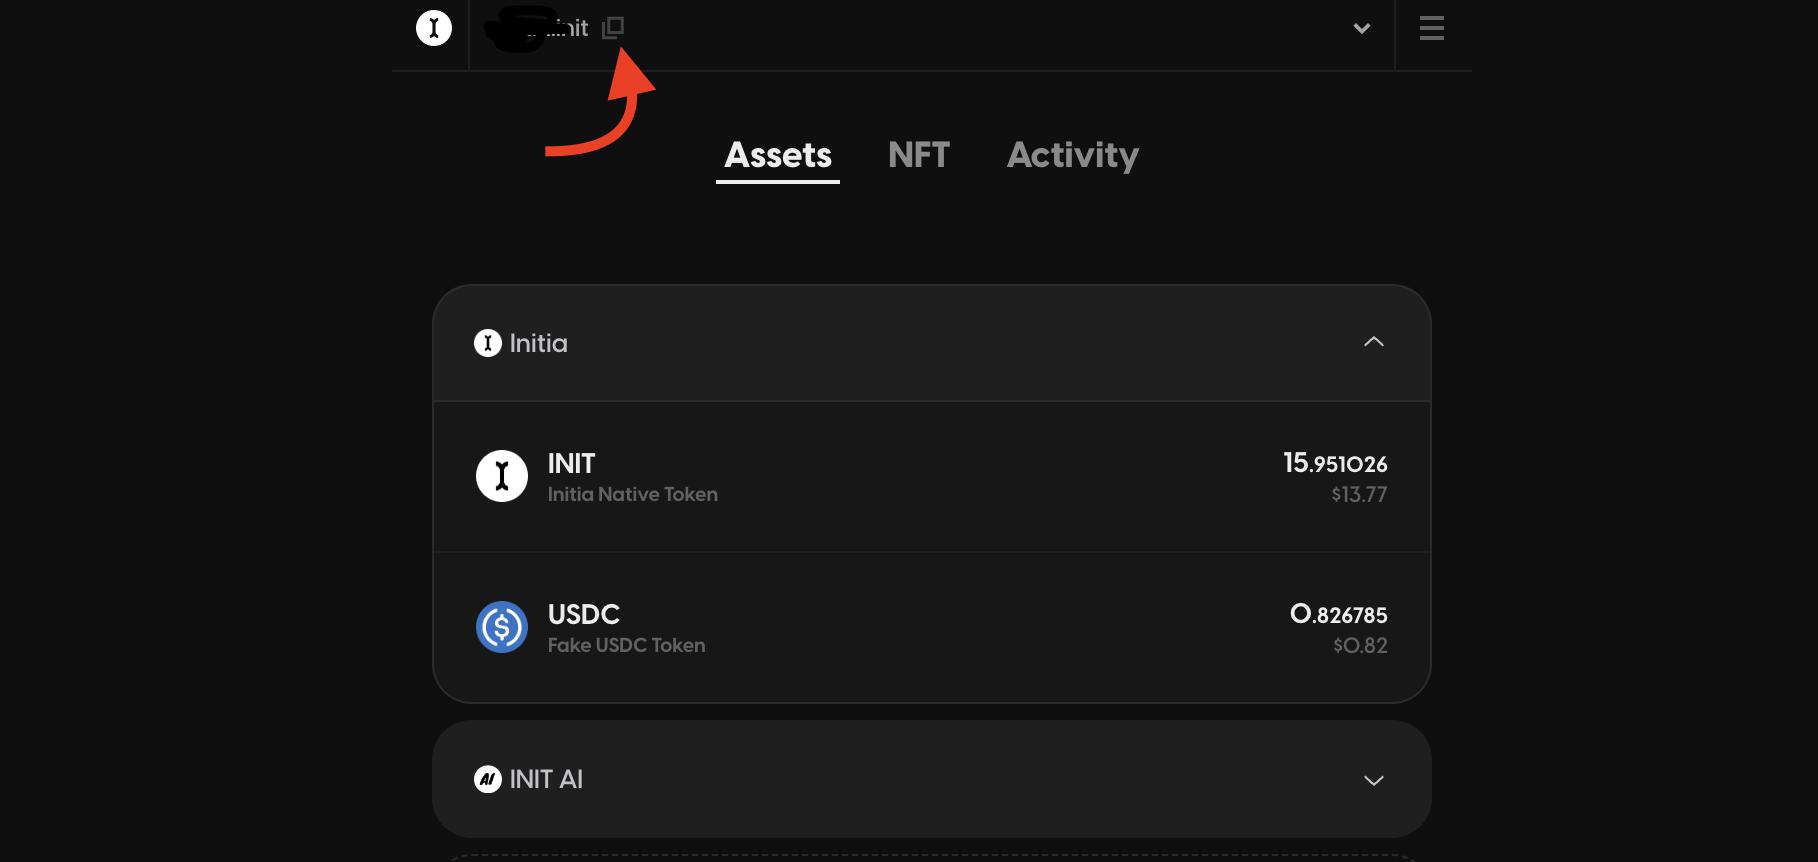
Request test tokens
- After registration, you’ll see wallet window, click on top left [icon] to copy your wallet address;
- Go to Initia Faucet and click on [Discord channel link] to pass faucet verification;
- Faucet verification role should assigned to your account from 15 minutes to few hours.
- After verification, enter copied [wallet address] and click [Submit] button;
- If you received an error while claiming, just try again.

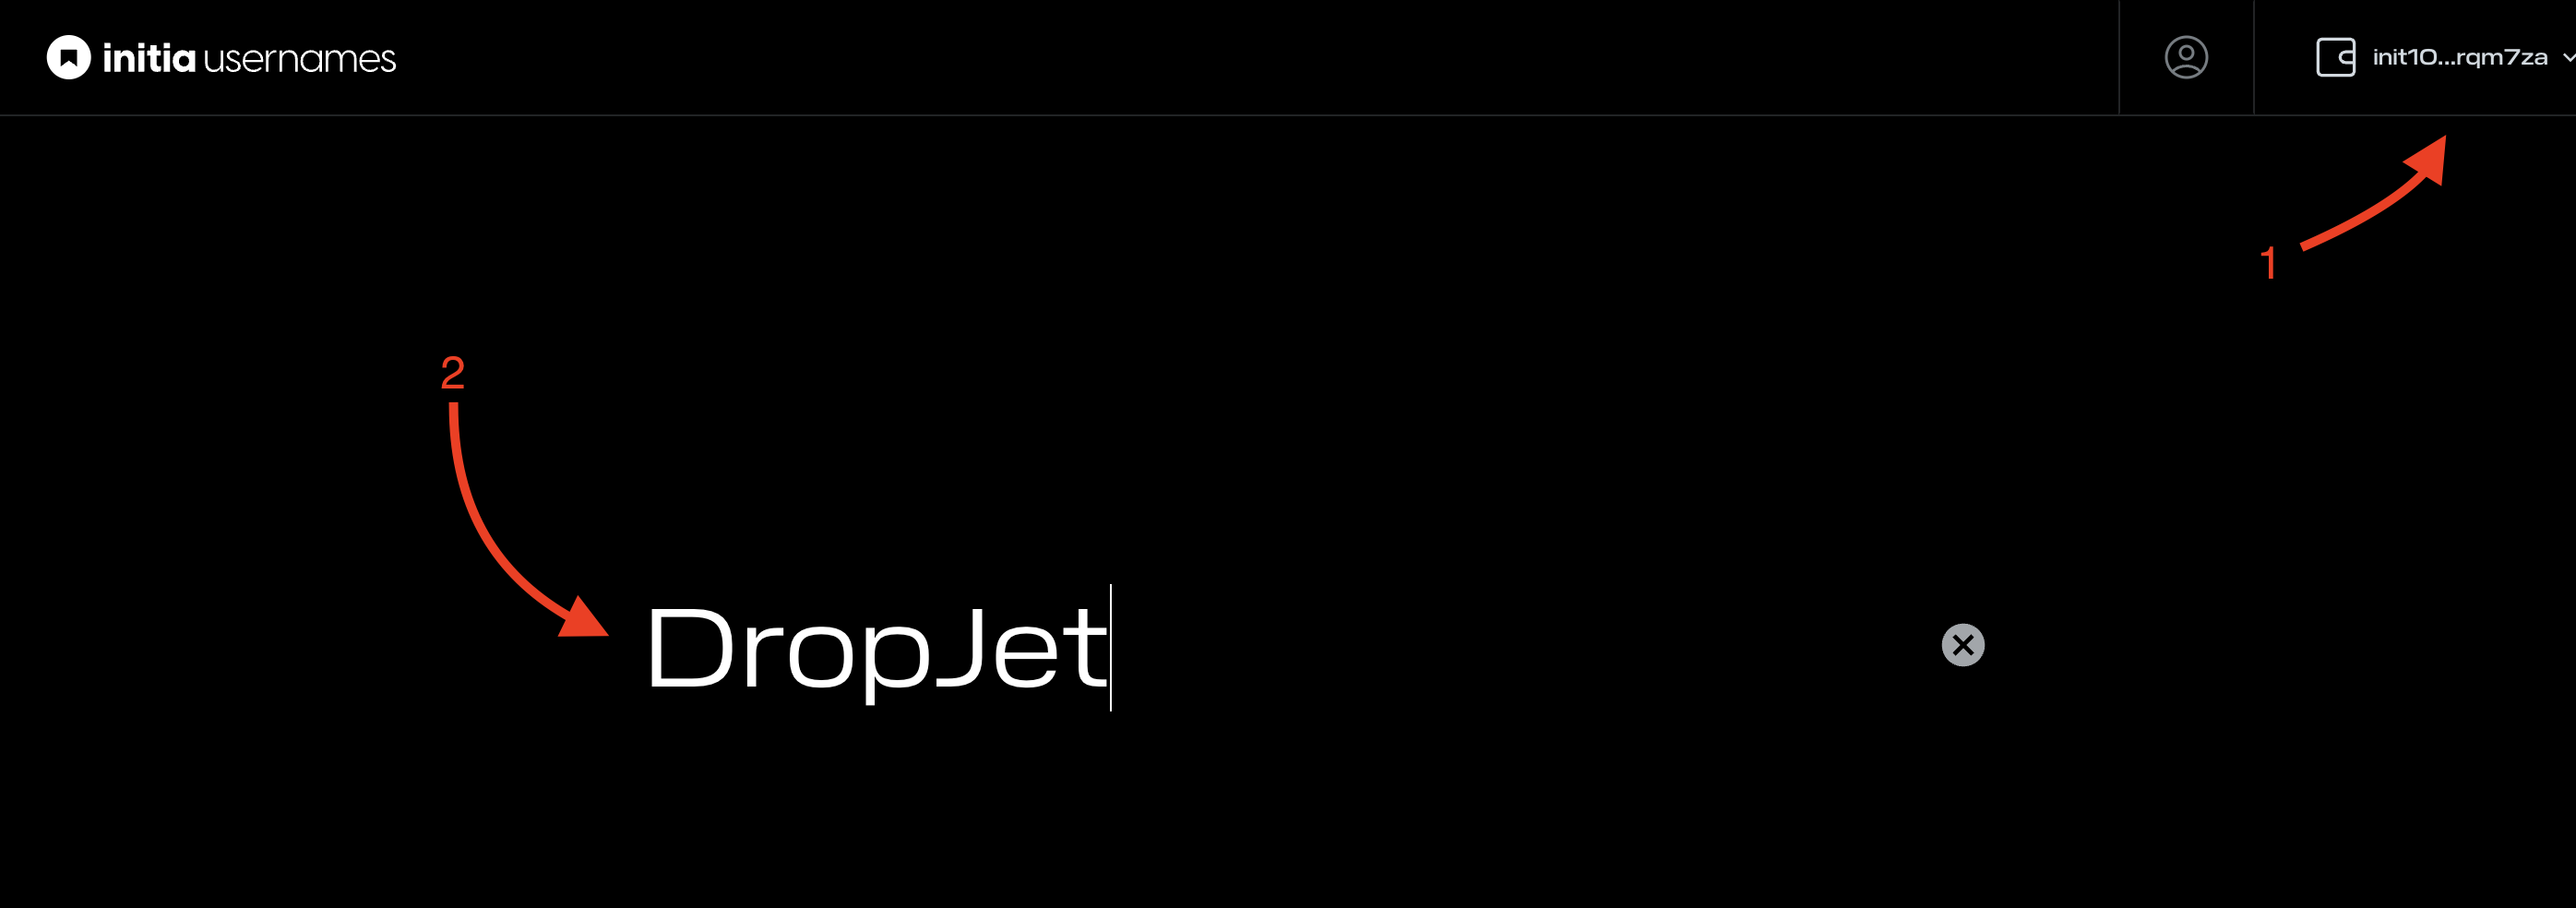
Buy an Initia Username
- Go to Initia Usernames service and click [Connect] in top right corner and connect with [Initia Wallet] method;
- Next, enter your [username] and press [Enter] key or [submit] from keyboard on your mobile;
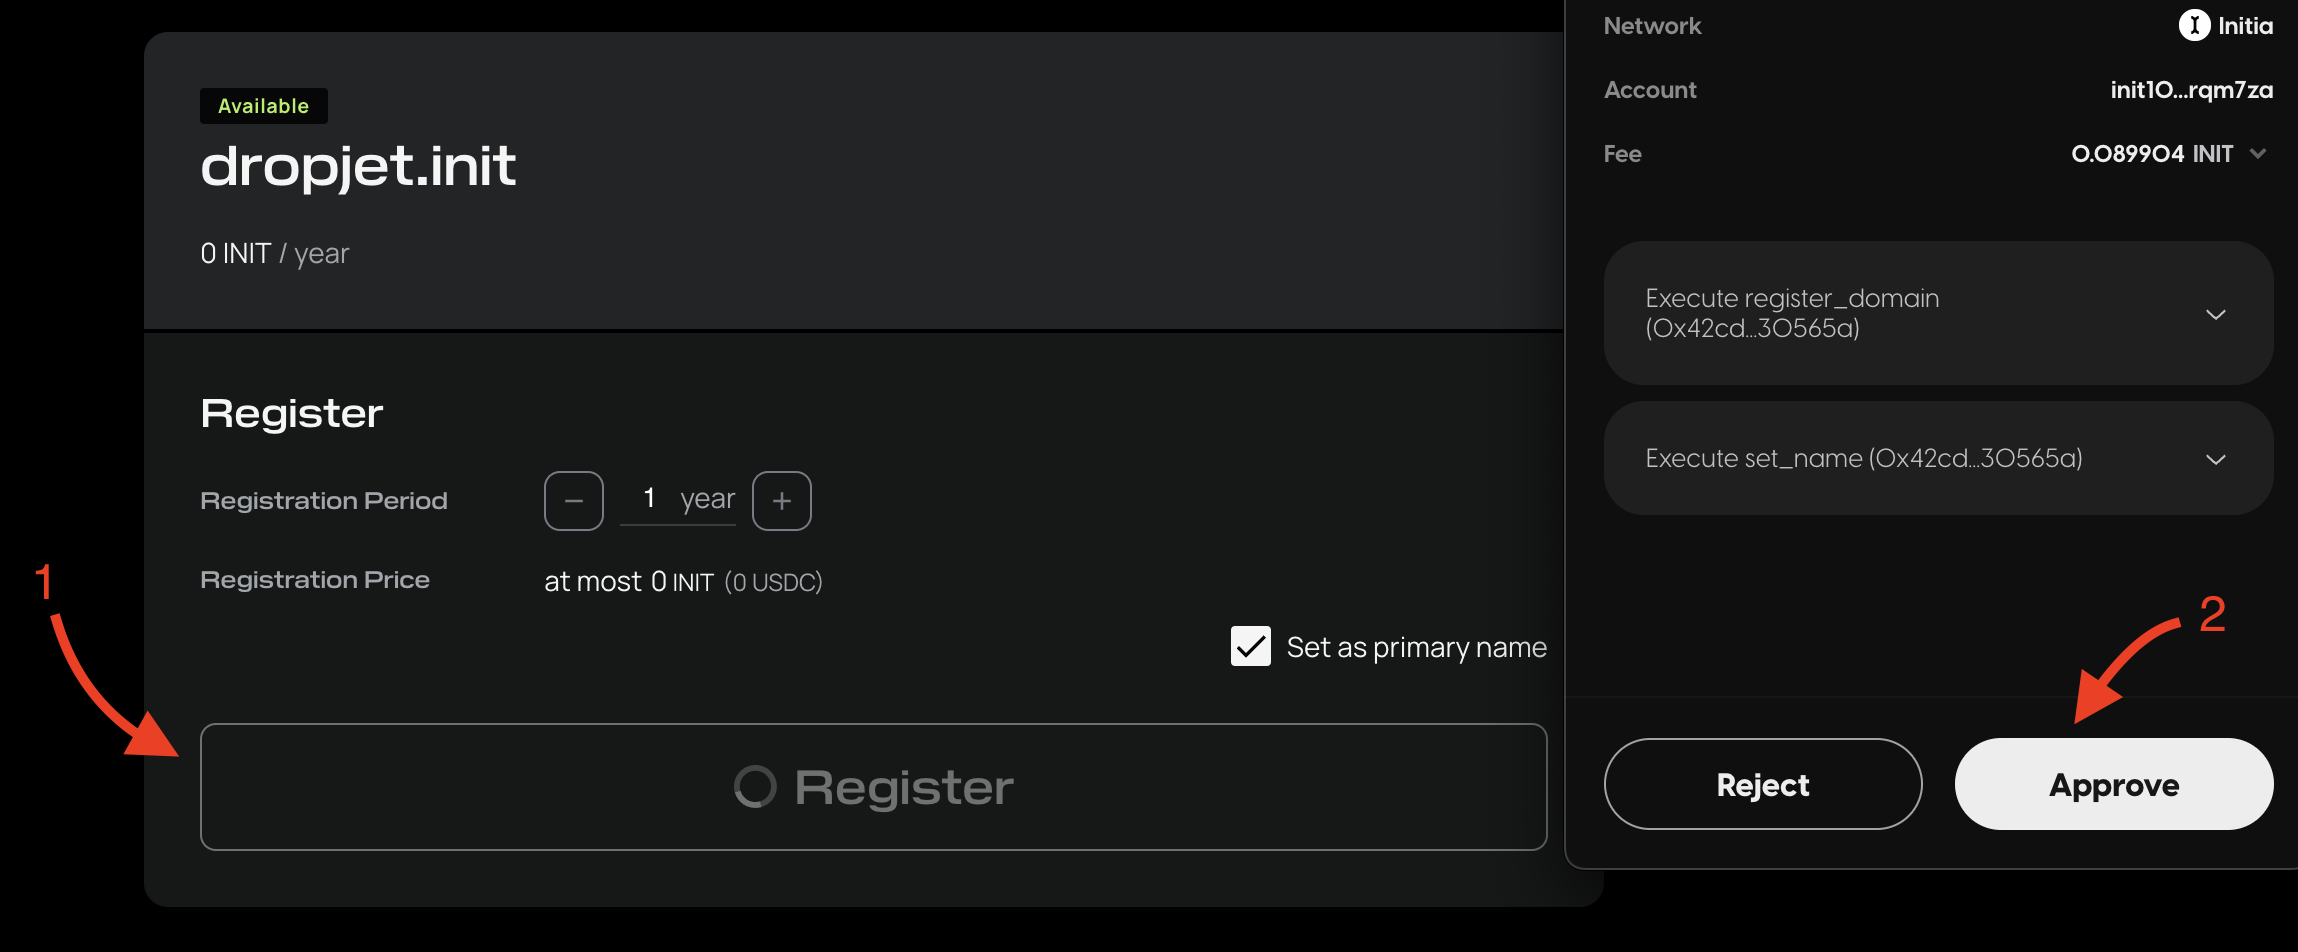
- In next window, click [Register] button and [Approve] in Initia wallet;
Make tokens swap
- Go to Initia Swap click [Connect] wallet in header;
- Enter 1-3 INIT to USDC, ETH or TIA and click [Next];
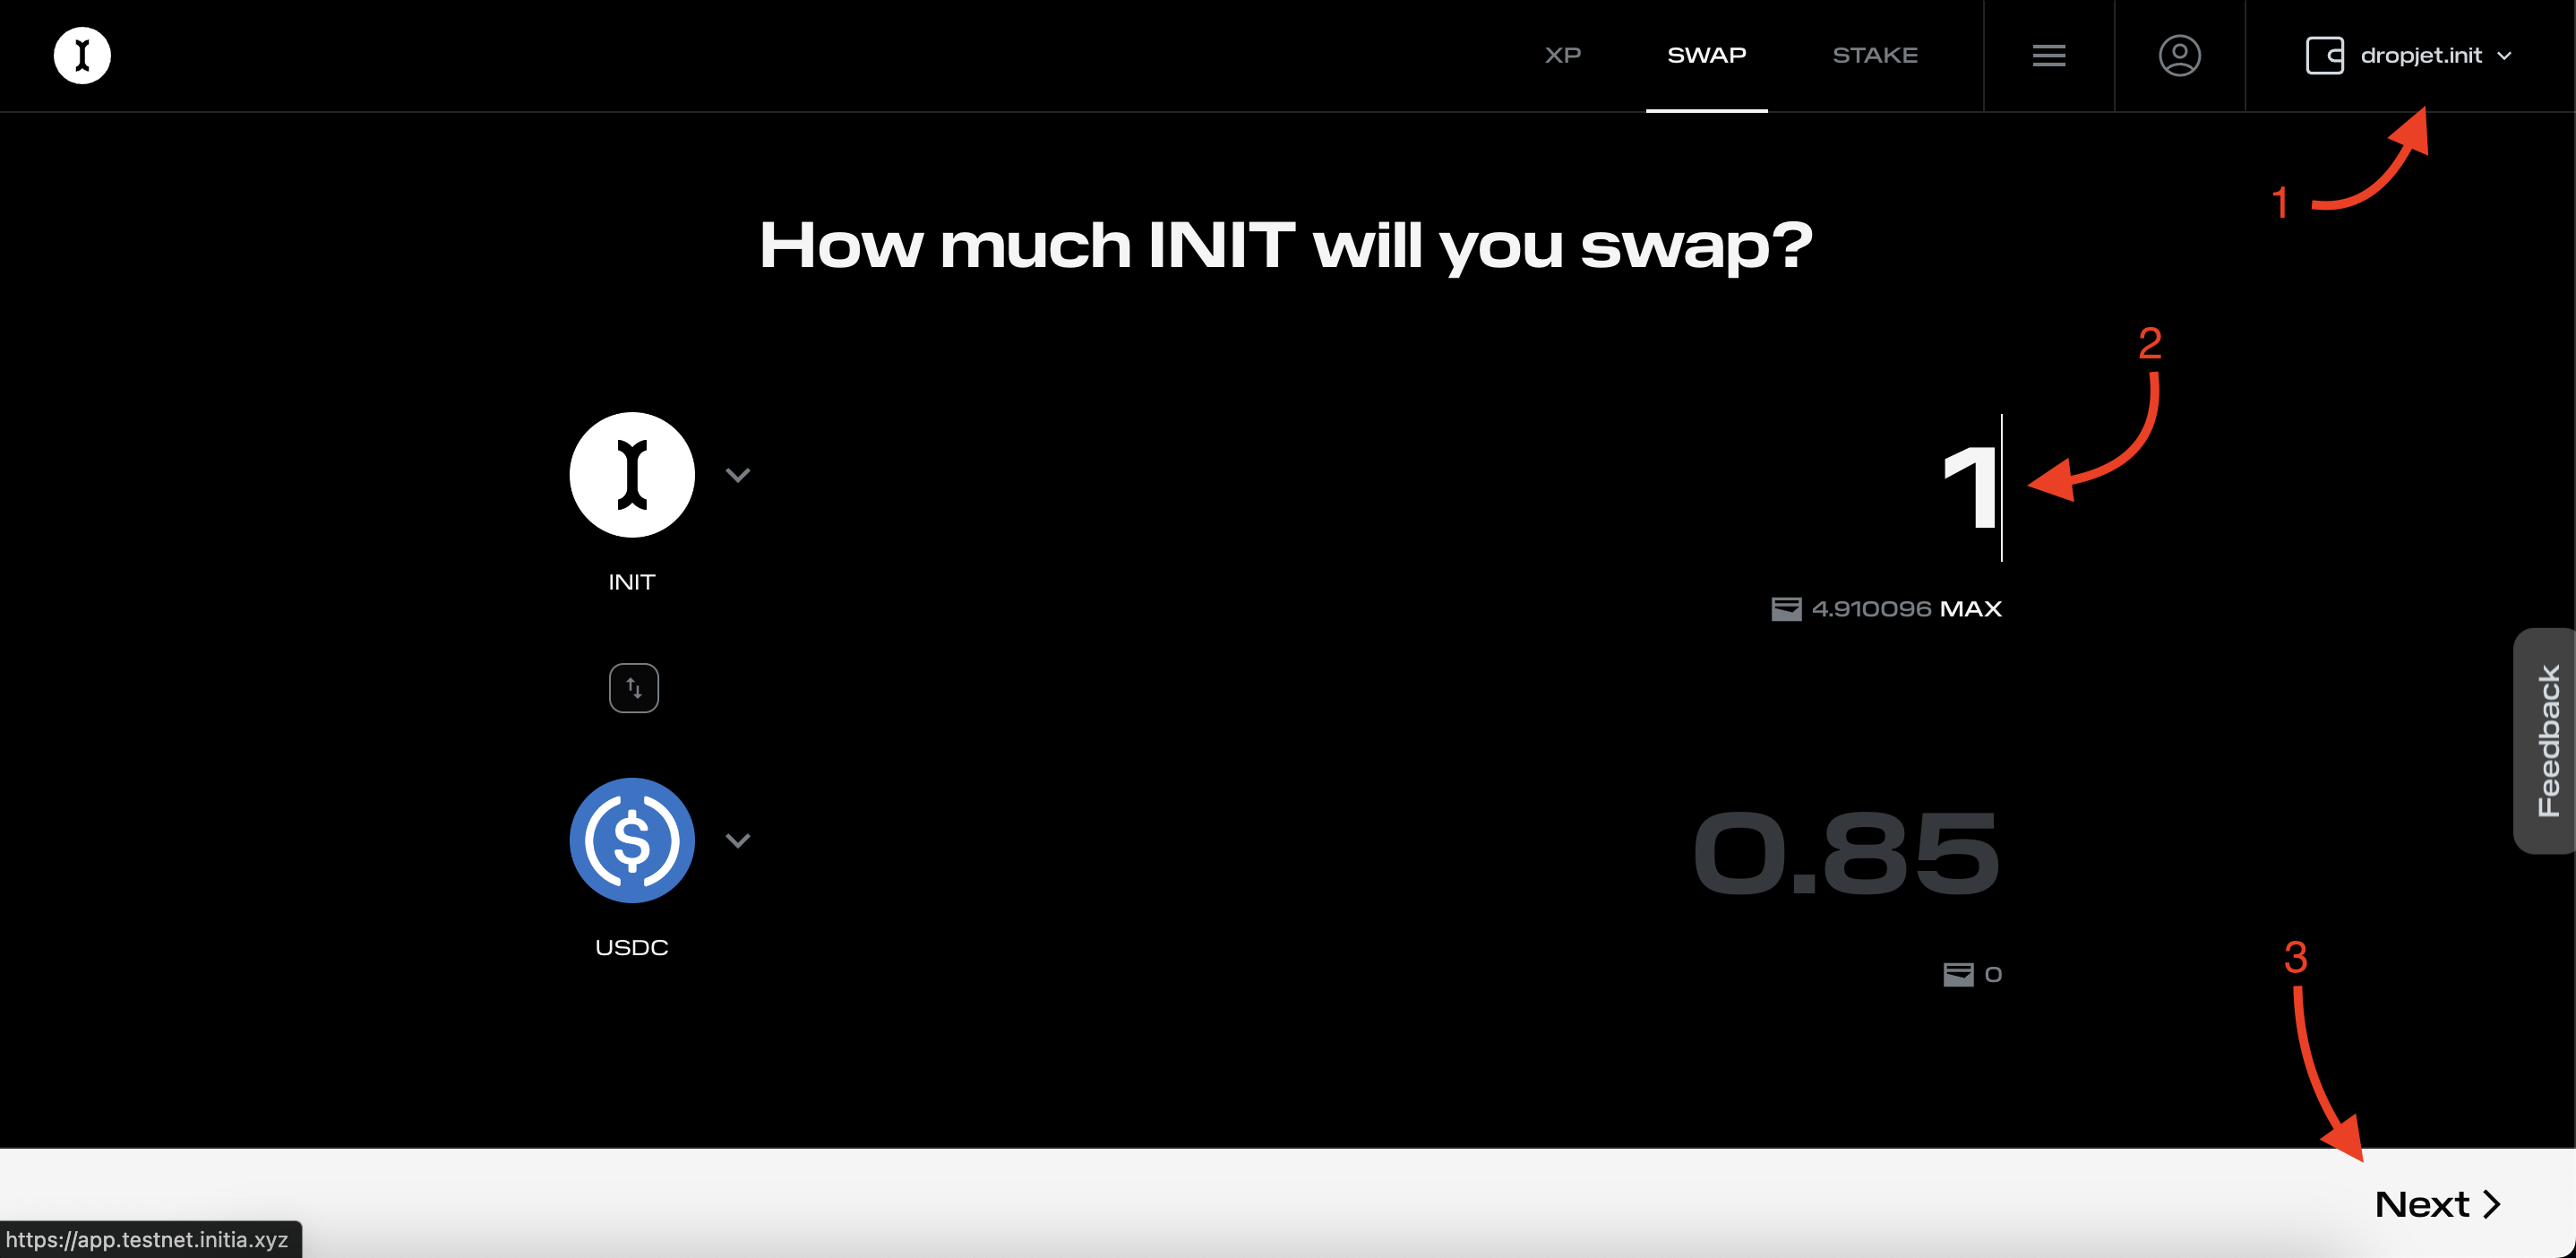
- And in next window click [Confirm] on the same button place and [Approve] in wallet.
Stake INIT with a validator
- Go to Initia Validator Stake and enter 1 INIT and click [Next];
- In next window, select validator with free spots from the list and click [Next];
- And on the confirmation page, click [Confirm] and [Approve] in wallet.
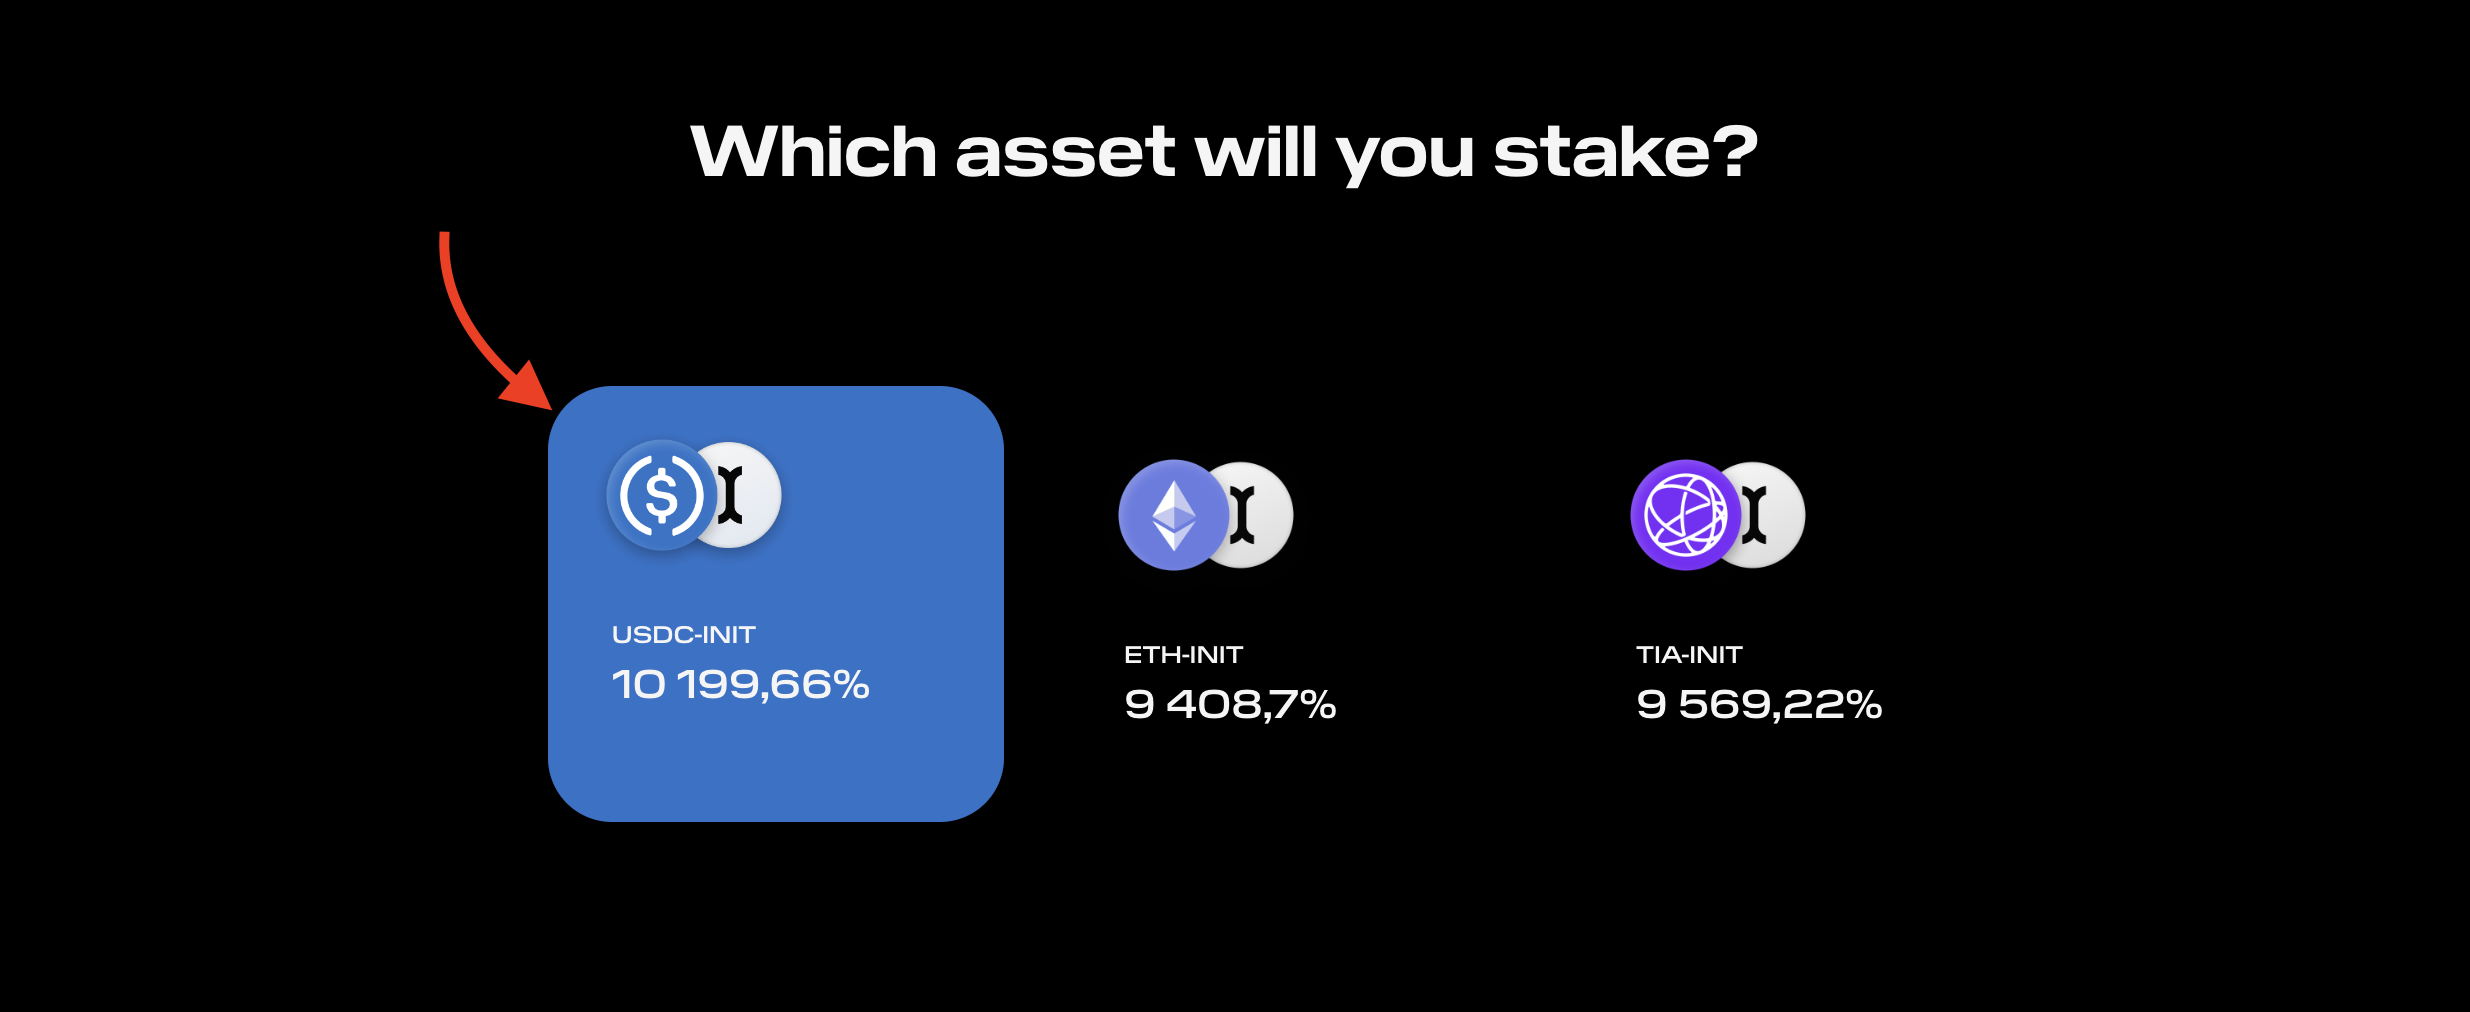
Stake INIT LP with a validator
- Visit Initia LP stacking page and select one of pair you tokens have (Example: INIT-USDC);
- Enter an amount of tokens to stake and click [Next];
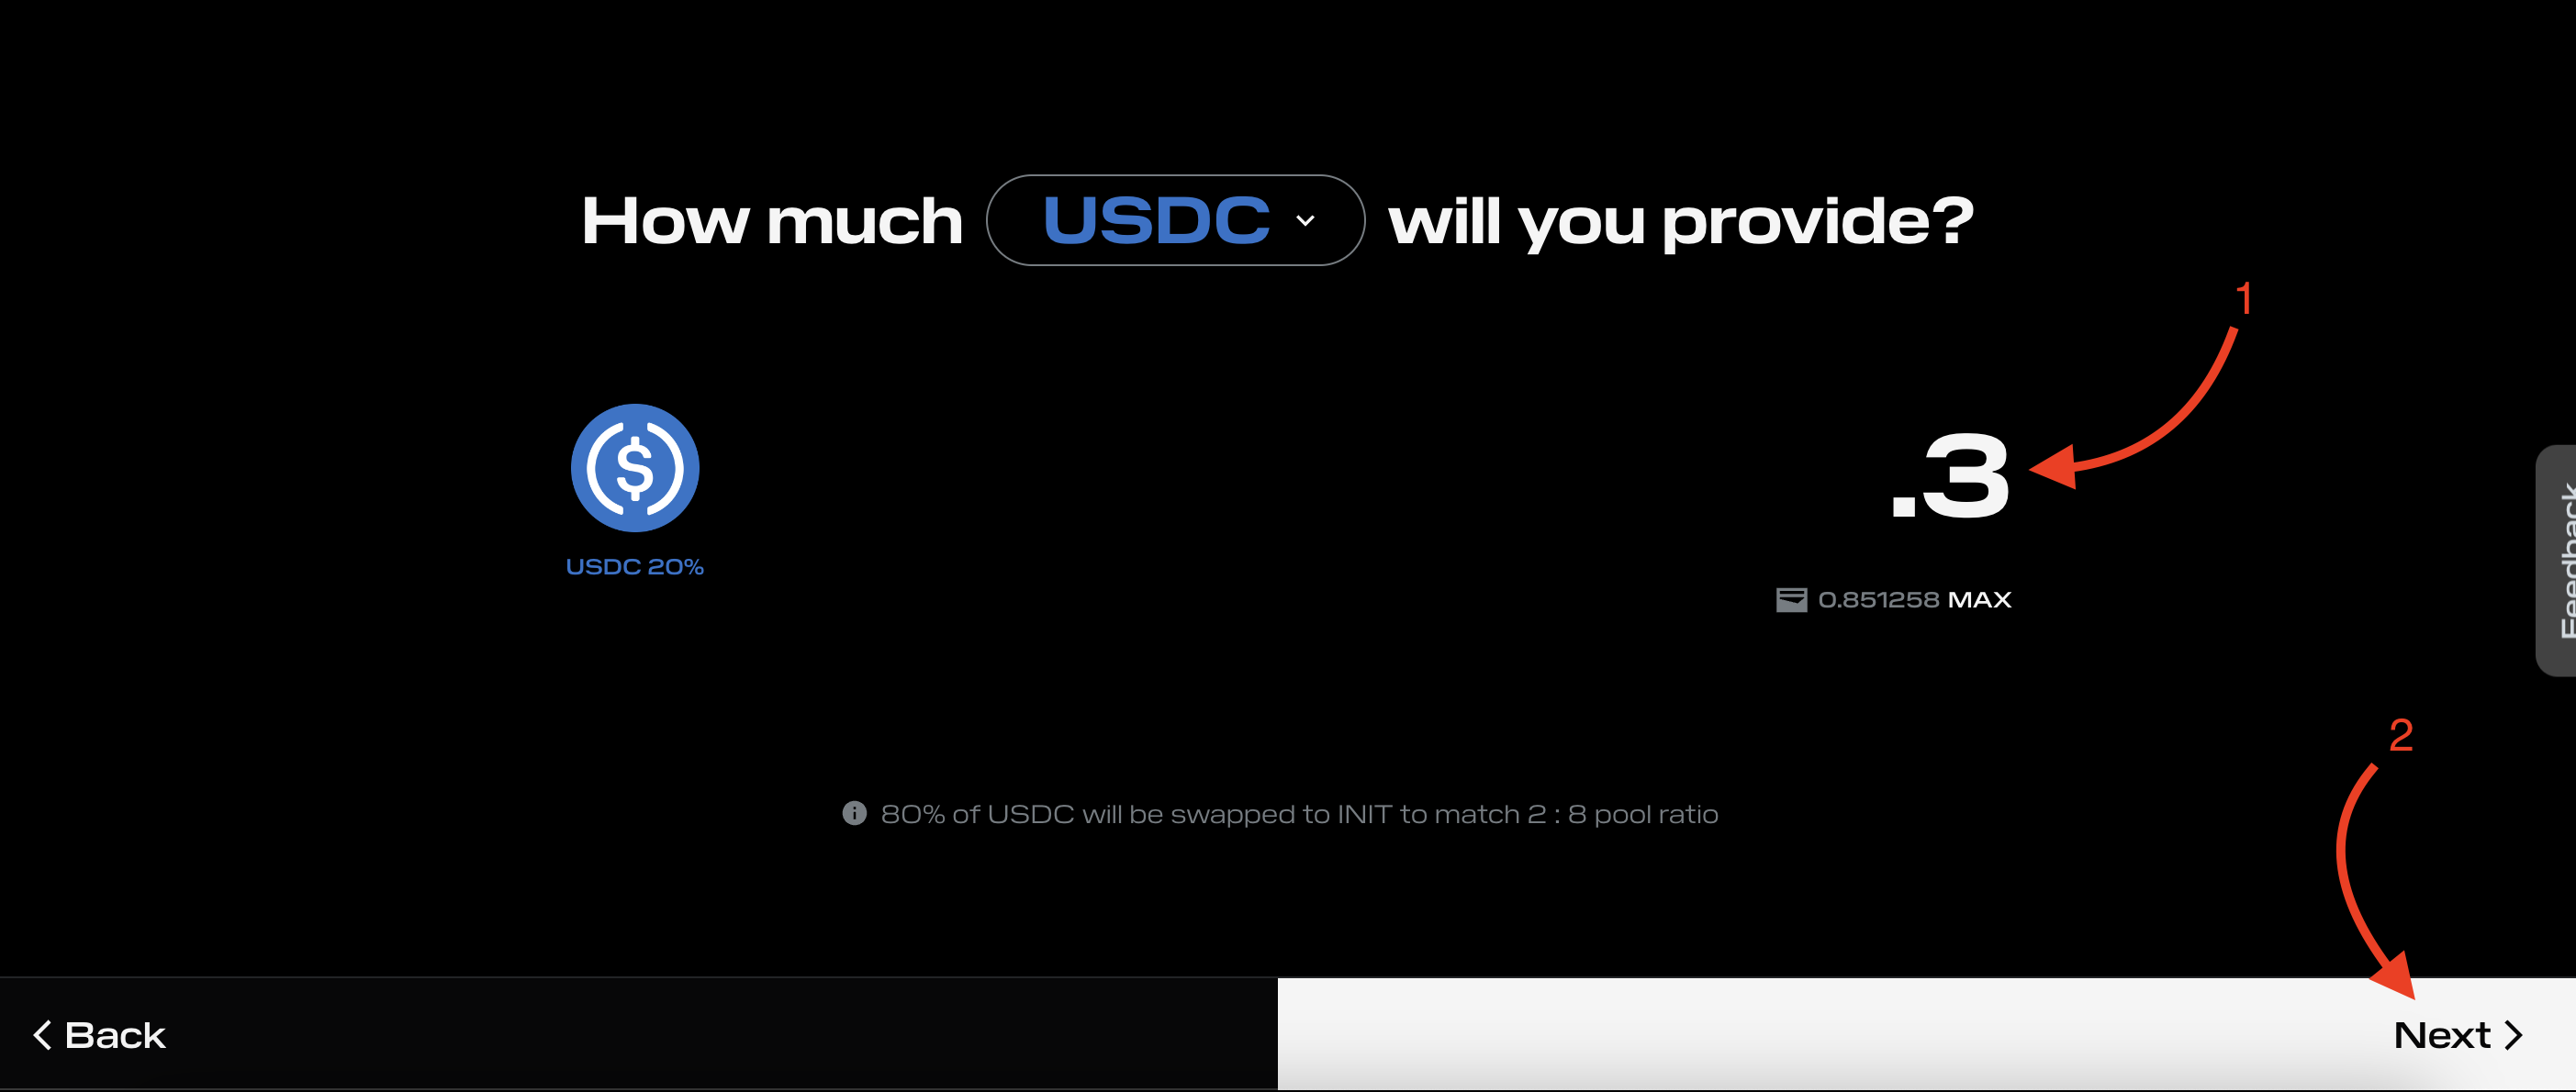
- Again select validator from the list and click [Next];
- And to complete stacking click [Confirm] button and [Approve] transaction in Initia wallet.
Claim staking rewards
Go to XP Dashboard and click on [Claim stacking reward] box and [Approve] in wallet.
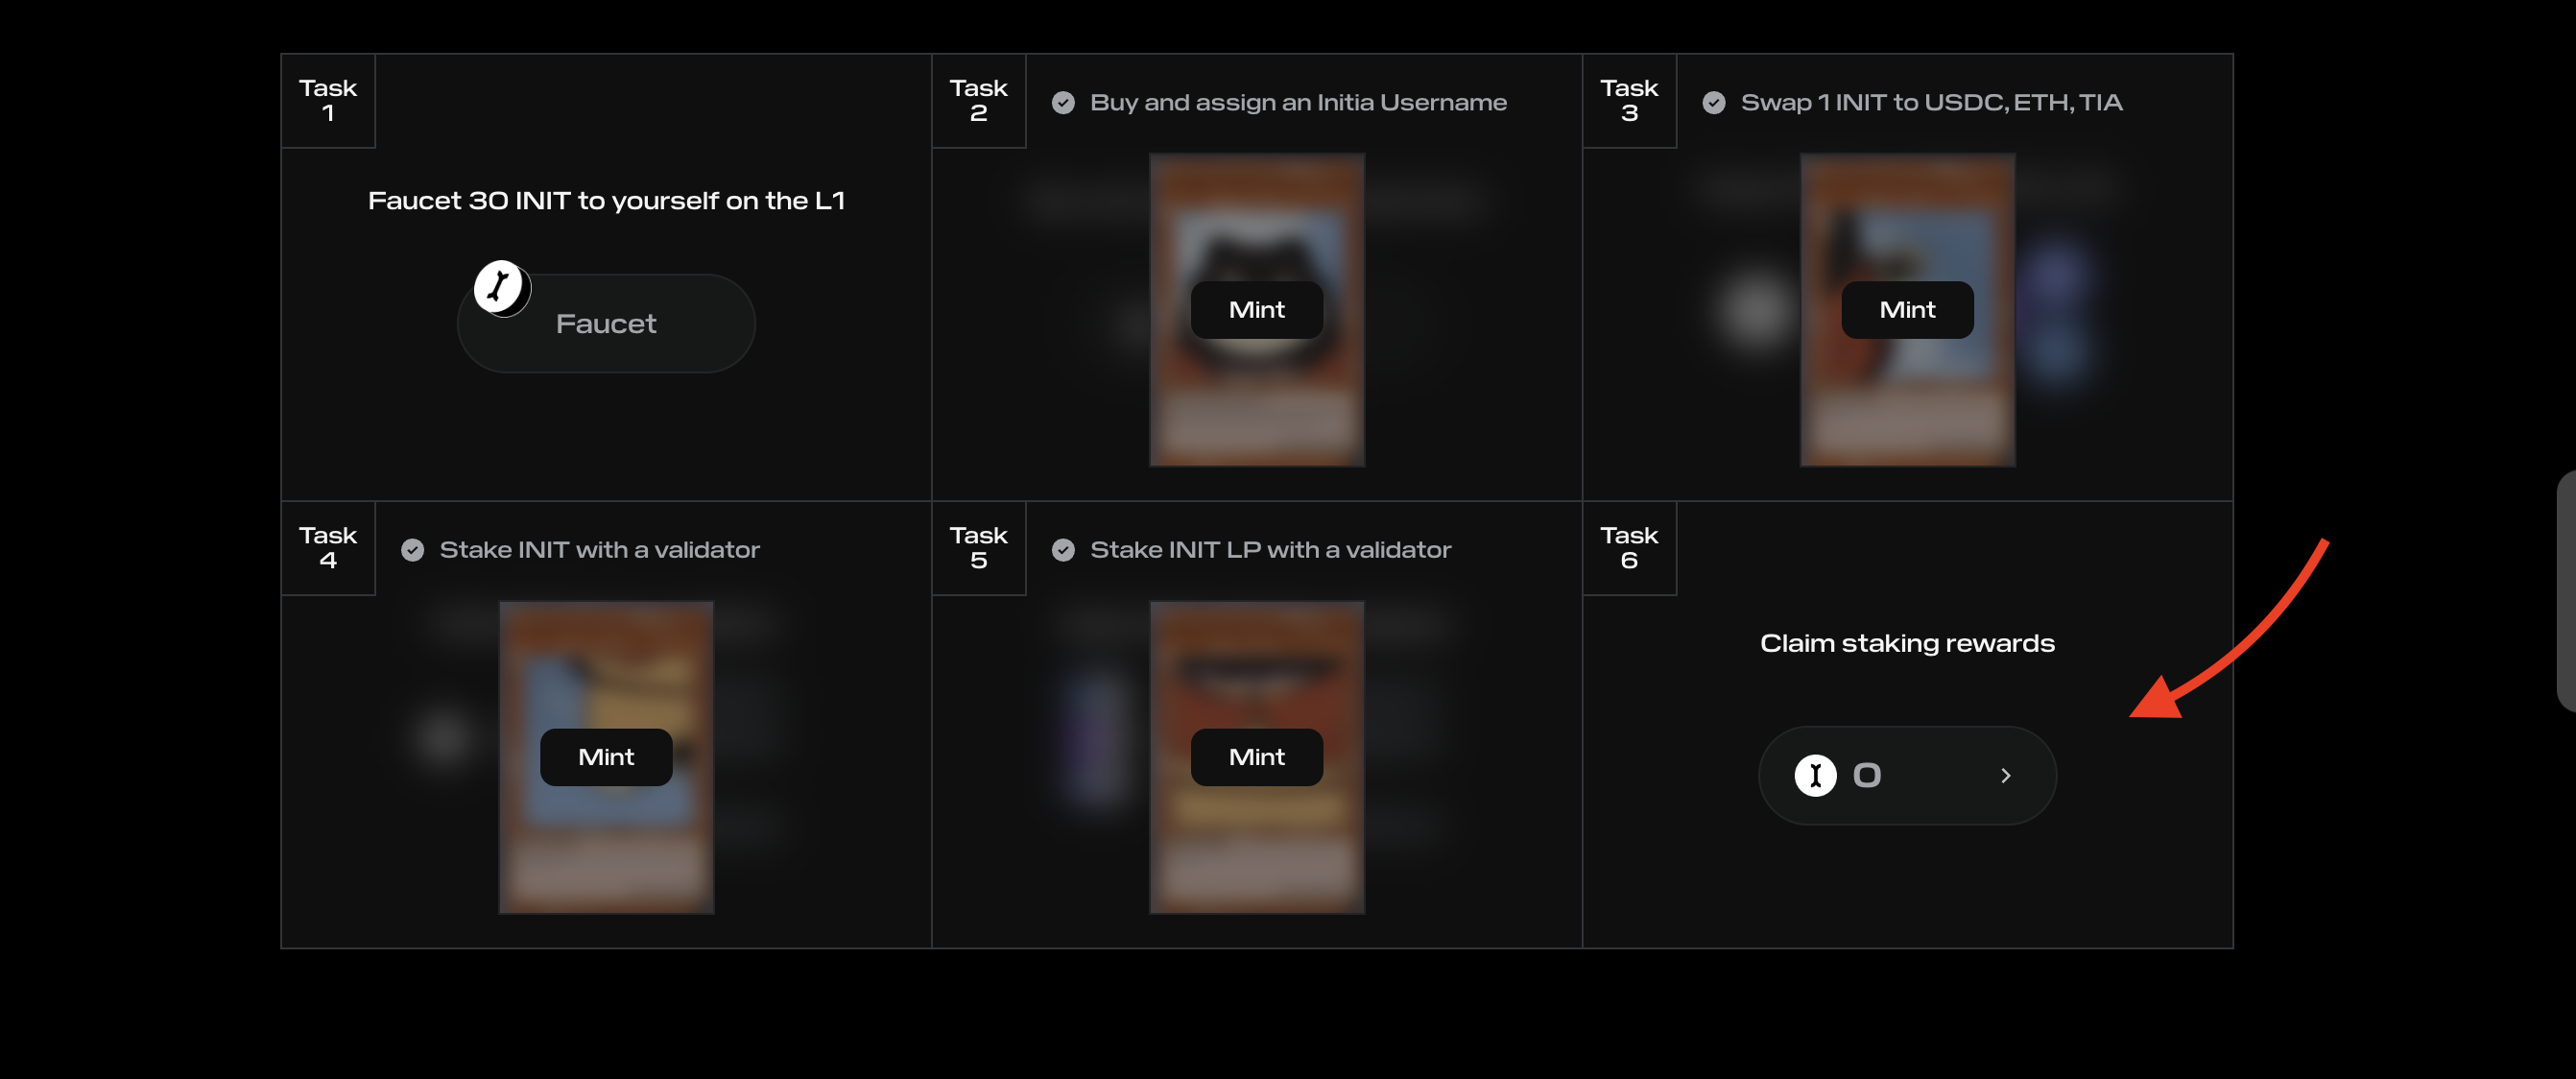
Mint NFTs for completed tasks and Build Jennie
- Click [Mint] button on each NFT and [Approve] it in your Initia wallet.
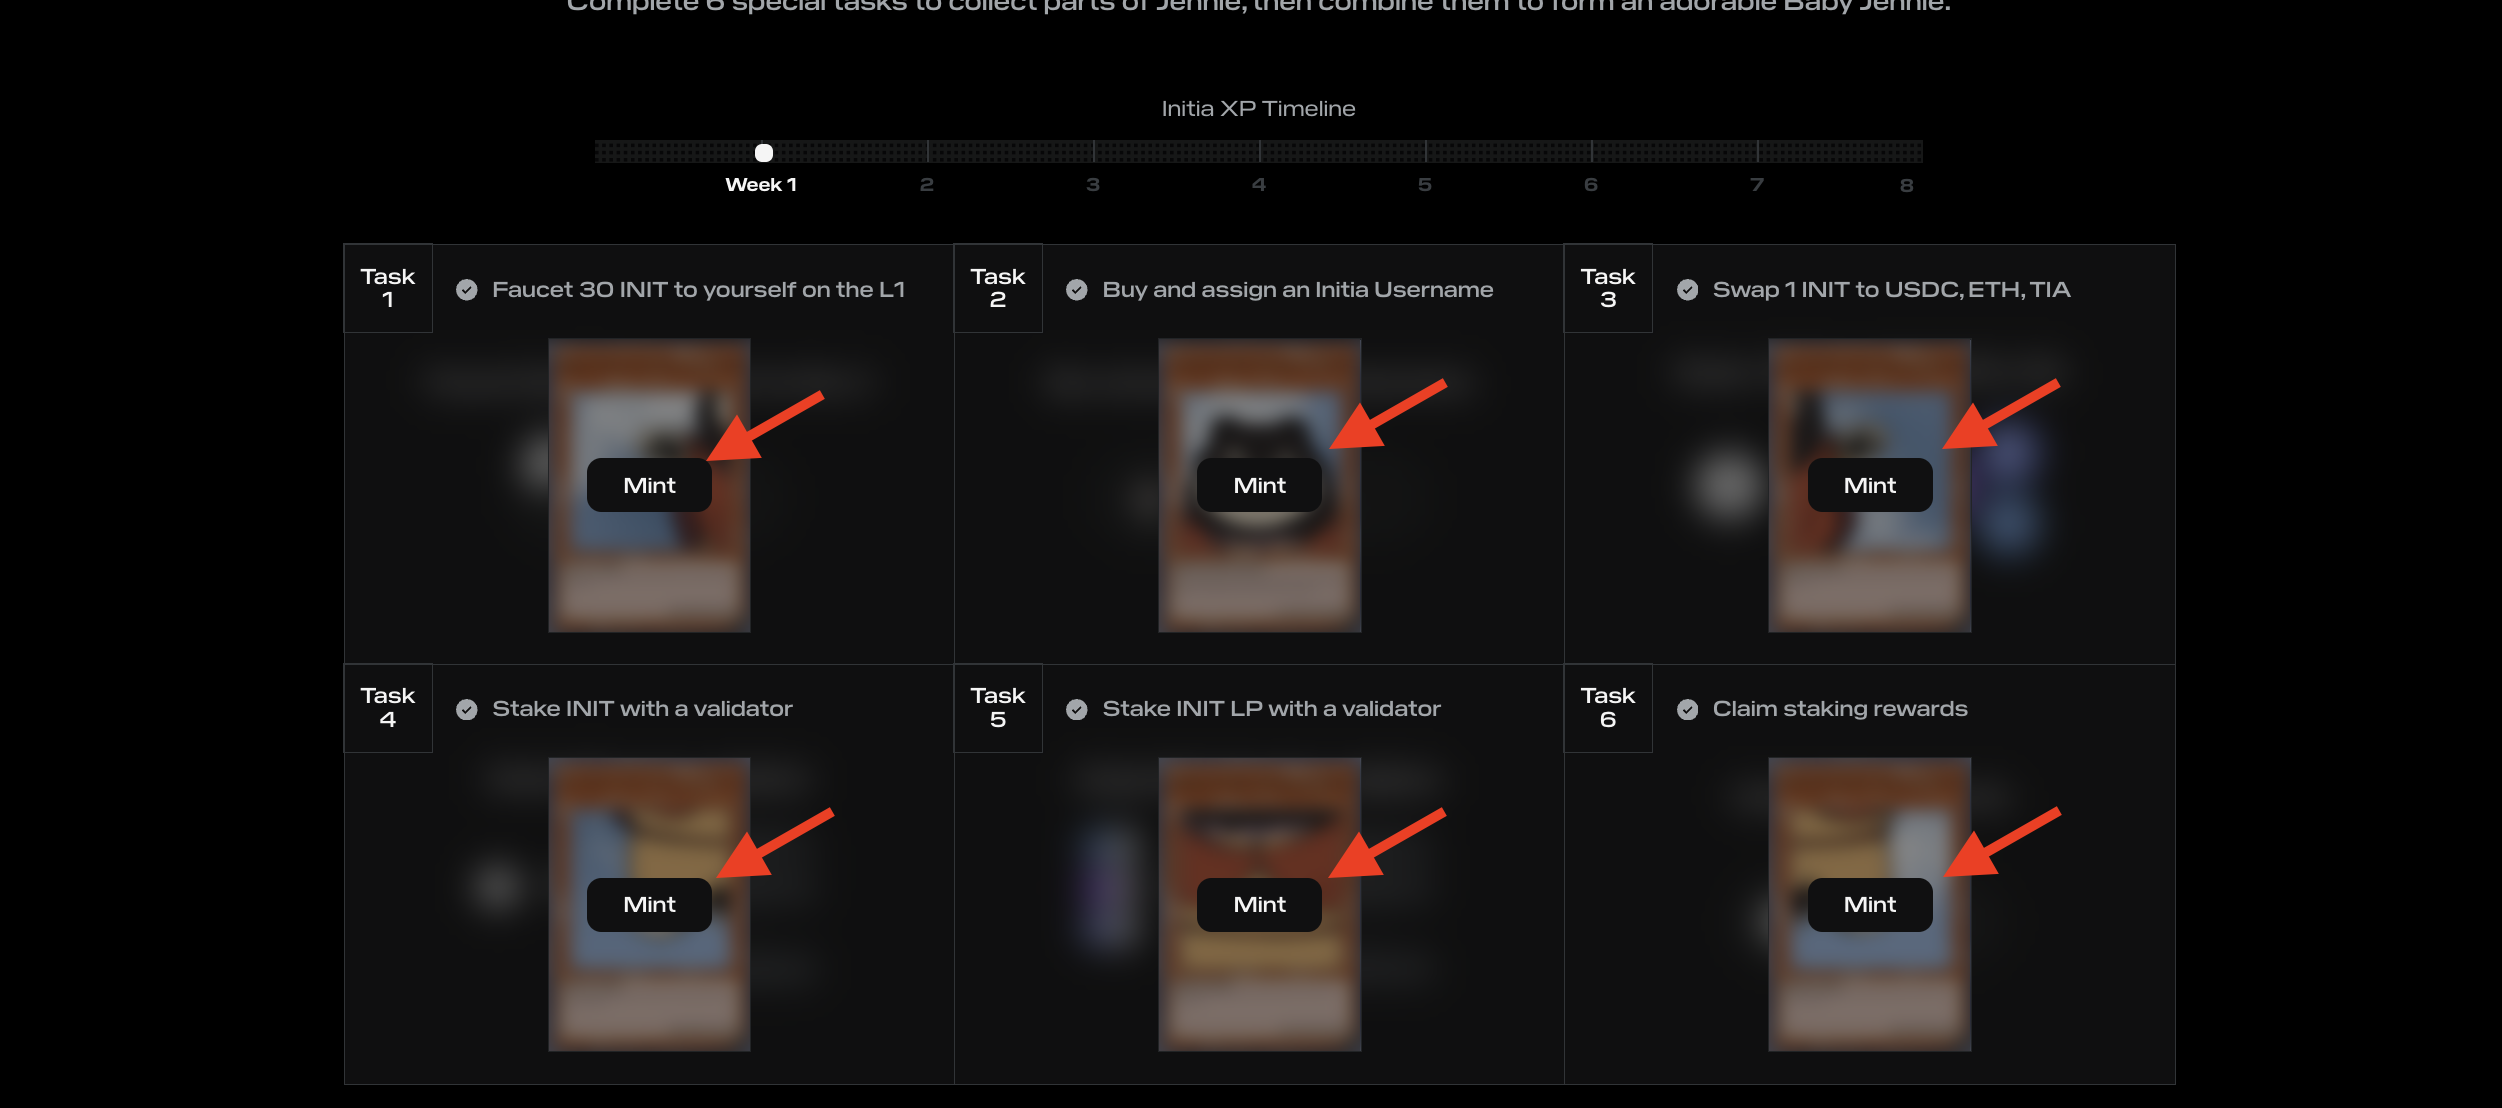
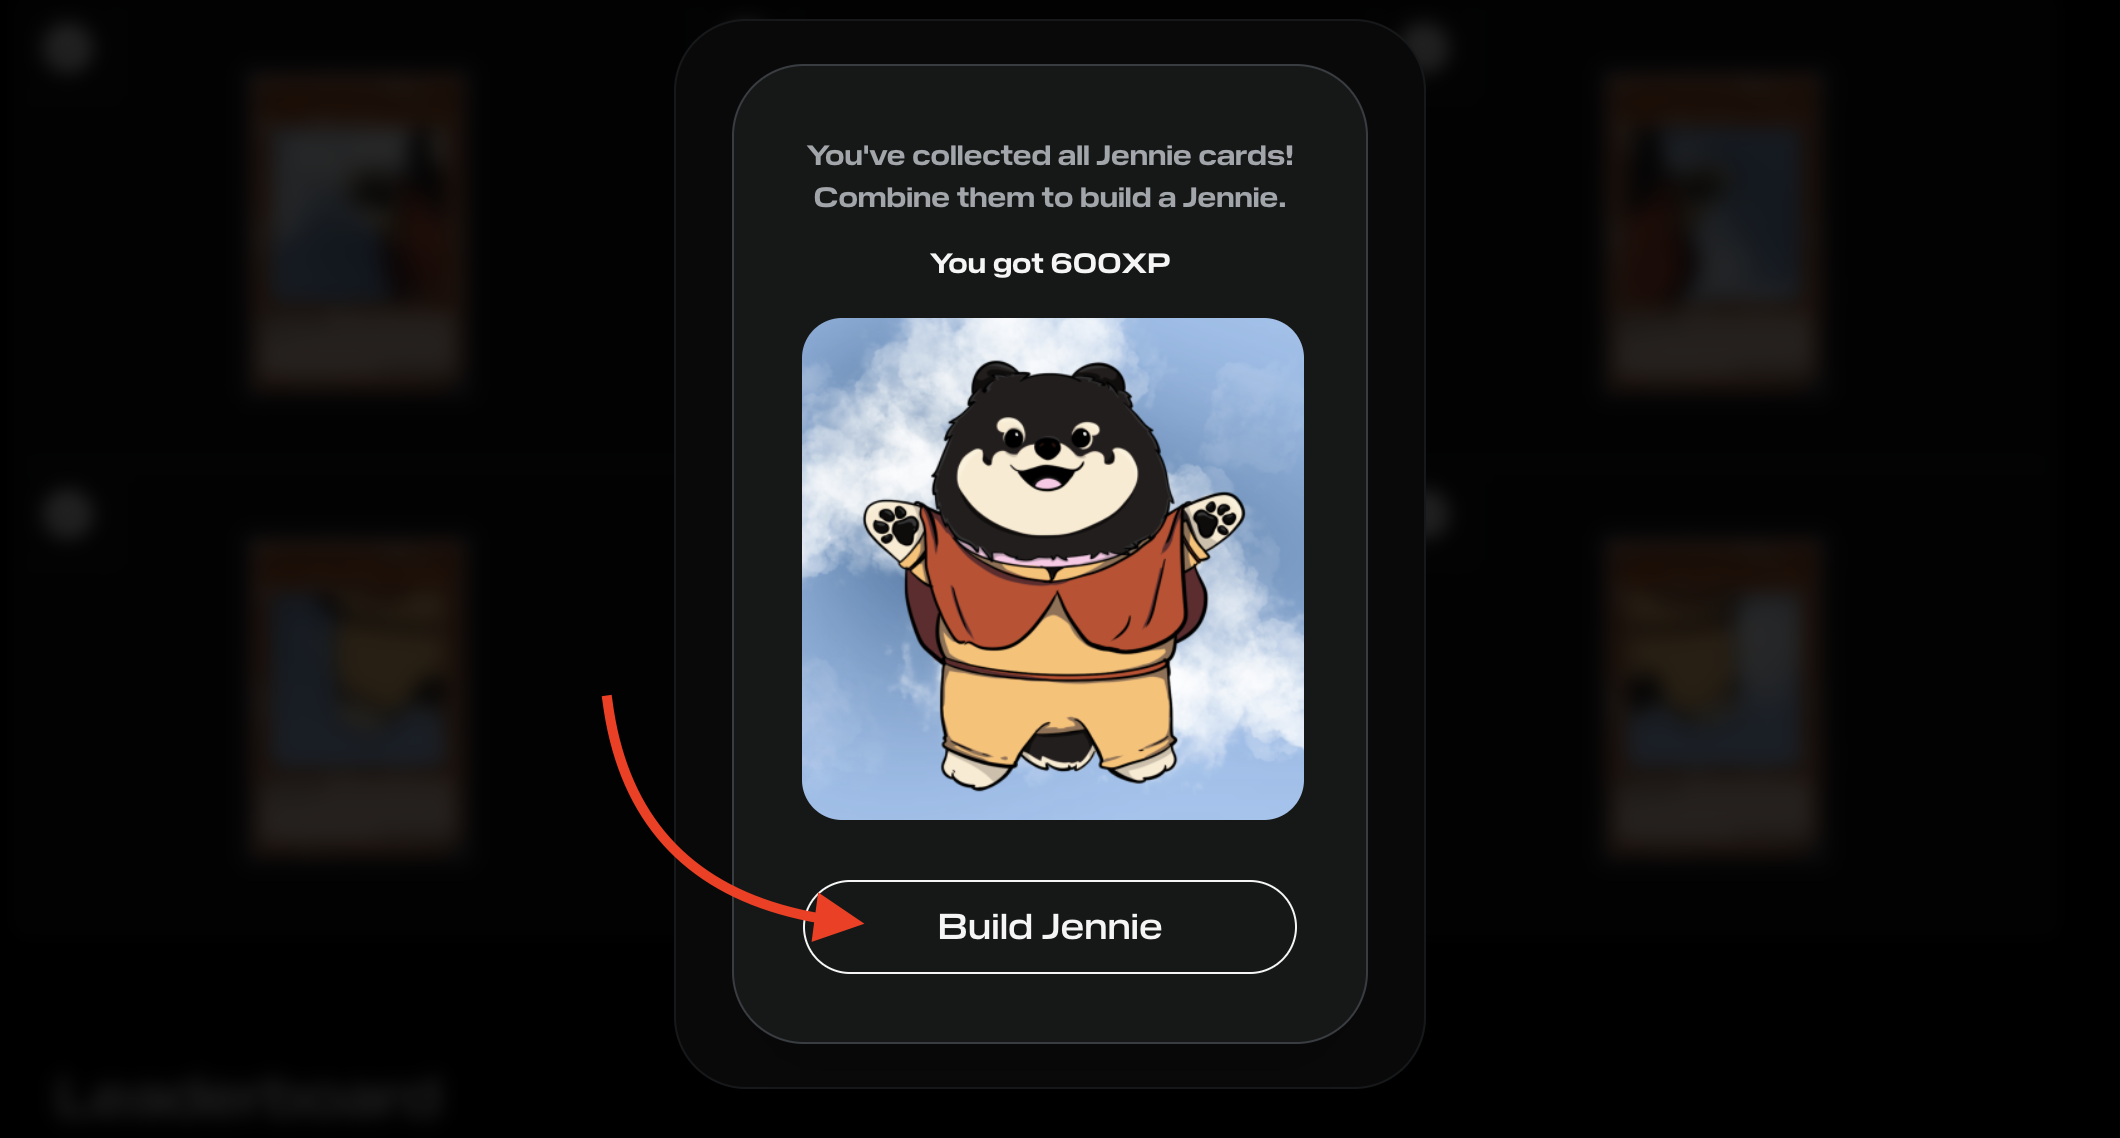
- After minting each NFT from 6 tasks, a popup appears with the [Build Jenny] button. Click it and [Approve] transaction.
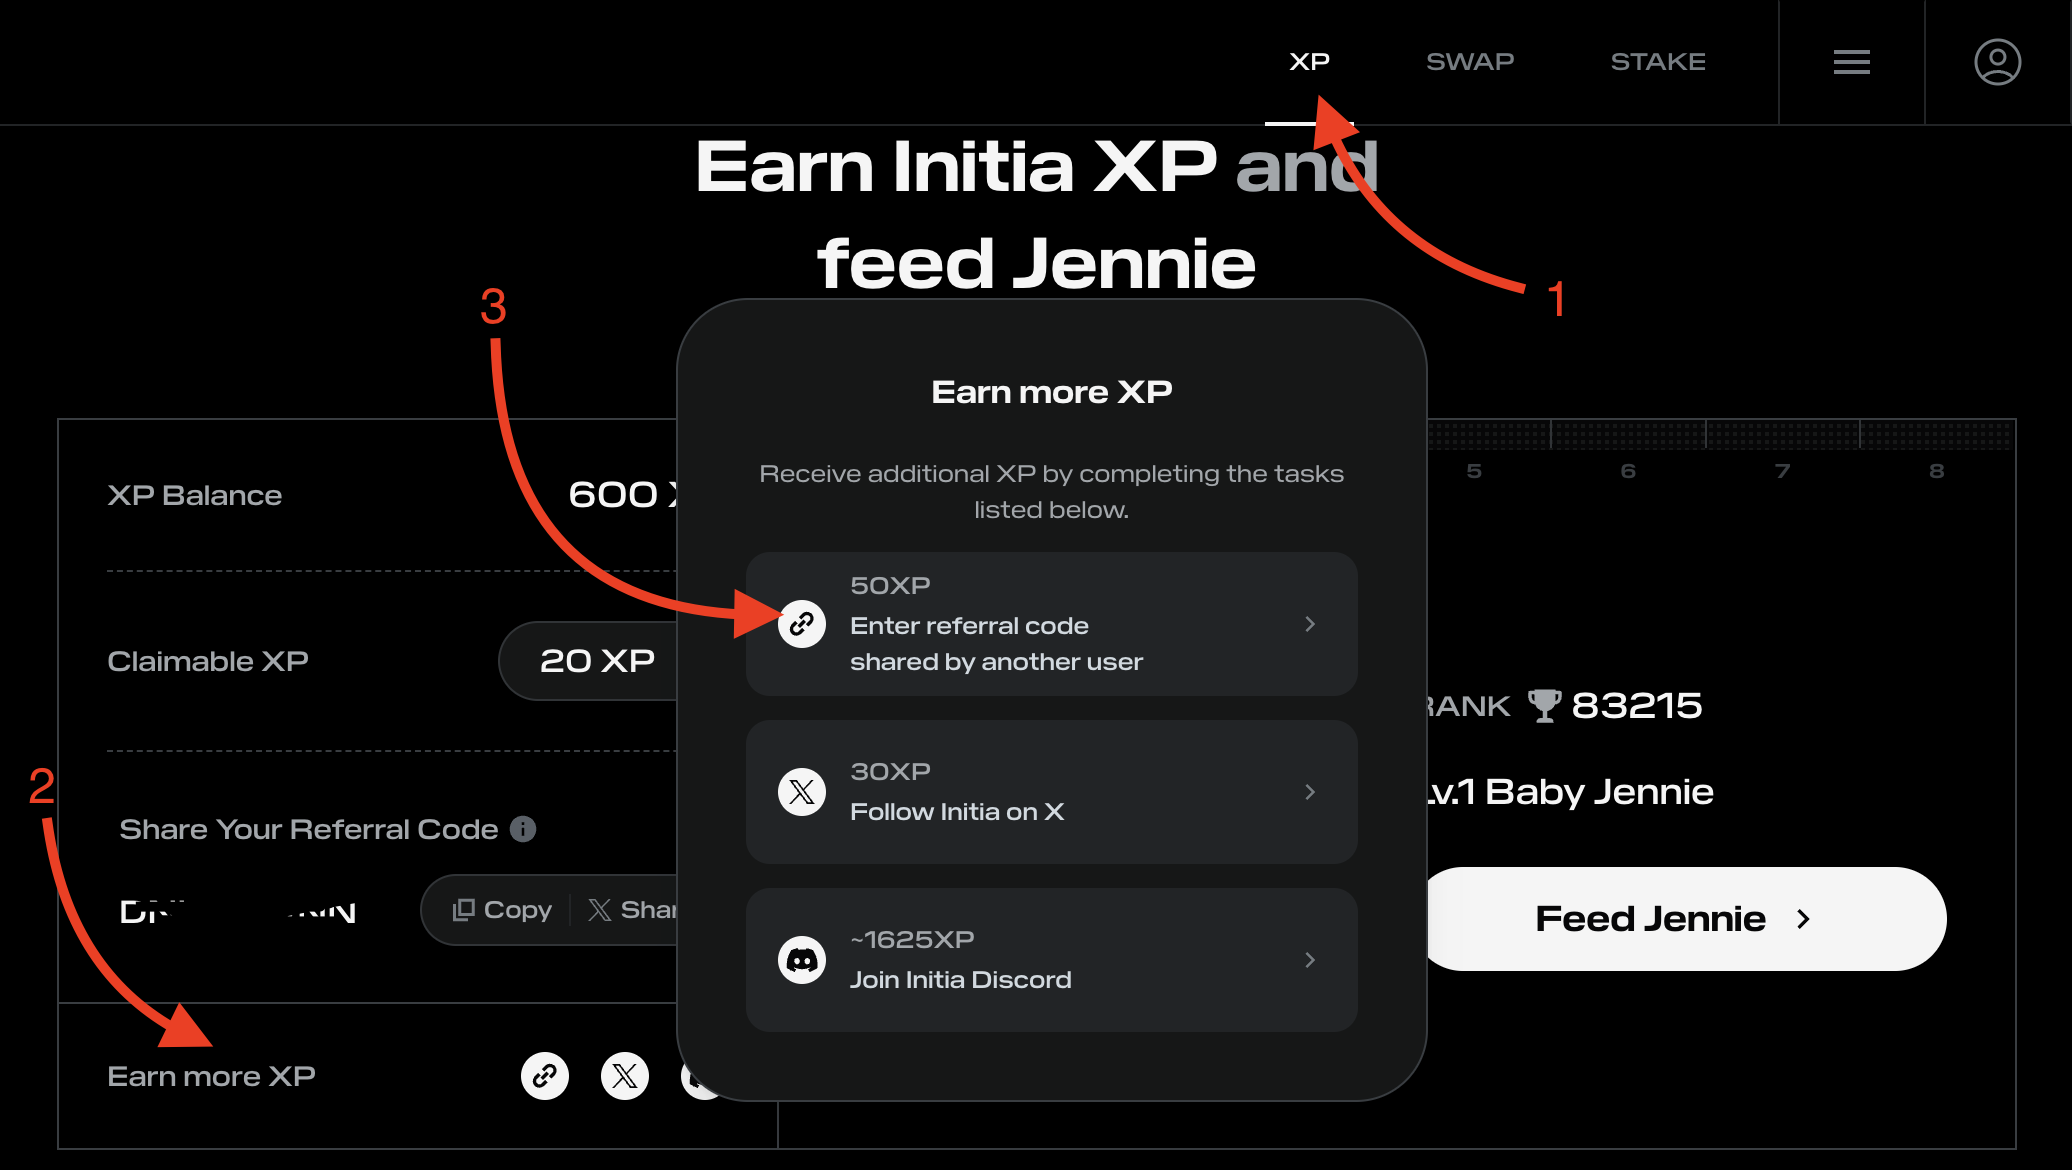
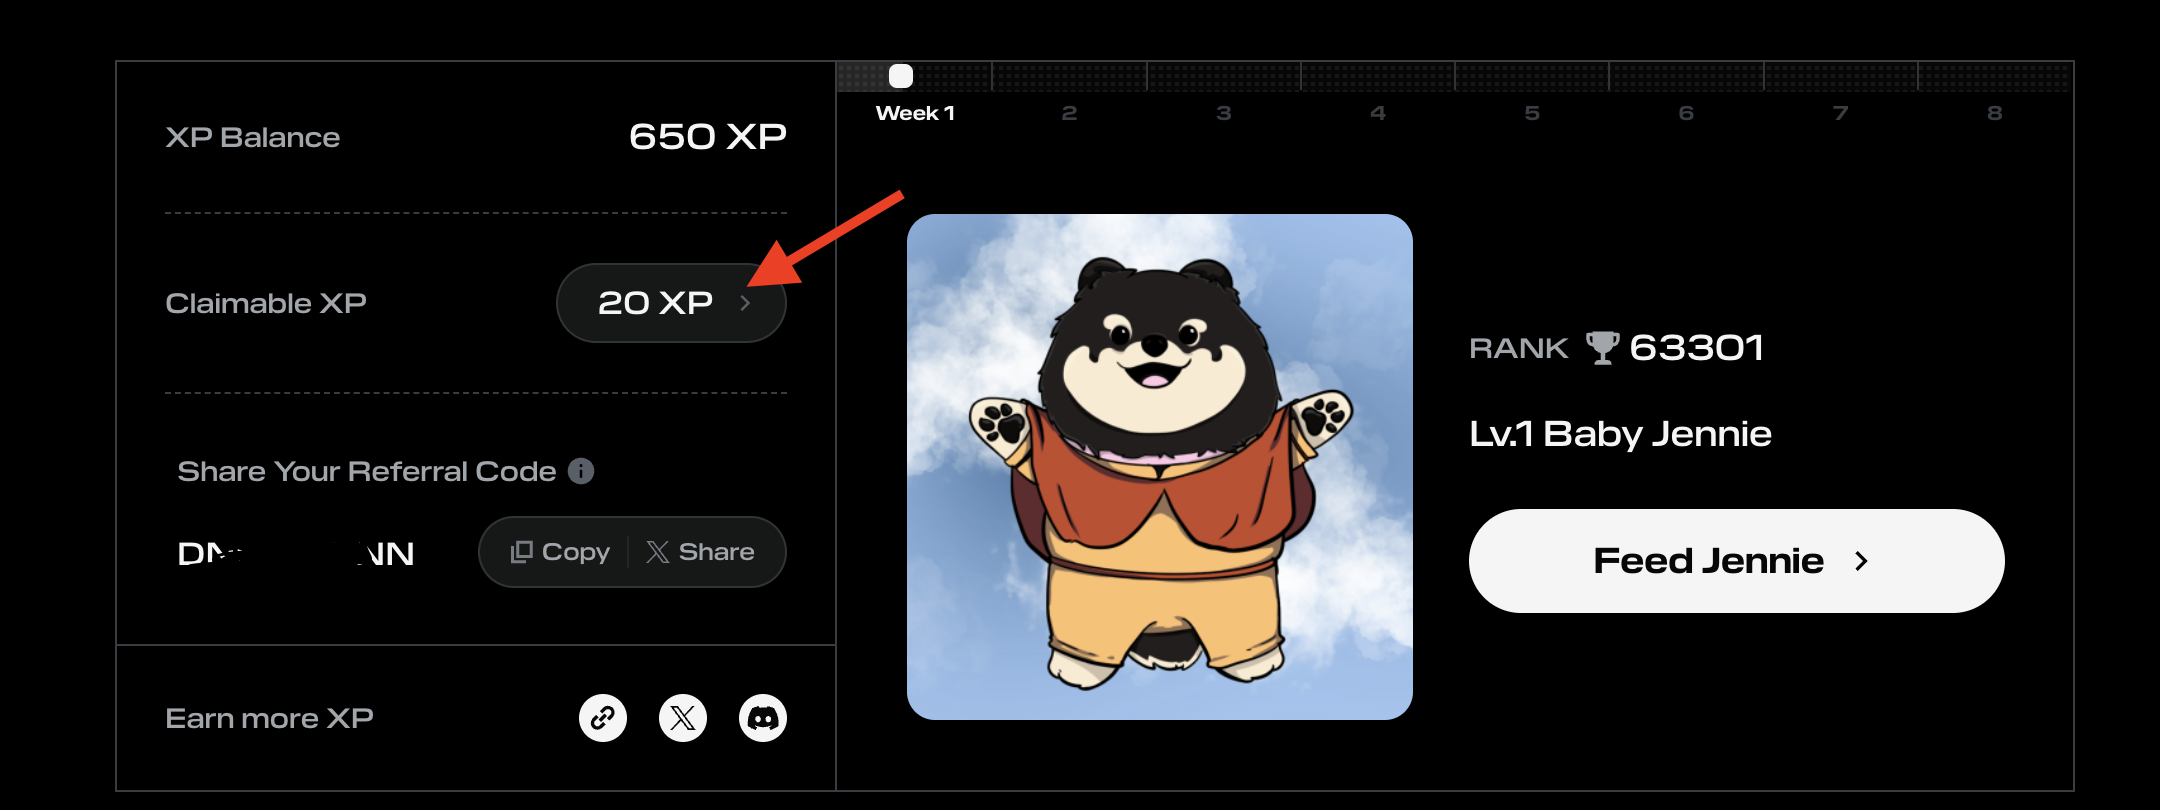
Collect additional XP
XP is needed to buy food for Jennie to improve his level. The higher his level, the higher you will be in the leaderboard.
- In [XP] section click on [Earn More XP];
- Now in opened popup, click [Enter referral code] and enter code: X480DRC3 (+50 XP);
- In the same popup click on [Follow Initia on X] and authorize X (Twitter) account with Inita App. Then follow Initia profile (+30 XP);
- Next [Join Initia Discord], join to project discord channel and get roles. The more roles you have, the more XP you get (up to 1625 XP).
- Also you can collect additional XP from [Claimable XP] section every 24 hours. Amount of claimable XP varies depending on the level of your Jennie.
Feed Jennie
(Very Important) Now you have a pet that needs to be cared for or it will die and you won’t be able to complete all 8 weeks of the testnet.
- Visit Initia Food Store and [Buy food] for your Jennie. The store works on the roulette principle. Therefore, you can collect more XP and try to get more rare food by buying one of the three options to choose from. The more expensive the option, the greater the chance to get better food that will significantly boost your Jennie.
- After you have bought the food, go here and in the type of food you get you see the amount available for use. (Keep in mind that you can only use the food once a week, so I recommend trying to get the best quality possible)
- To feed Jennie click available food and in opened popup click [OK] and [Approve] it in Initia wallet.
- Pay attention, you can only feed Jennie once per week.
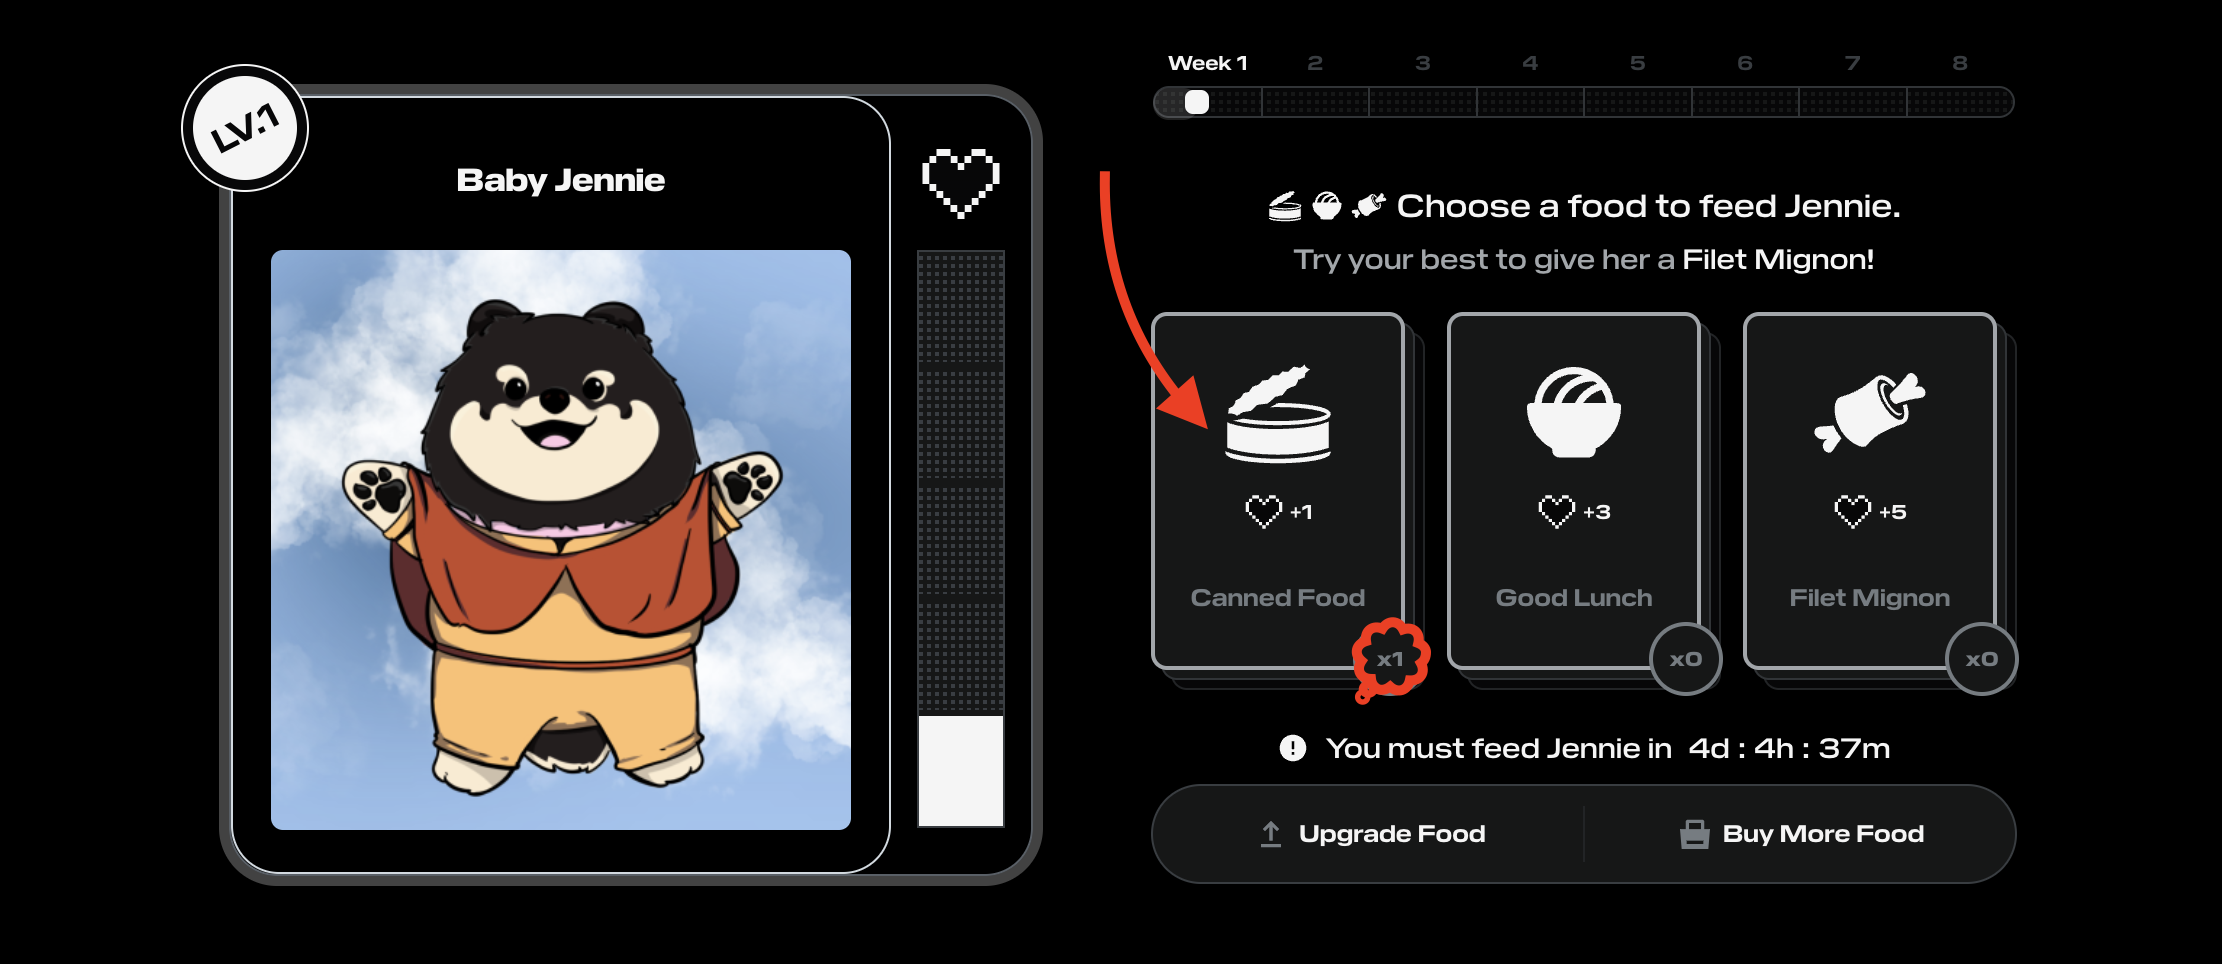
- Food have 3 tiers:
- Tier 1: +1 HP
- Tier 2: +3 HP
- Tier 3: +5 HP
- You can improve food Tier by combining it:
- 10 pieces of Tier 1 = 1 piece of Tier 2 food;
- 5 pieces of Tier 2 = 1 piece of Tier 3 food.
Earn XP with partner apps
You can also earn additional XP for interacting with Initia partner projects. You can find them on the Jennie dashboard under [Earn more Initia XP]. I’ll cover how to interact with partner projects in a later article.

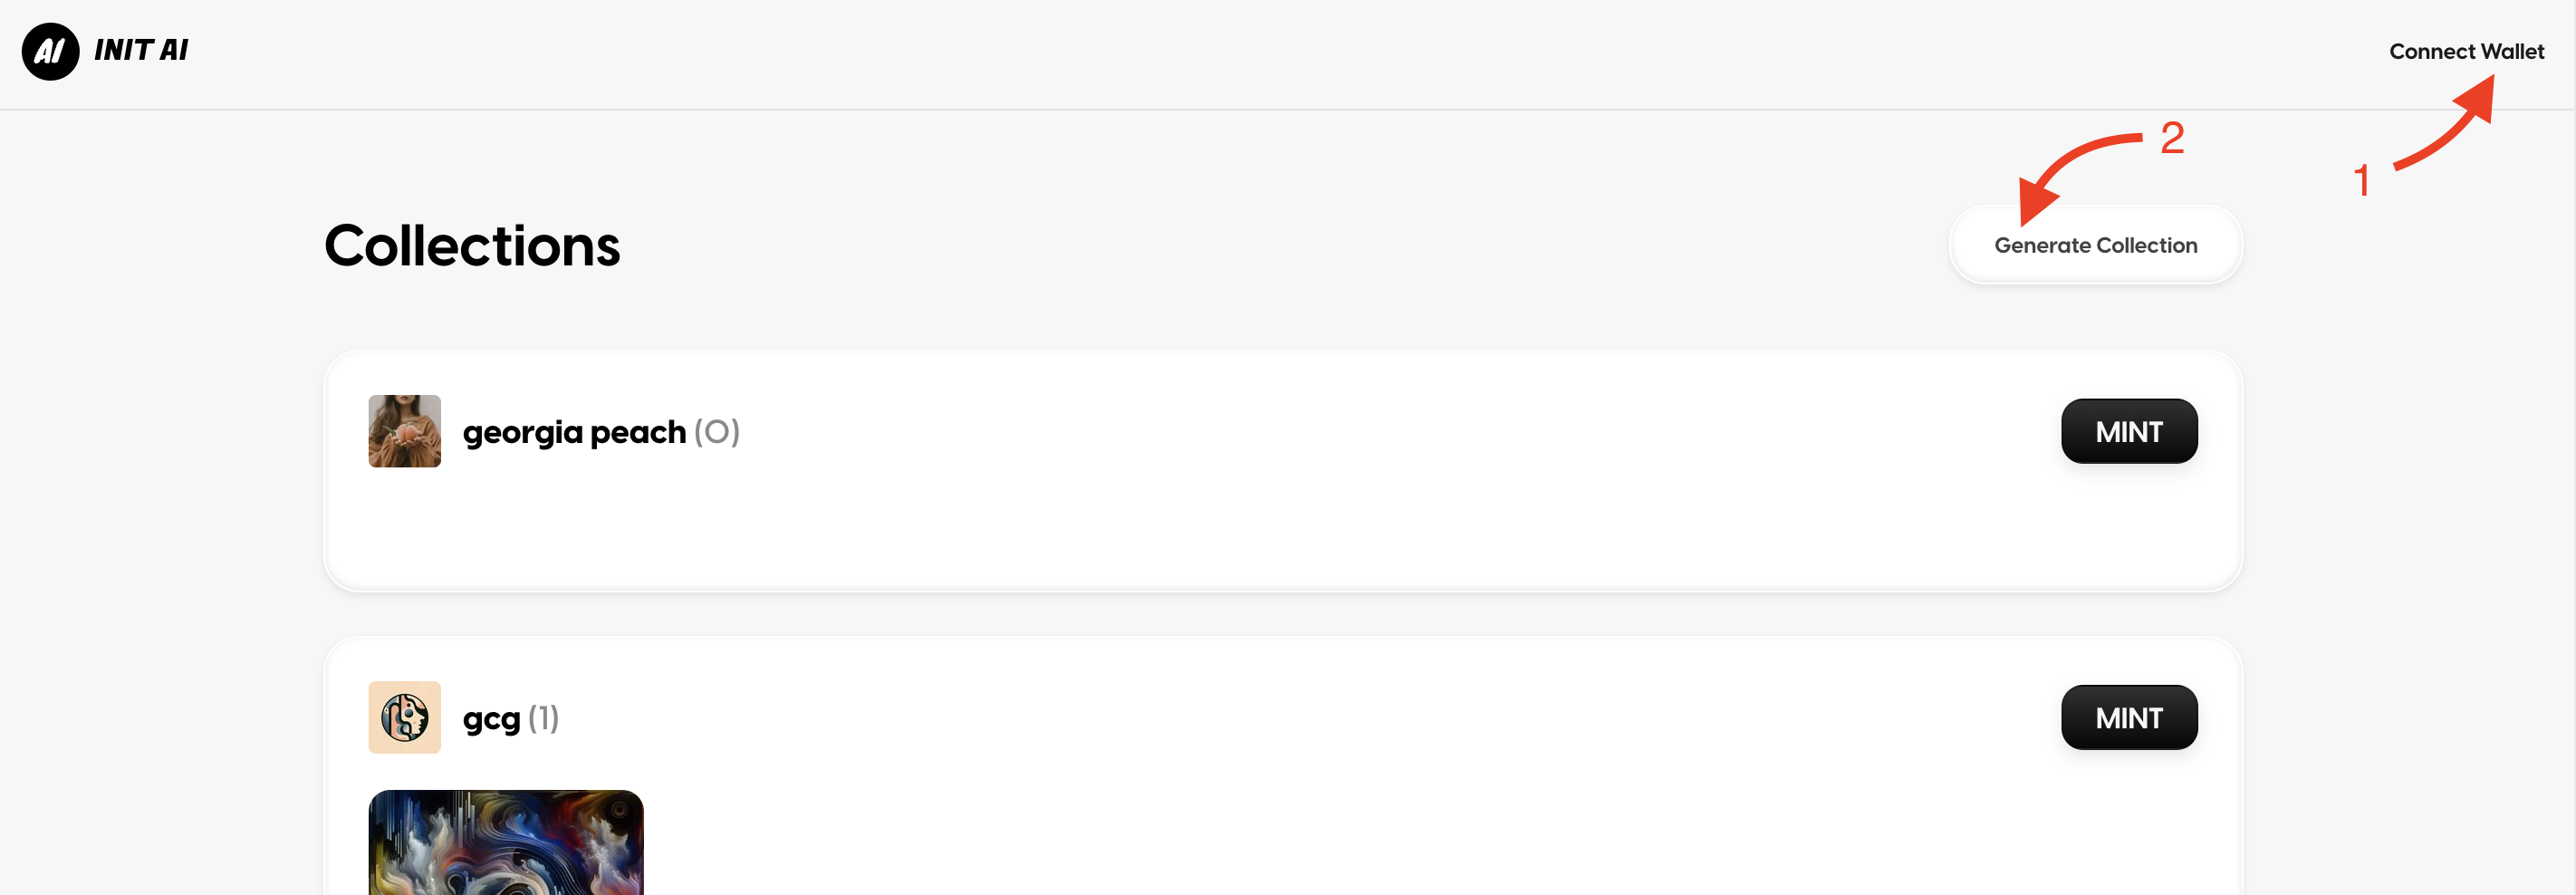
INIT AI
- Bridge ~5 INIT tokens to INIT AI;
- Go to Init AI and click [Connect Wallet] in header;
- Next, click [Generate Collection];
- Enter collection Name, Prompt, Description and click [Submit] and [Approve] transaction;
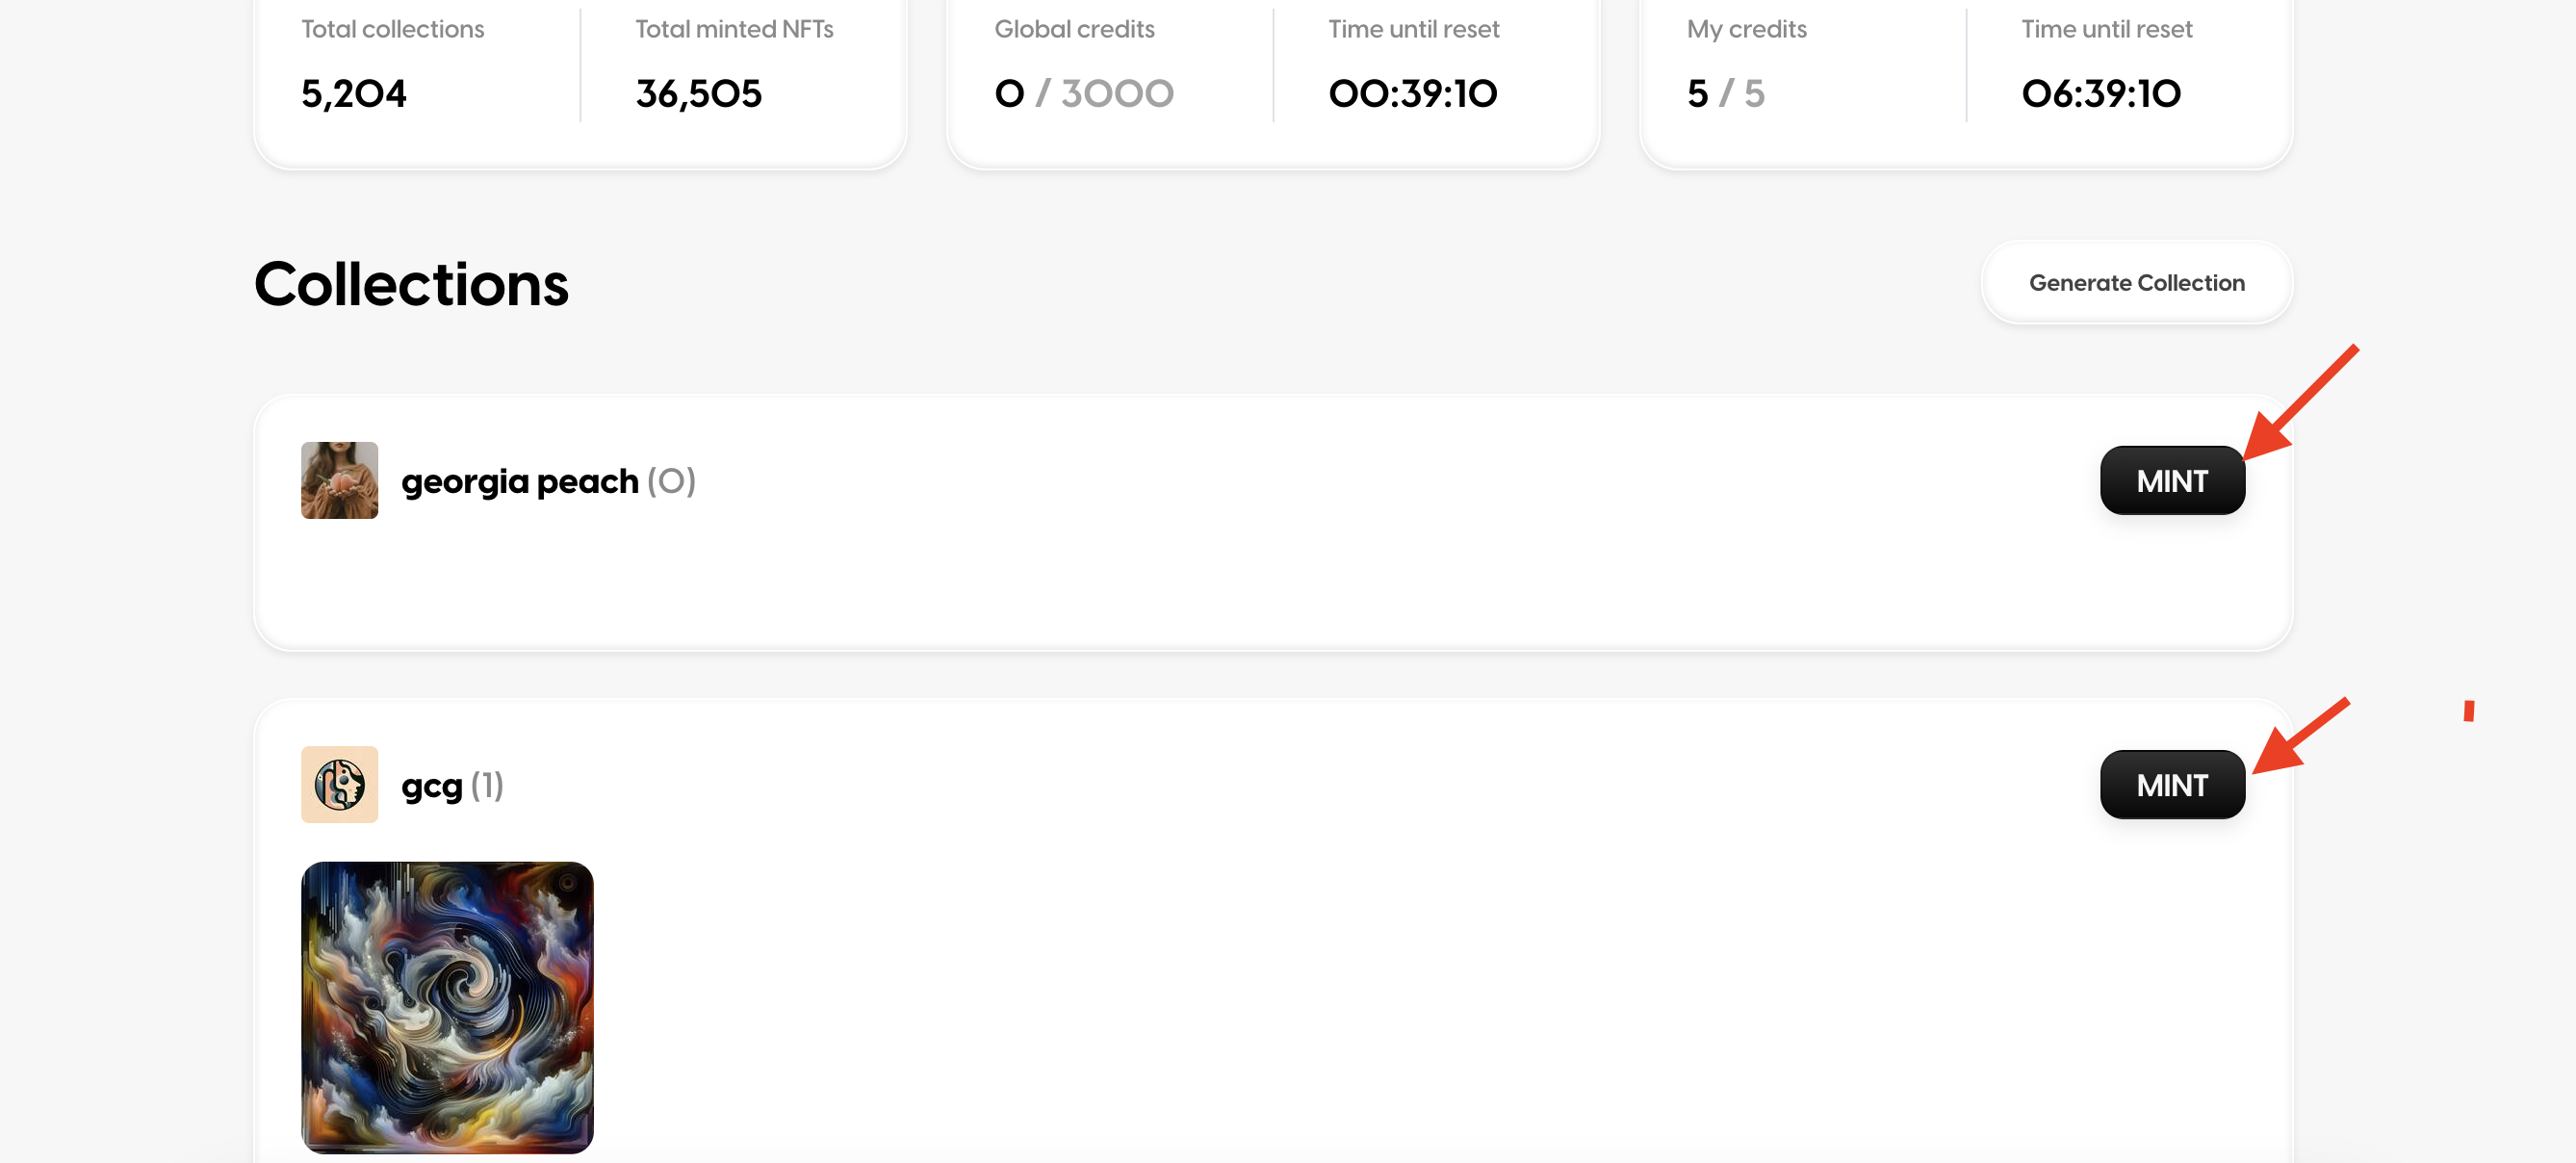
- Then, go to home page and click [Mint] button on other collection to mint NFTs other users;
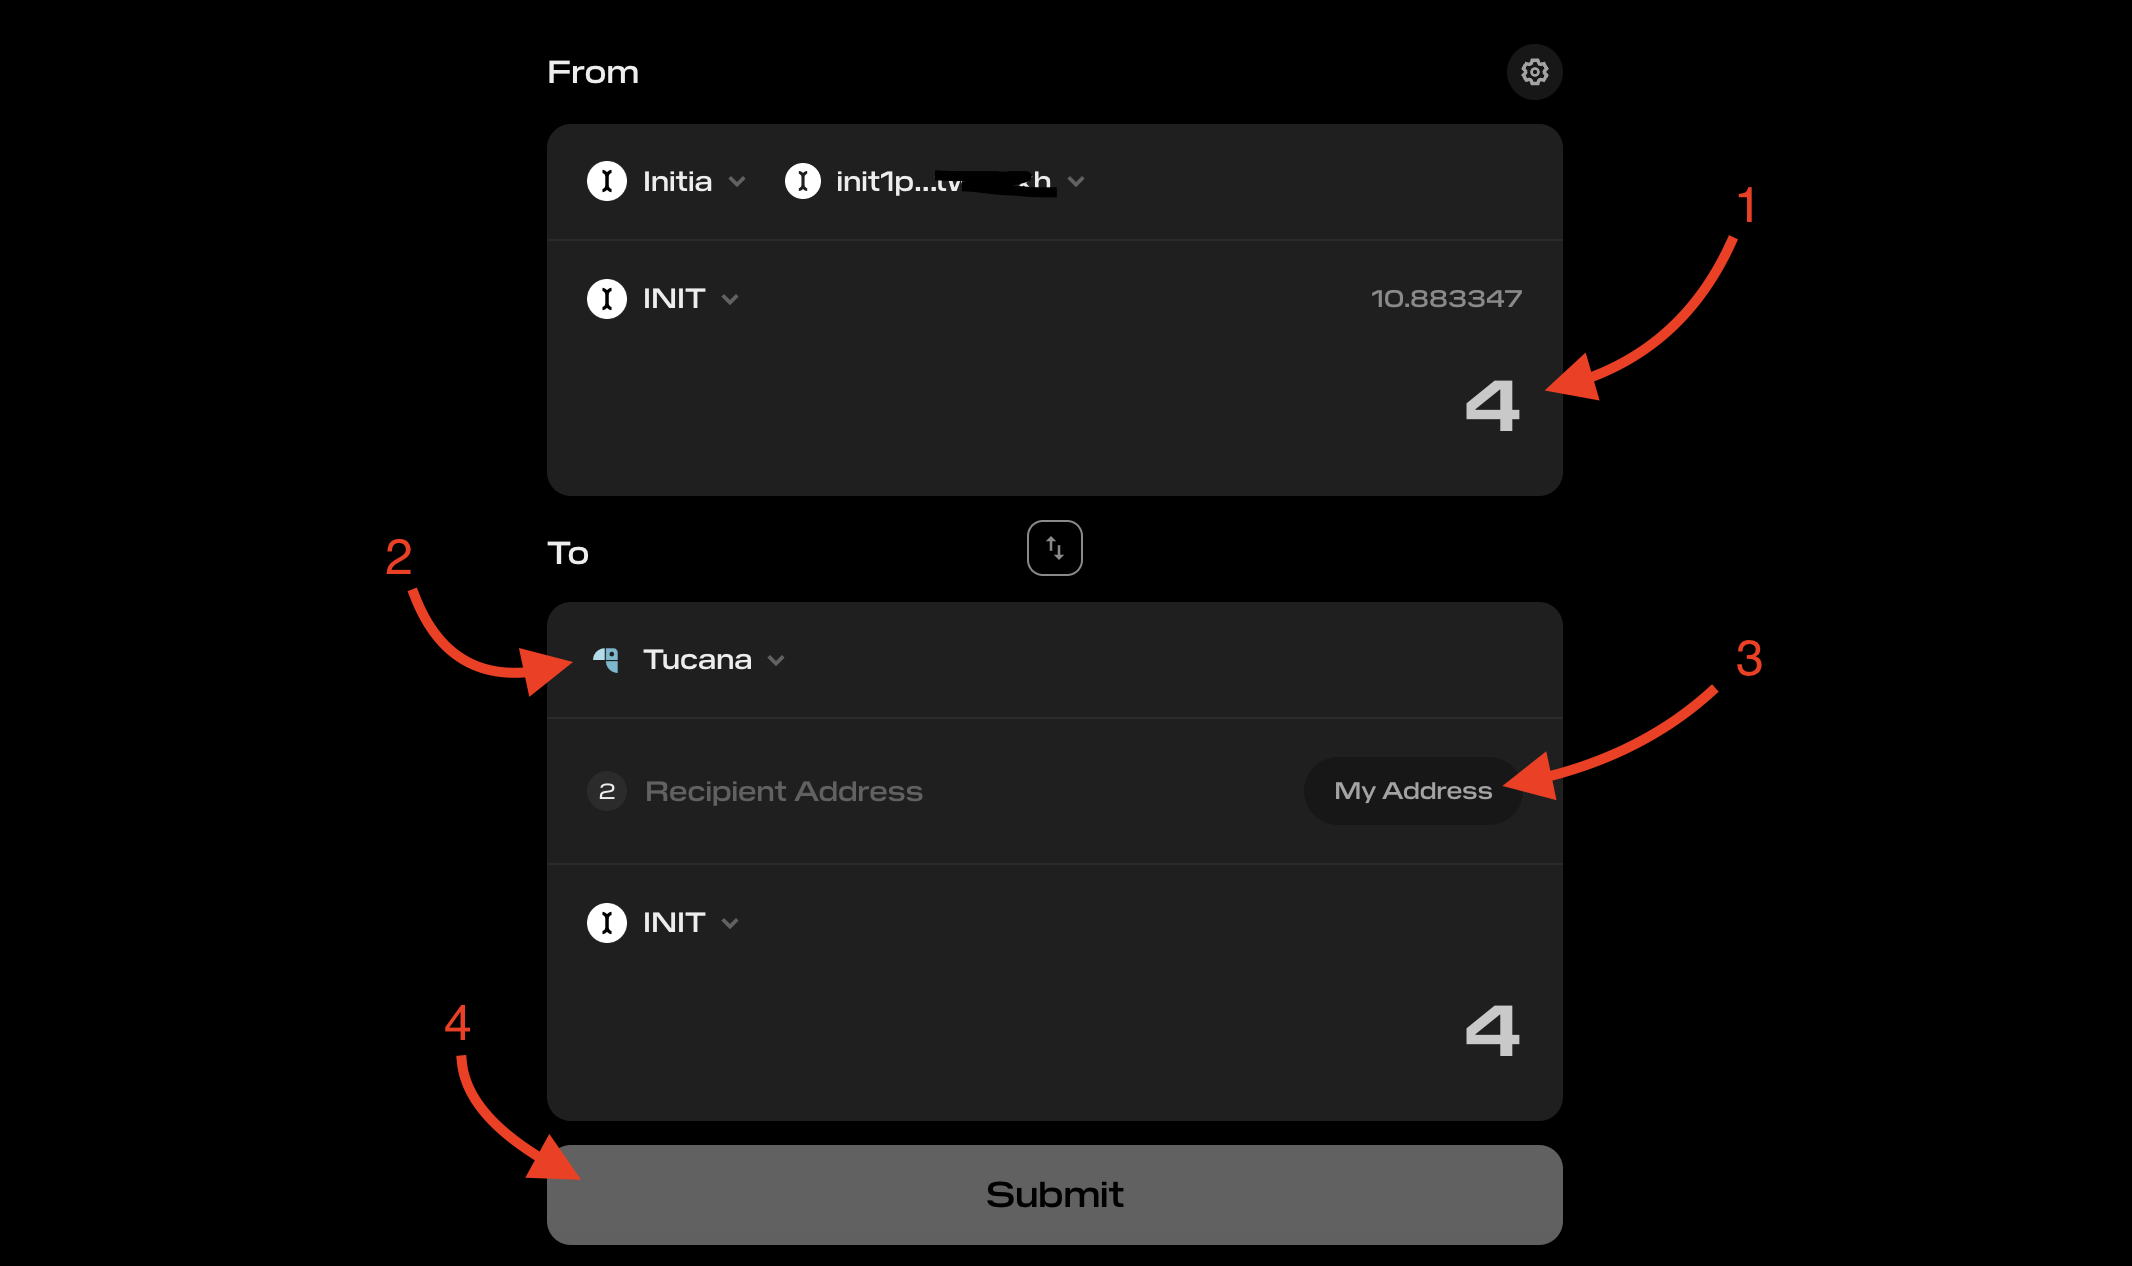
Tucana
- Go to Initia Bridge and send ~4-5 INIT tokens to Tucana;
- Request tokens from Tucana Faucet;
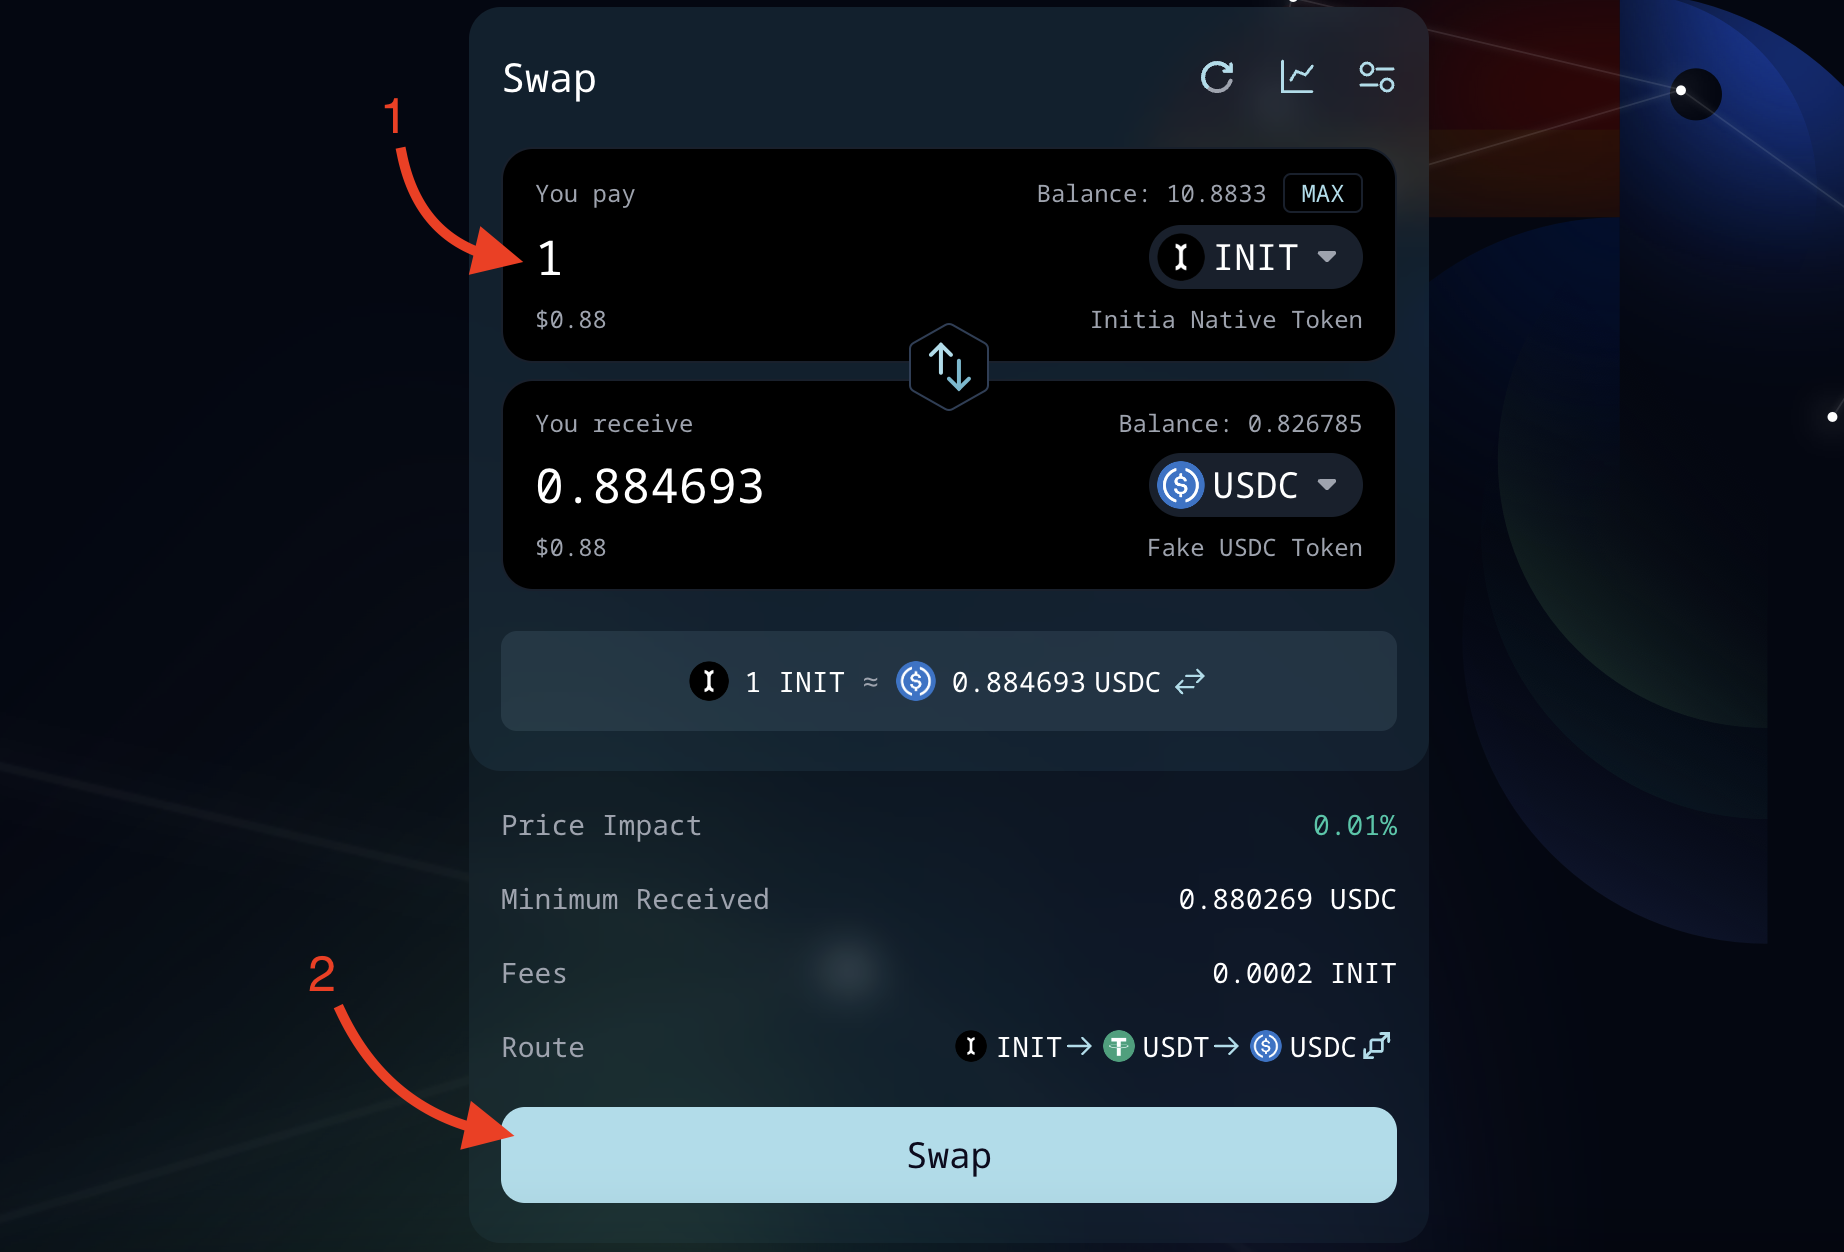
- Make swap with Tucana DEX;
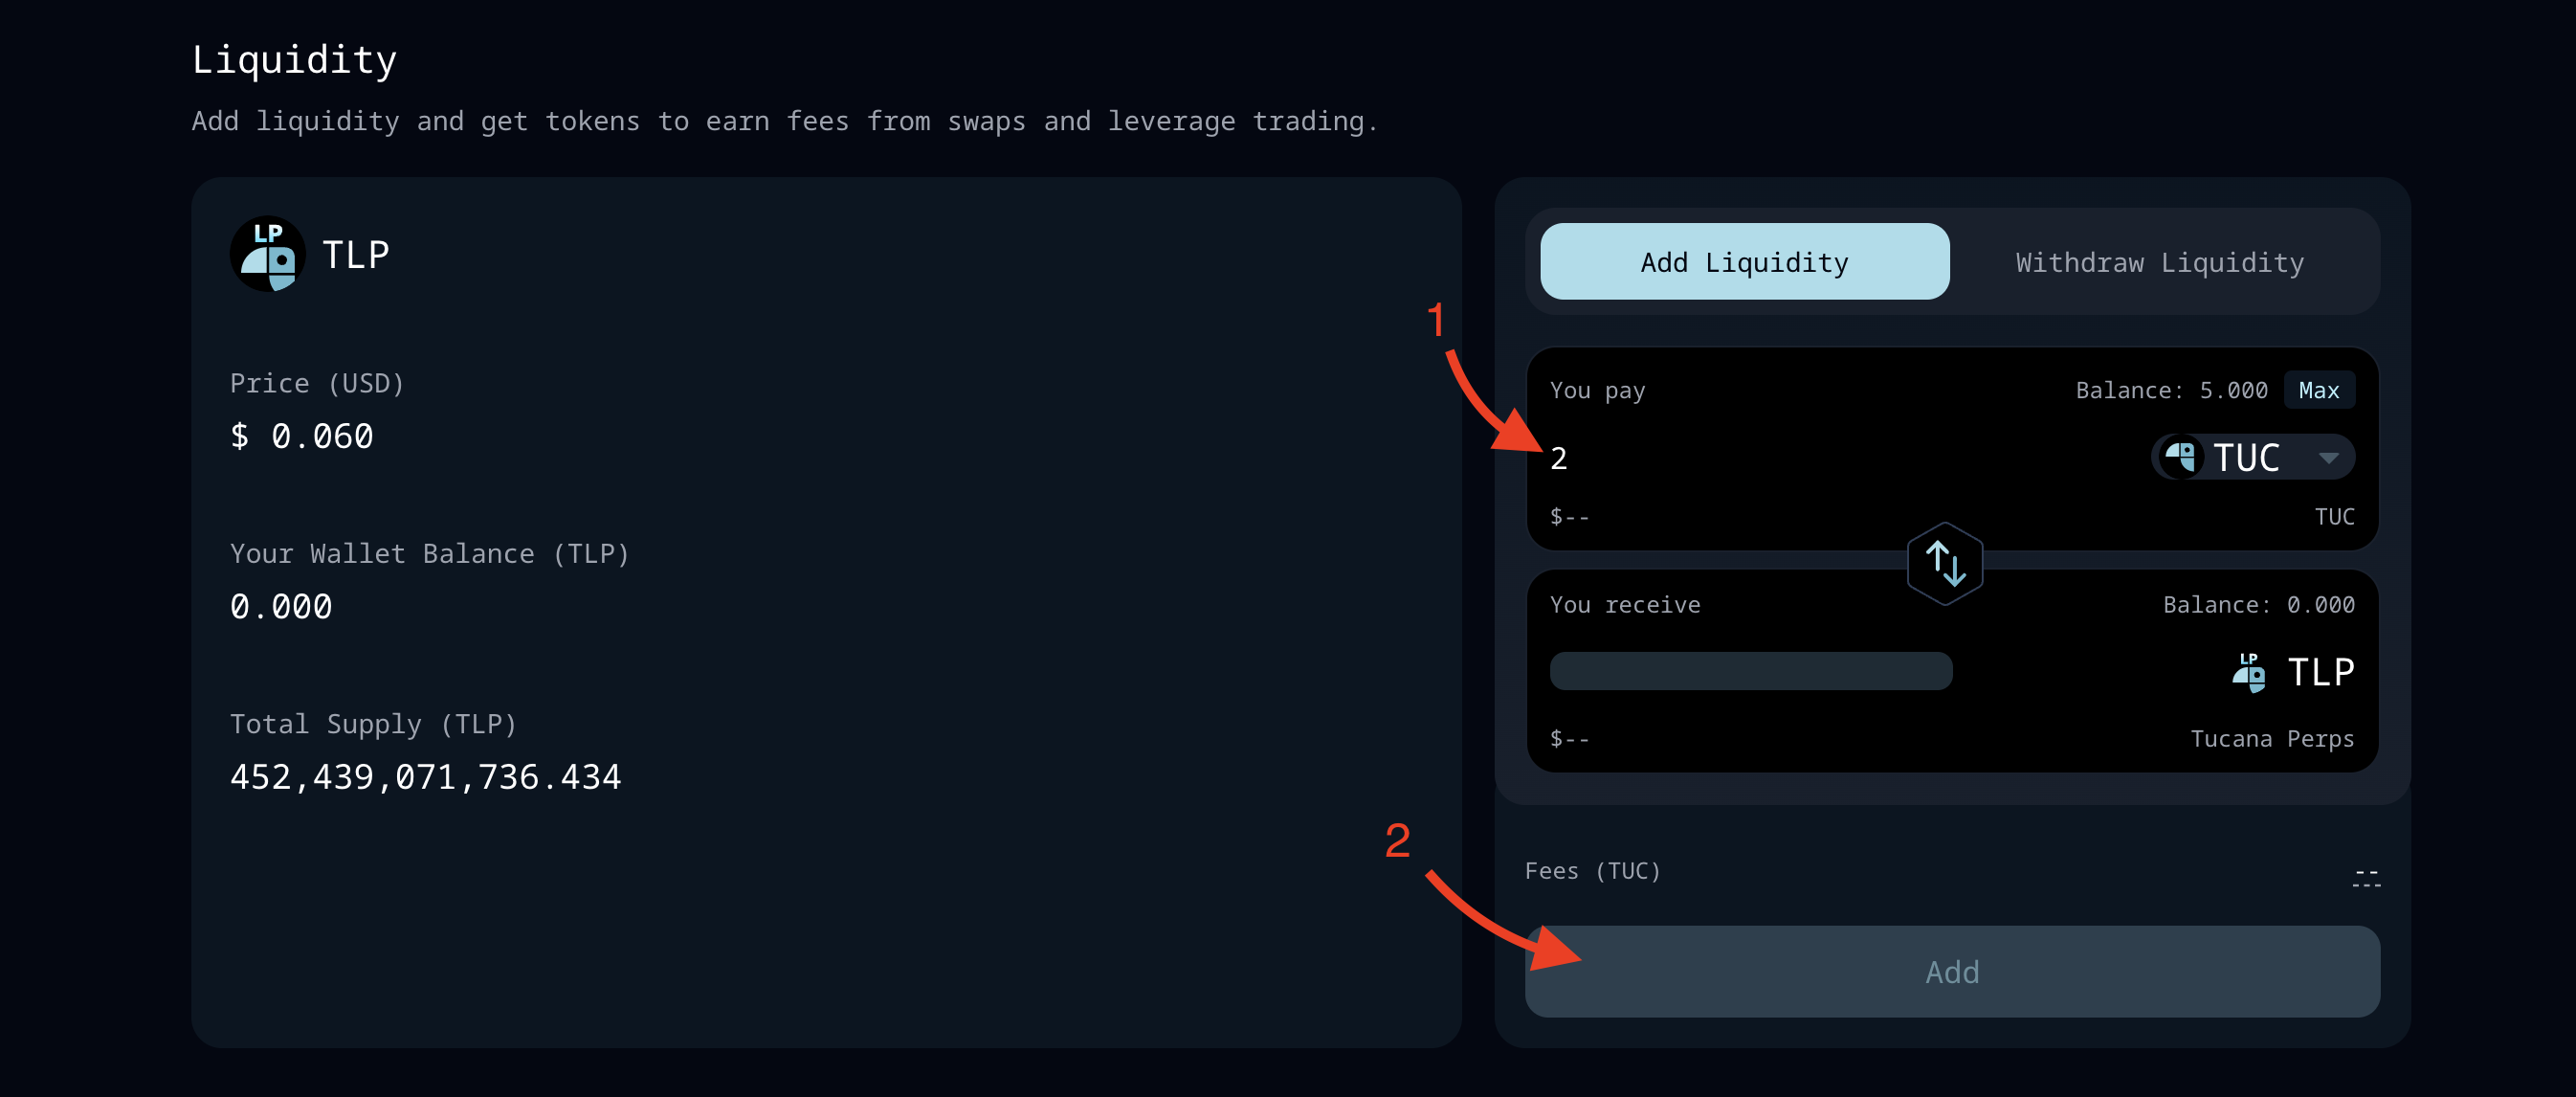
- Add tokens to Liquidity pool on Tucana DEX;
- Add TUC tokens claimed from Tucana Faucet to Tucana Perps liquidity;
Blackwing (You need to deposit real assets)
Important! This step is only for users who know how to trade on pairs.
- Go to Blackwing platform;
- Enter any invite code. You can request it here;
- Connect and verify your Twitter, Gmail and Telegram accounts;
- Deposit available assets to Blackwing and receive BXP;
- Swap part of your BXP to BUSD;
- Move to Trade section and trade on ETH-BUSD trading pair.
Lunch
- Lunch App works only through the mobile.
- To authorize in this application, you need a referral code.
- At the moment, I don’t like the way this app works, so I’ll test it later and update the guide.
Conclusion
The project is quite interesting given that it is a Layer 1 blockchain, I have been following it for a long time. Given that the project is well-funded and backed by Binance Labs, this means that we may see it listed on Binance and get a potential airdrop from the project on TGE.
The testnet activities are new and interesting, although due to the flow of people, it is a bit difficult to find time to do it comfortably and without glitches. But I definitely recommend not to miss it. All new activities that will be released will be added to the project page, so stay tuned.
All the best to you, fat airdrops and be careful. DYOR.
Yes, it’s testnet phase.
~30 minutes. Depending on the transactions speed and potential lags.
Enjoyed this article?
Click the like button below to show your support and let us know you found it helpful! Your feedback keeps us motivated to create more content like this.