Nubit is Bitcoin’s own data accessibility layer designed to revolutionize transaction processing on the Bitcoin network.
At the moment the project has announced the launch of the first phase of the testnet. The tasks are simple and this is so far the only activity for which there is an opportunity to get an airdrop.
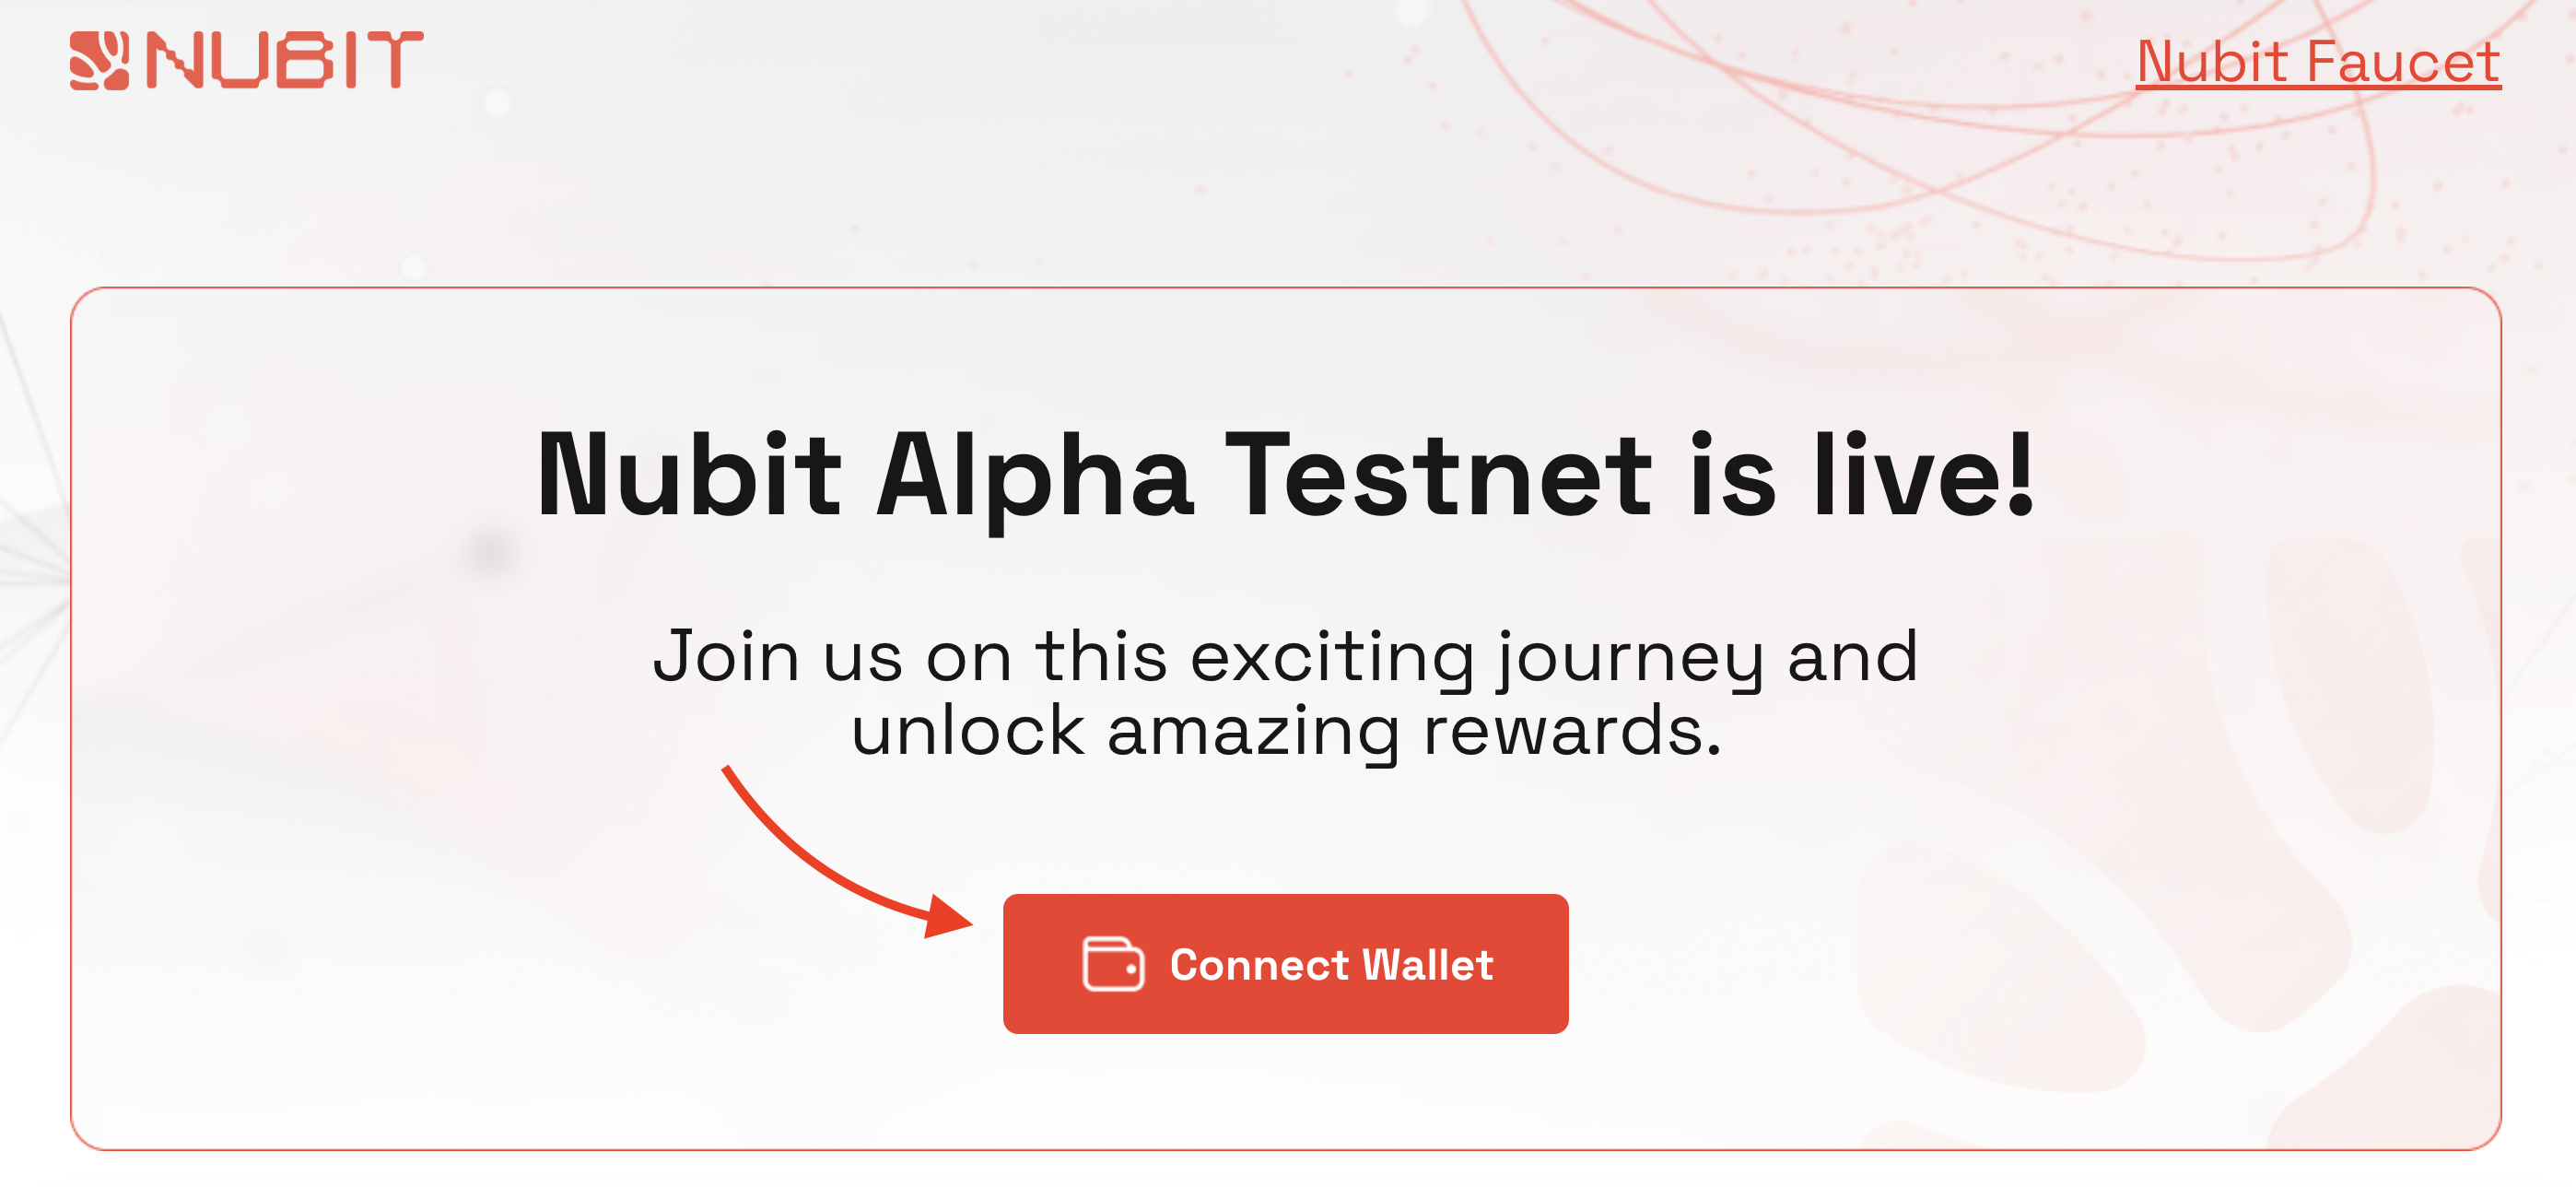
Сonnect to the testnet
- Install Keplr Wallet;
- Go to Nubit website and press [Explore Alpha Testnet] button;

- Click [Connect Wallet] and connect Keplr to Nubit;
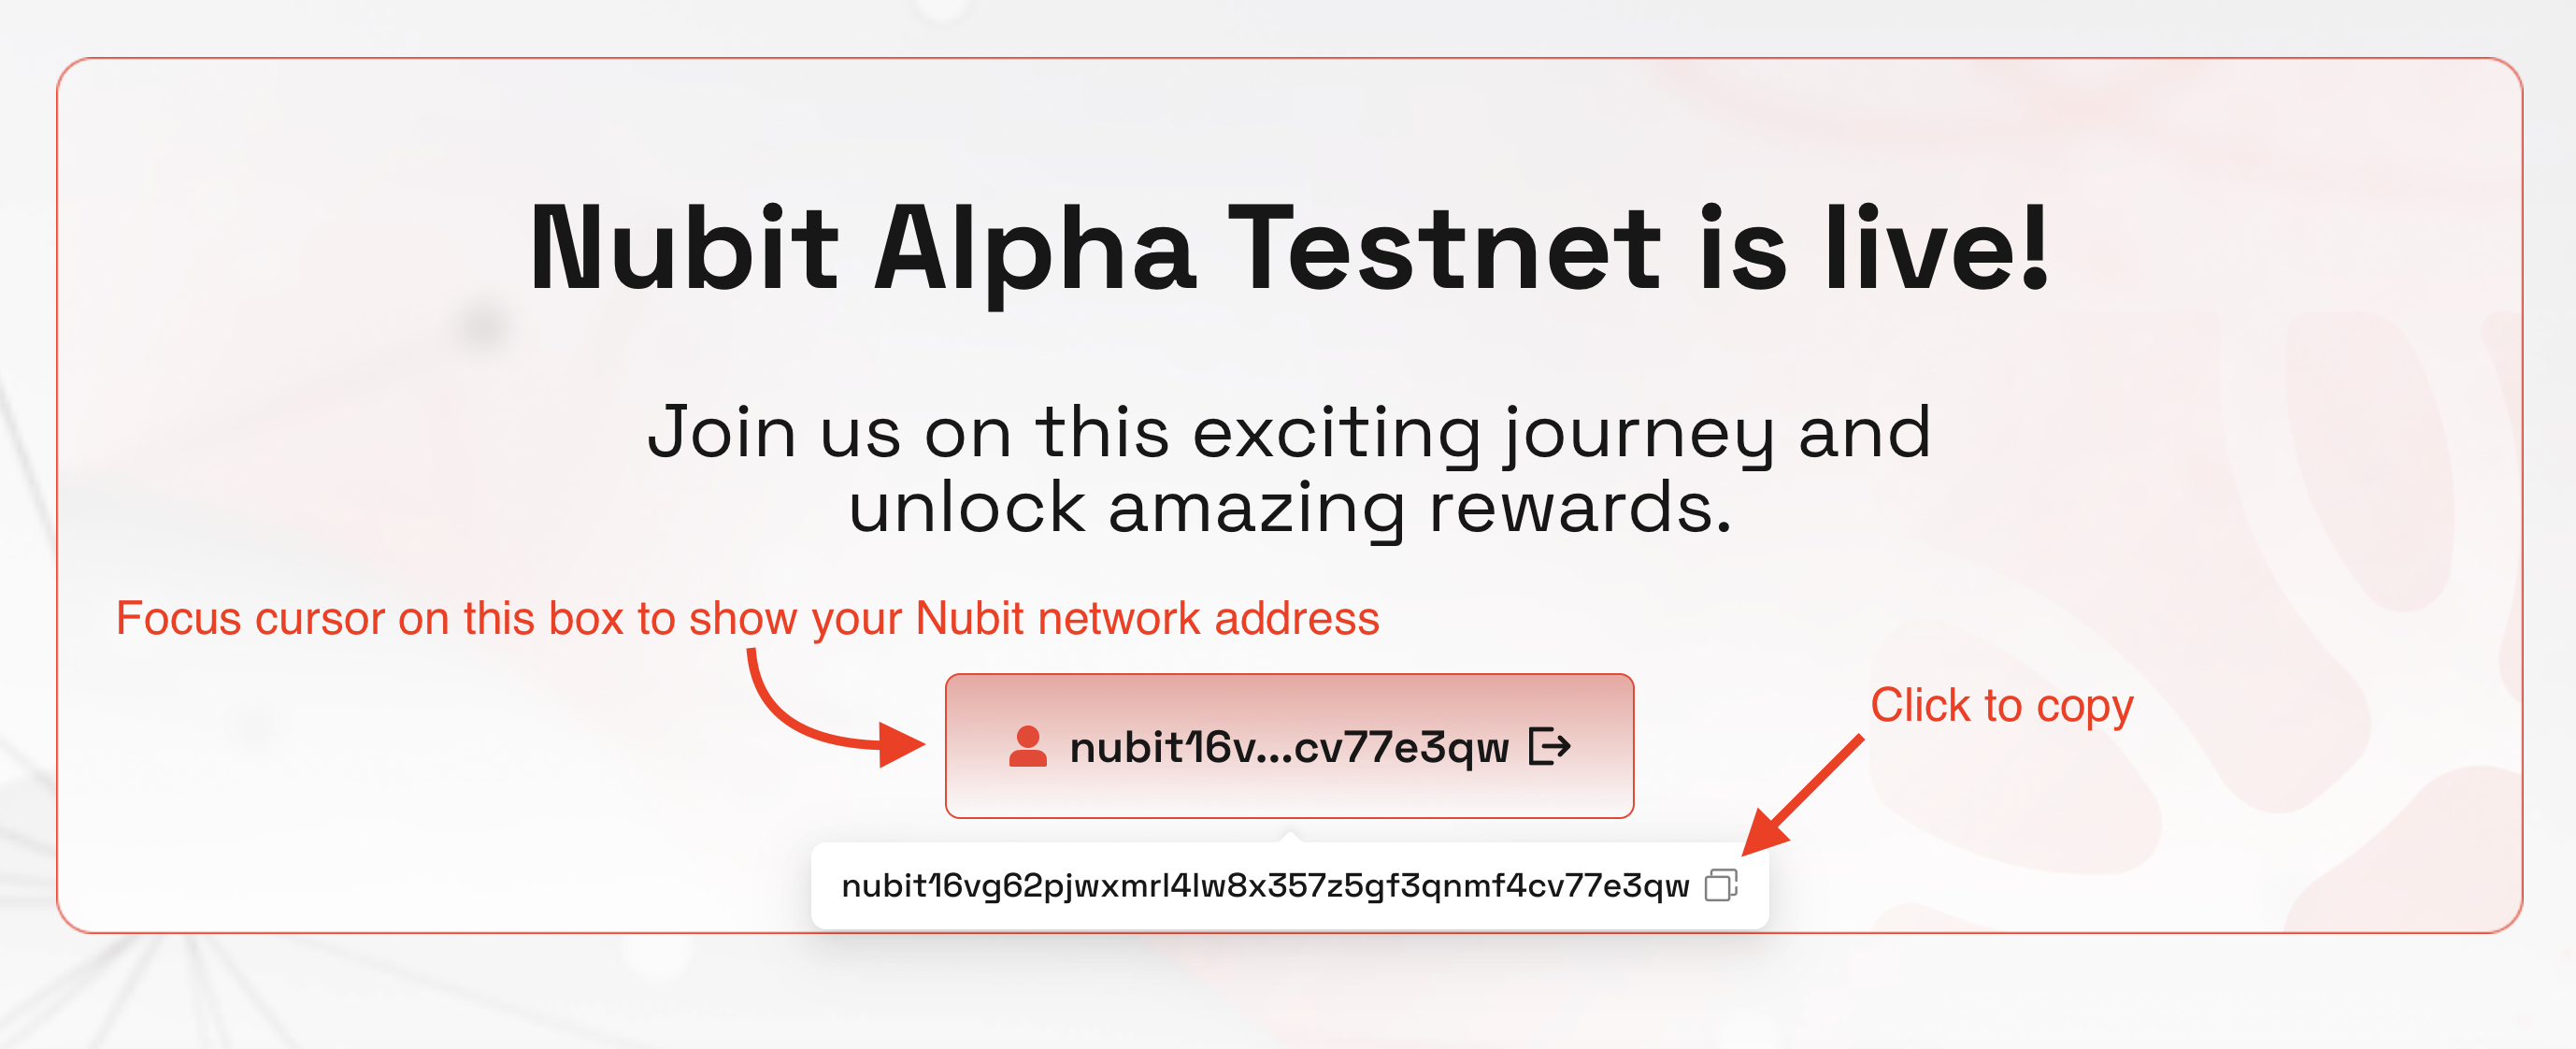
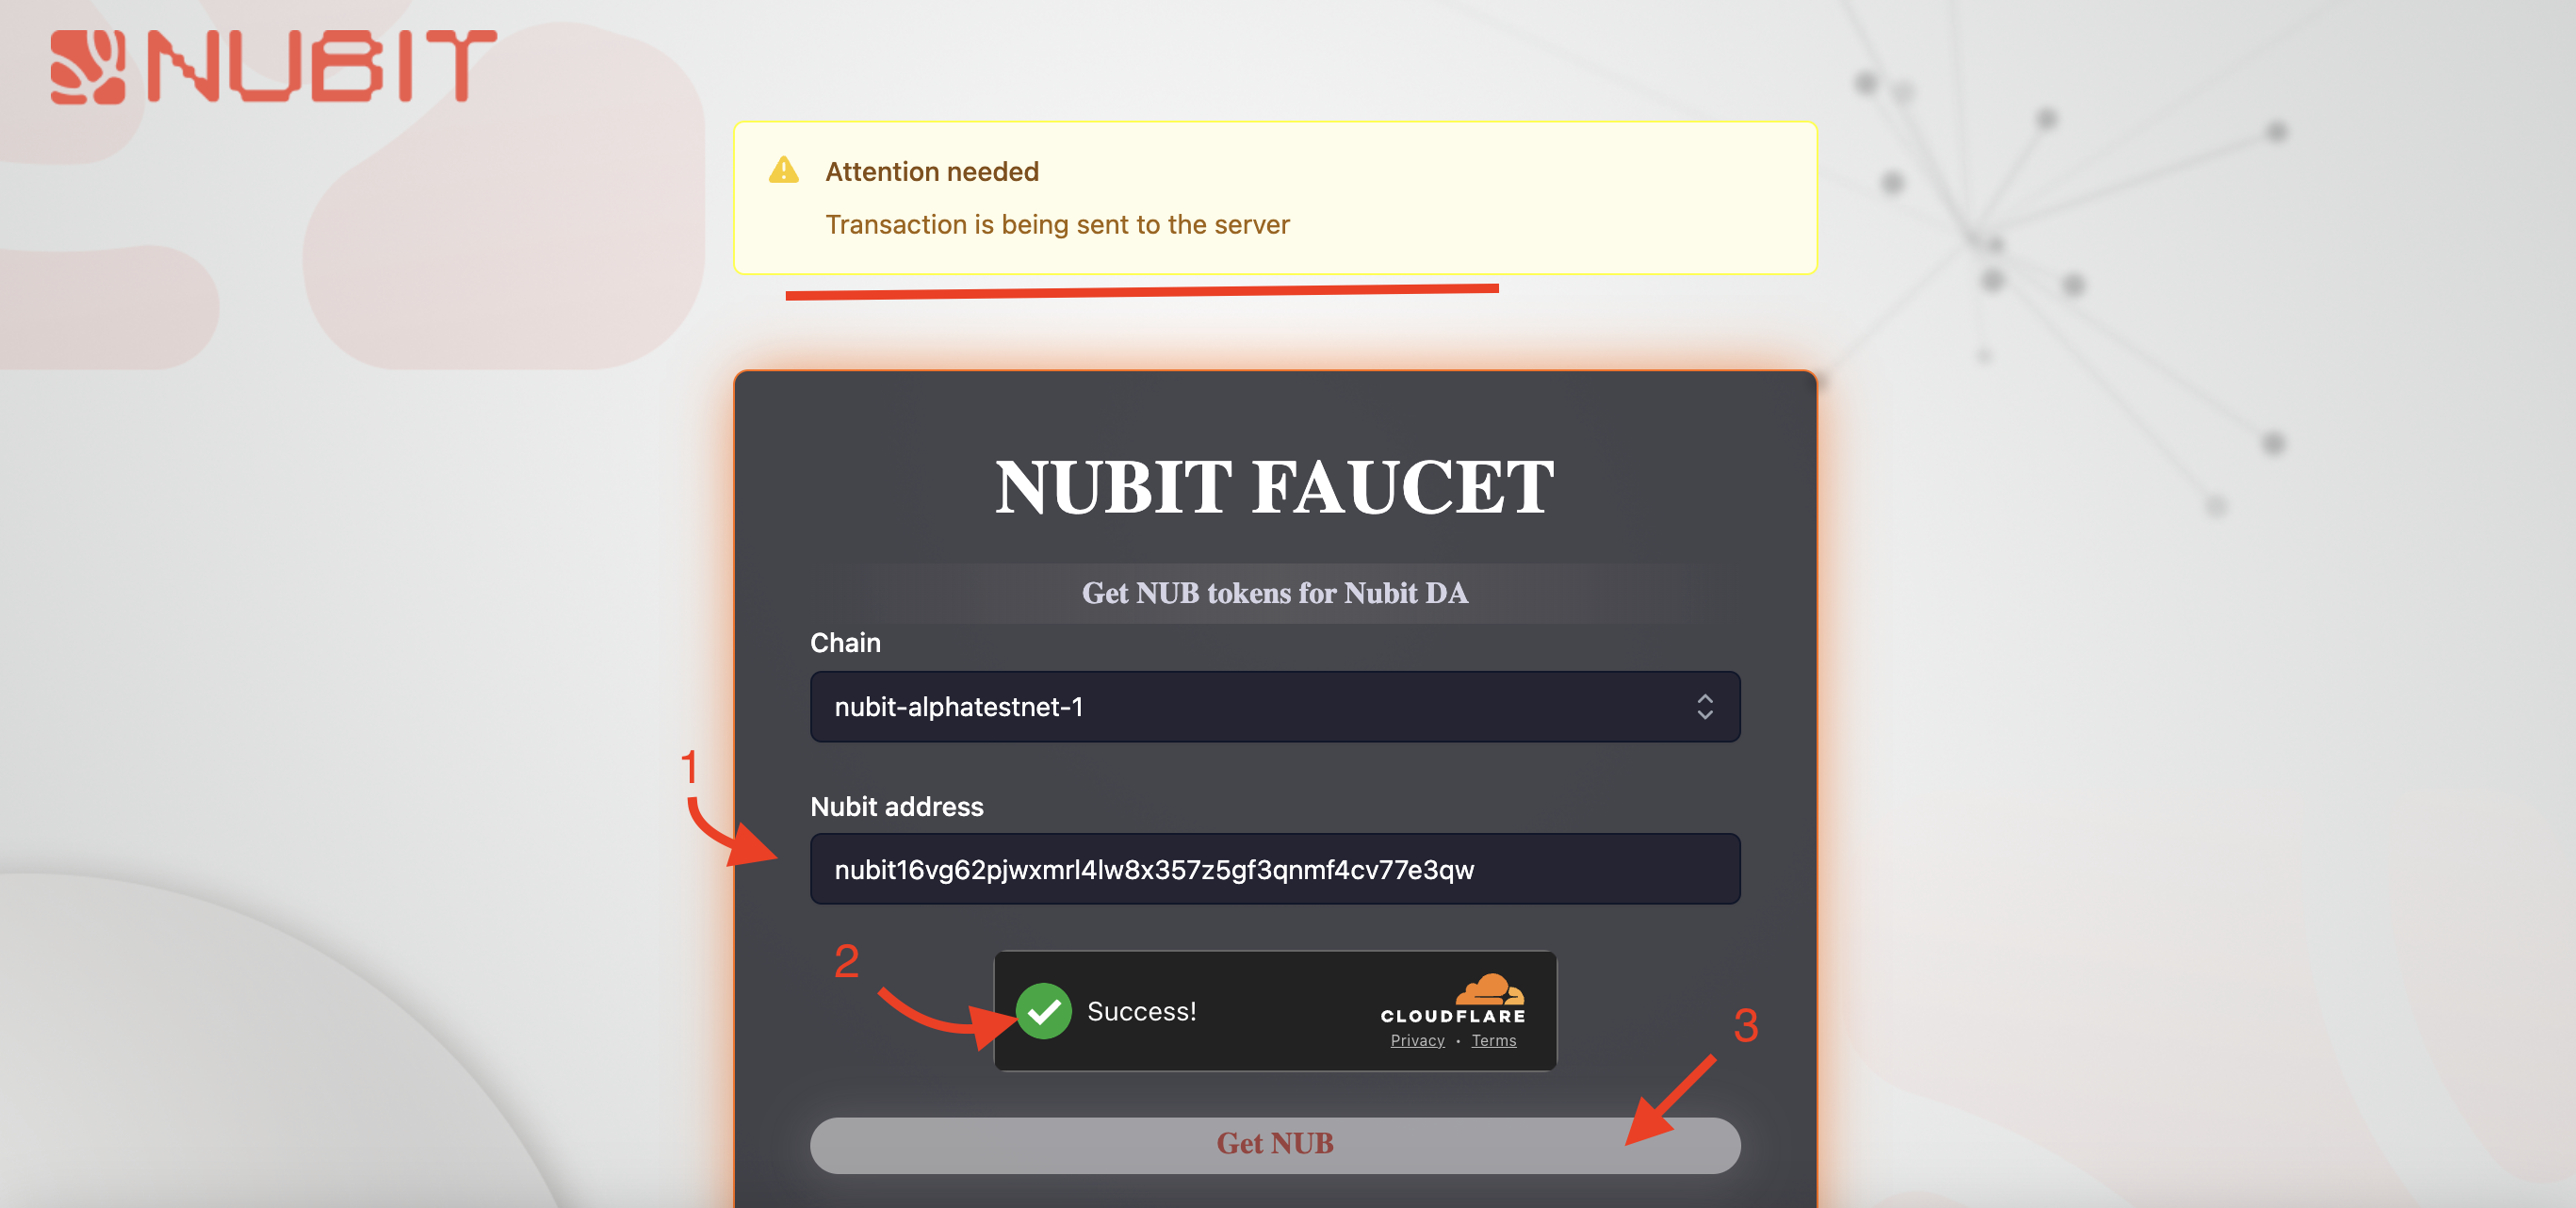
- Copy your Nubit address for faucet;
- Request test tokens from the faucet and wait until [Attention needed] will changed to [Success];
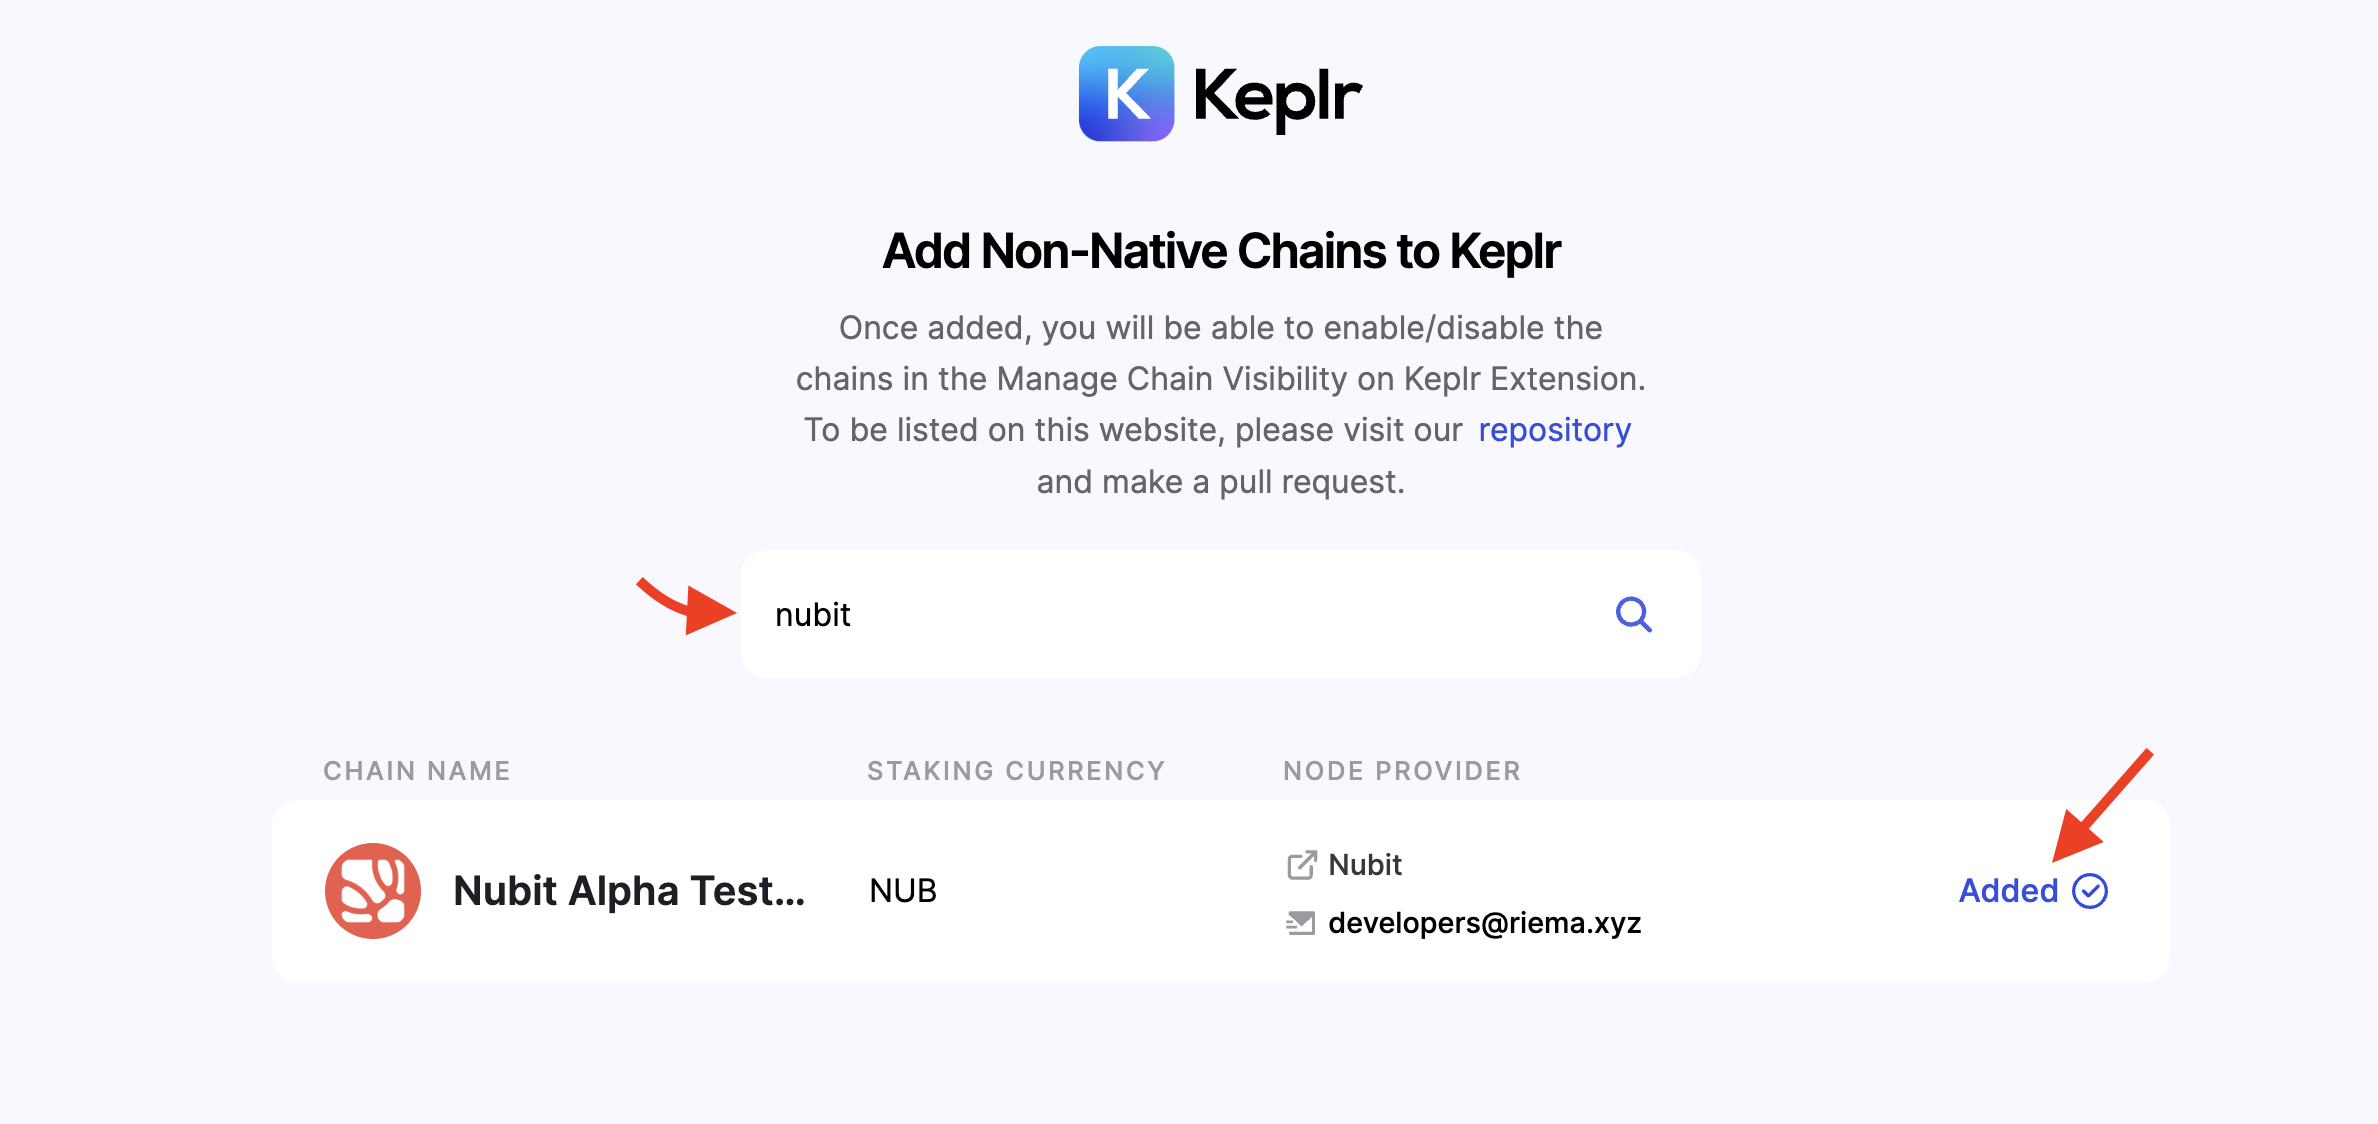
- Add Nubit Testnet Alpha network to your Keplr;
- Send $NUB tokens in your Keplr to your another address or other random addresses which you can find in explorer;
- Next, complete available Phases in the list;
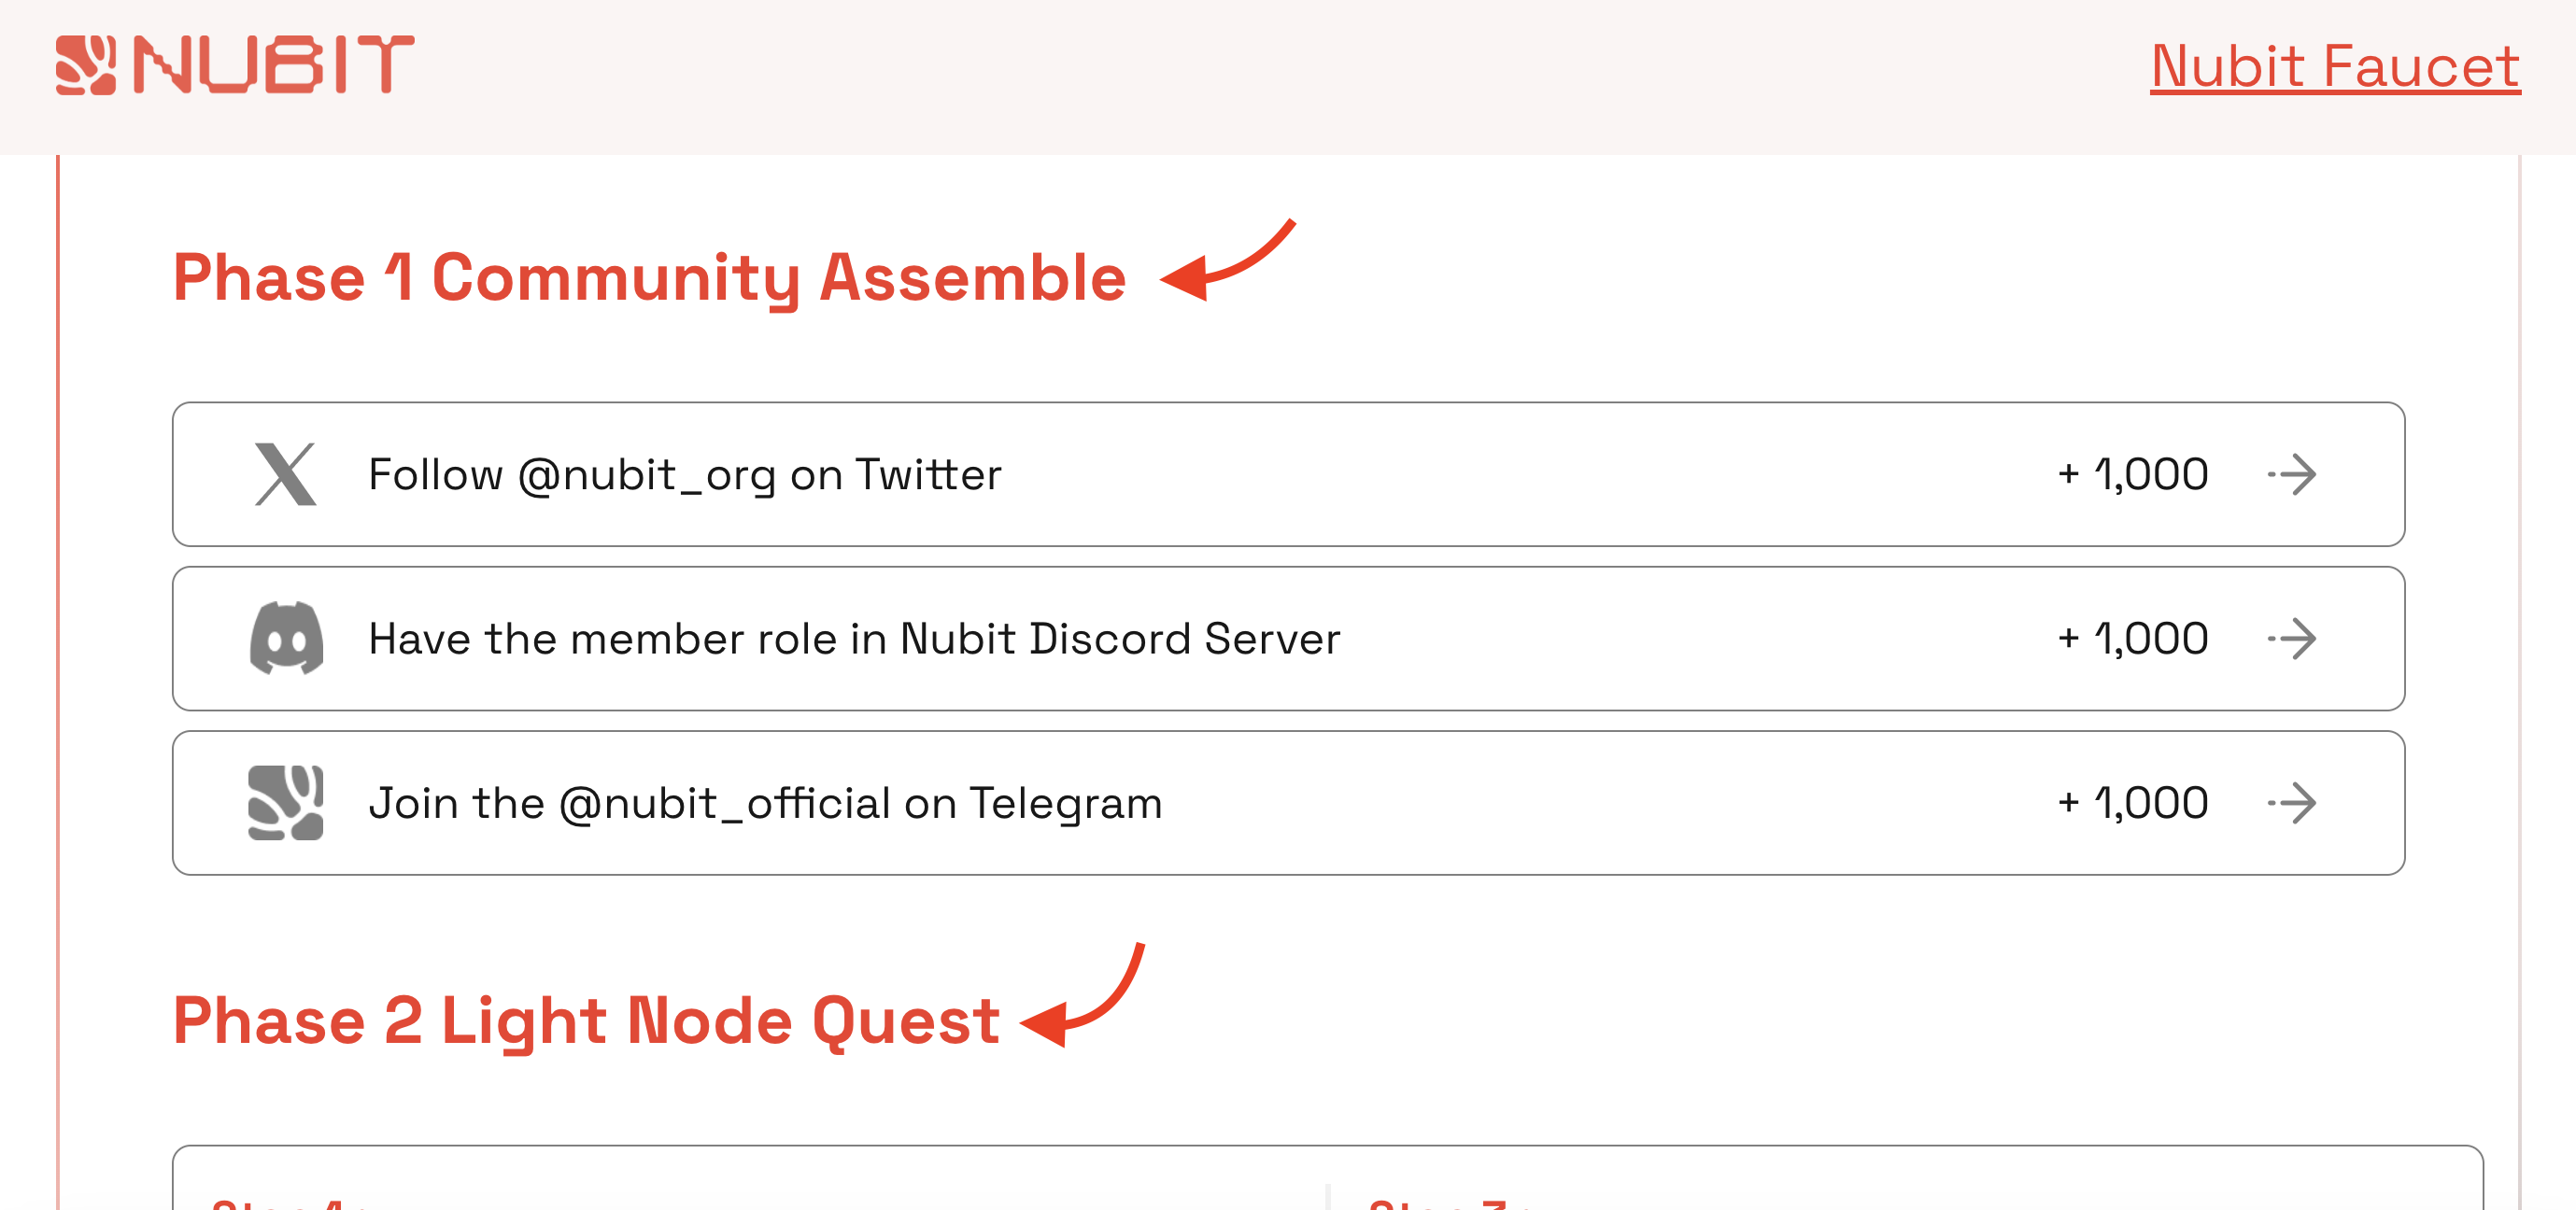
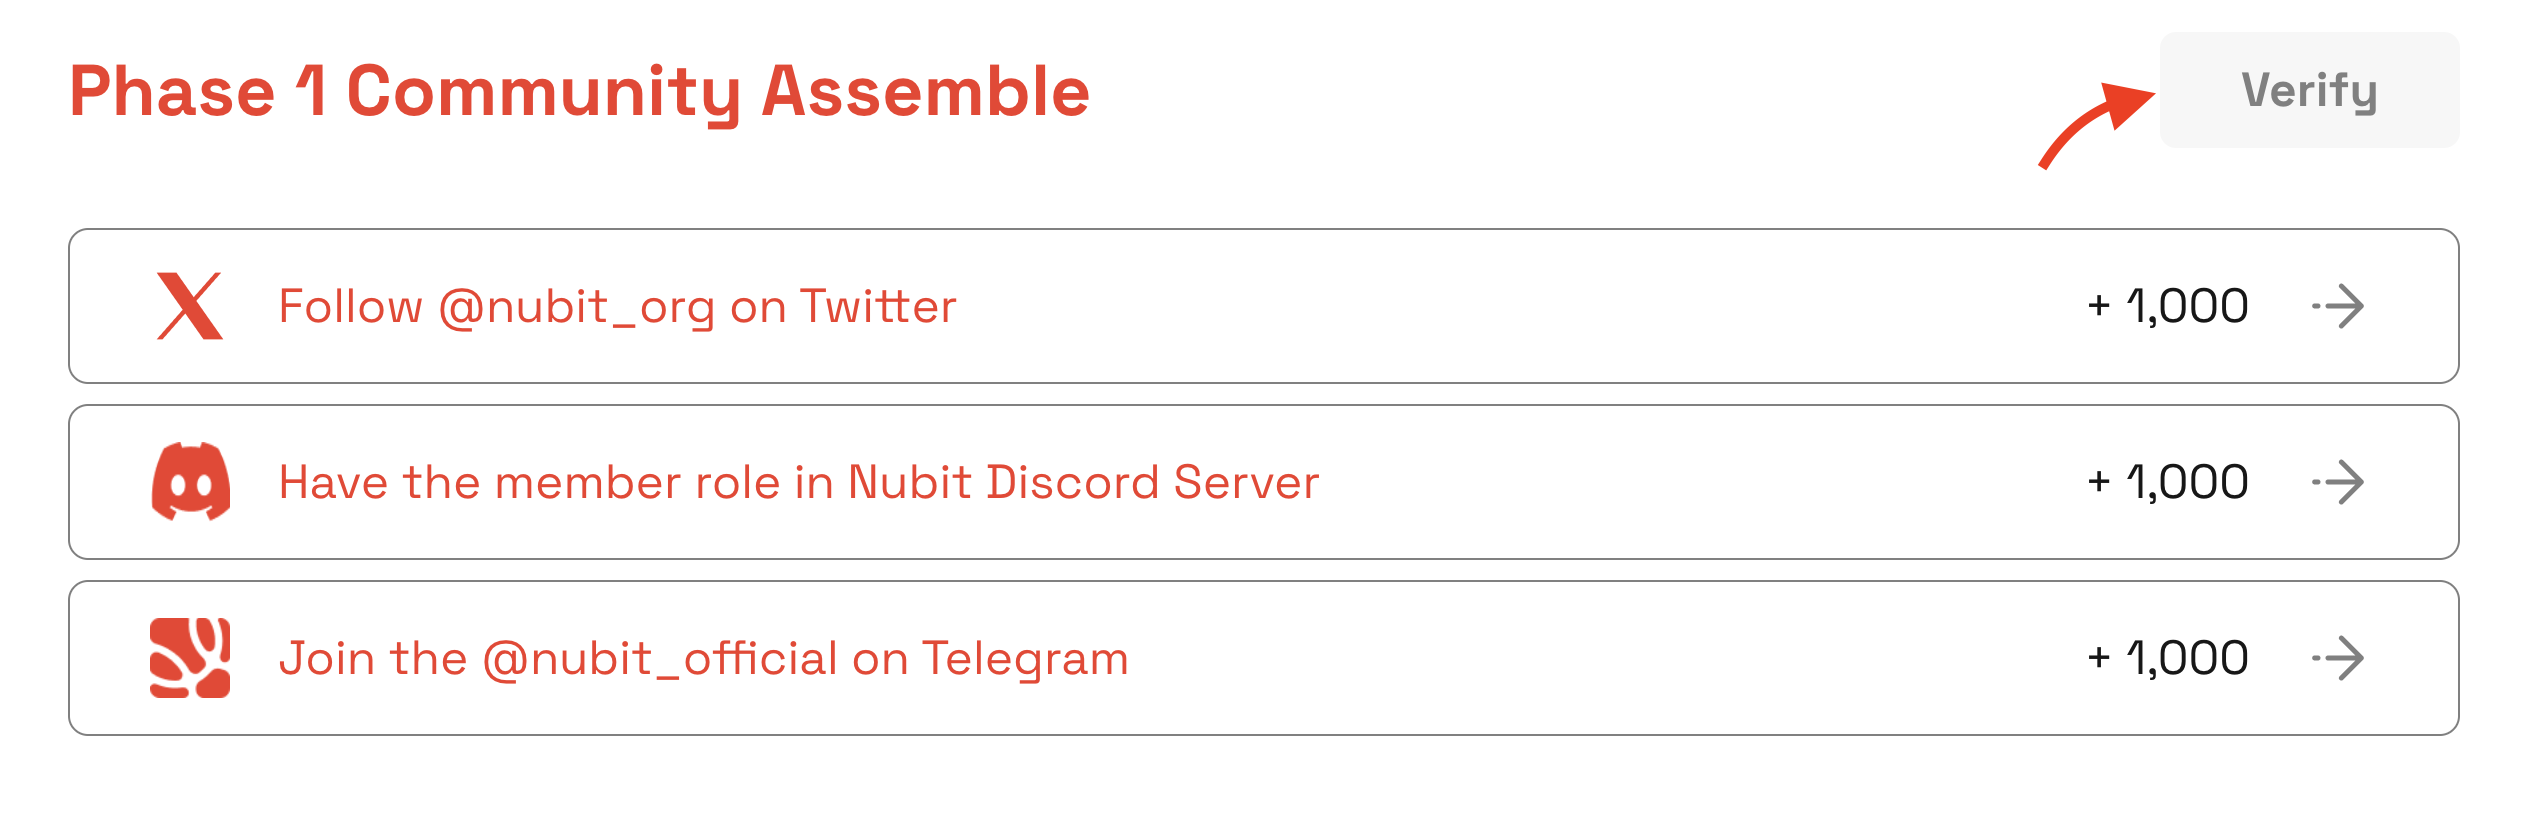
Phase 1 Community Assemble
Take 3 simple steps to join Nubit’s social networks.
- Go to Galxe and join socials and click [Claim] points;
- Return back to the Nubit tasks and click [Verify] to collect points;
- Also move to Nubit Genesis Campaign on Galxe and complete it.
- Quiz: С, А, В, В, А
Phase 2 Light Node Quest
You can use official Node Run guide;
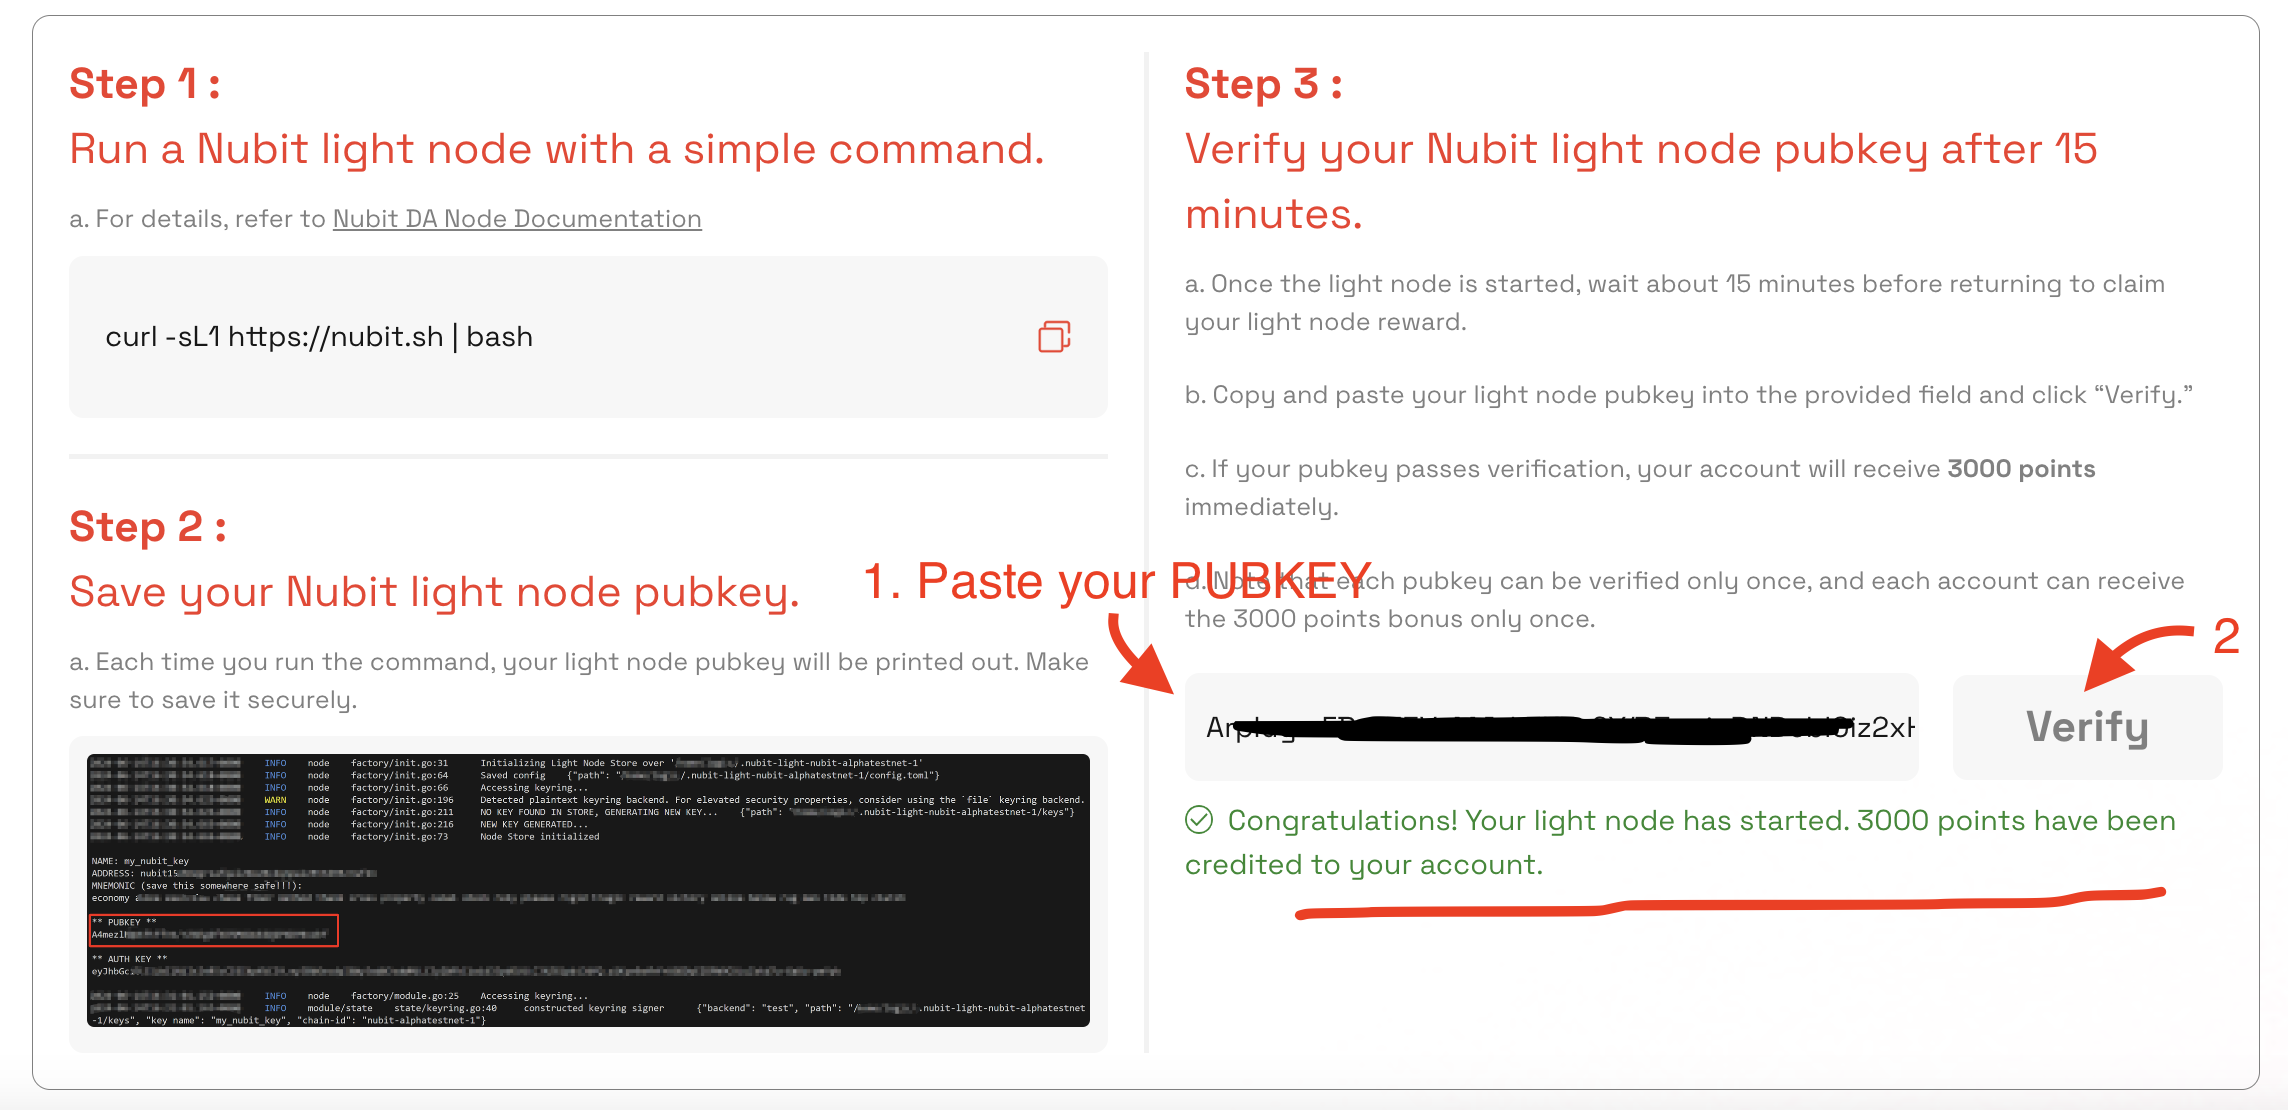
To complete this phase, follow these steps:
- Configure your terminal if you Windows user.
- Open terminal and enter
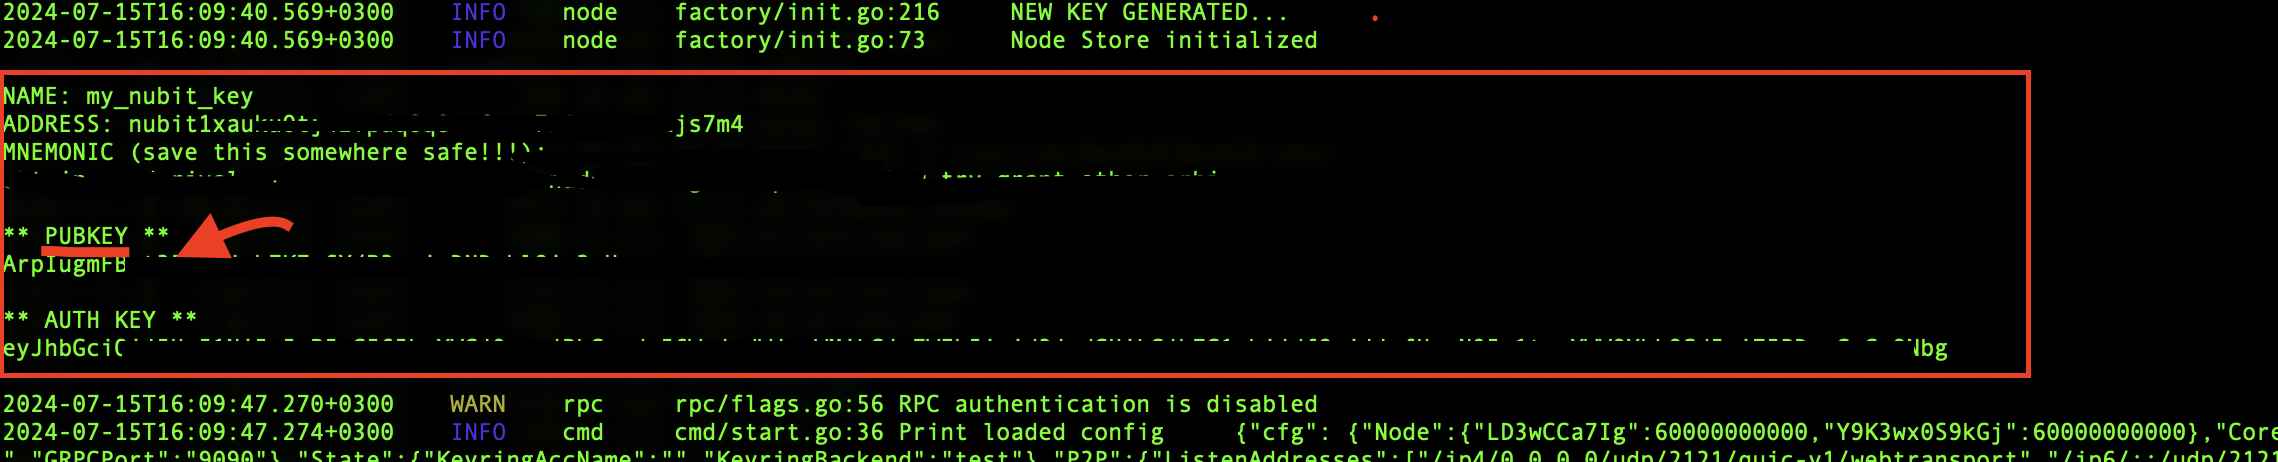
curl -sL1 https://nubit.sh | bashand wait until the files are uploaded and the node starts working; - Next, copt your PUBKEY and mnemonic after node running in safe place.
- Wait for your node to run for more than 15 minutes after uploading the files;
- After that, go to the Nubit website and proceed to Phase 2. Paste the PUBKEY you copied from the terminal into the field and click [Verify];
- If everything went well, you will see a Congratulations message and 3000 points will be credited to your balance;
Run node on MacOS / Linux
- Open [Terminal];
- Enter
curl -sL1 https://nubit.sh | bash; - Wait 15 minutes and try to verify your PUBKEY;
- After successful verification press Ctrl + C to stop node.
Run node on Windows
Important: To install WSL you will need Windows 10 or 11 version PRO.
Before starting node installation, please enable the virtualization feature in your BIOS.
- Open [Windows PowerShell] with administrator privileges;
- Update your WSL with command:
wsl --updateand restart PowerShell; - Verify that your WSL version is WSL-2 by inserting command:
wsl --set-default-version 2; - Enter
wsl --install --no-distributioninto PowerShell; - Wait until the installation is complete and restart your PC/Laptop;
- Choose available Linux distributions with command:
wsl --list --online; - Install Ubuntu by inserting this command into PowerShell:
wsl --install ubuntu;- You will be prompted for a username and password for the new Ubuntu installation;
- To start the light node, simply run the following command in PowerShell or Terminal:
curl -sL1 https://nubit.sh/ | bash; - Wait 15 minutes and go to Nubit website, insert your PUBKEY into the field and press [Verify];
- If the verification doesn’t go through right away, try again a little later, mine went through in 20 minutes.
- After successful verification press Ctrl + C to stop node.
Yes, it’s alpha testnet phase.
It took me 30 minutes, along with installing and configuring the node. But I did it on MacOS. On Windows, it can take an additional hour, because the process of setting up the node environment is more complicated.
Enjoyed this article?
Click the like button below to show your support and let us know you found it helpful! Your feedback keeps us motivated to create more content like this.