If you’re participating in Taiko’s Galxe campaign, you just need to do your best to participate in their testnet and fill it out as completely as possible. At this point, you need to take part in the latest phase. It makes sense for everyone to do this, even if they haven’t done the previous phases.
Pay attention: If you haven’t yet completed the latest Taiko quest on Galxe called “Exploring Taiko with OKX Wallet“, then do it quickly. Also, be sure to claim your Trust Bonus, which gives you 2500 pts, if you haven’t already done so.
Also, if you haven’t yet done a testnet on the Katla network, you can still do the same thing there. To do this, add a Taiko Katla L2 network and follow the same steps below.
Here is website to perform actions on Katla.
- Step 1: Add test networks to Metamask
- Step 2: Receive test tokens for Holesky network
- Step 3: Receive HORSE token on Holesky
- Step 4: Bridge ETH and HORSE from Holesky to Hekla
- Step 5: Perform swaps in Hekla
- Step 6: Interaction with the Liquidity Pool
- Step 7: Make swaps and add Liquidity on Henjin DEX
- Step 8: Deploy Smart Contract
- Step 8: Create your own NFT collection
- Step 9: Bridge NFT from Hekla to Holesky
- Step 10: Additional activities
- Conclusion
Step 1: Add test networks to Metamask
To perform all the steps, we need 2 test networks on which Taiko works.
Follow the links to add it:
Step 2: Receive test tokens for Holesky network
At the moment, there are 3 faucets from which you can get them:
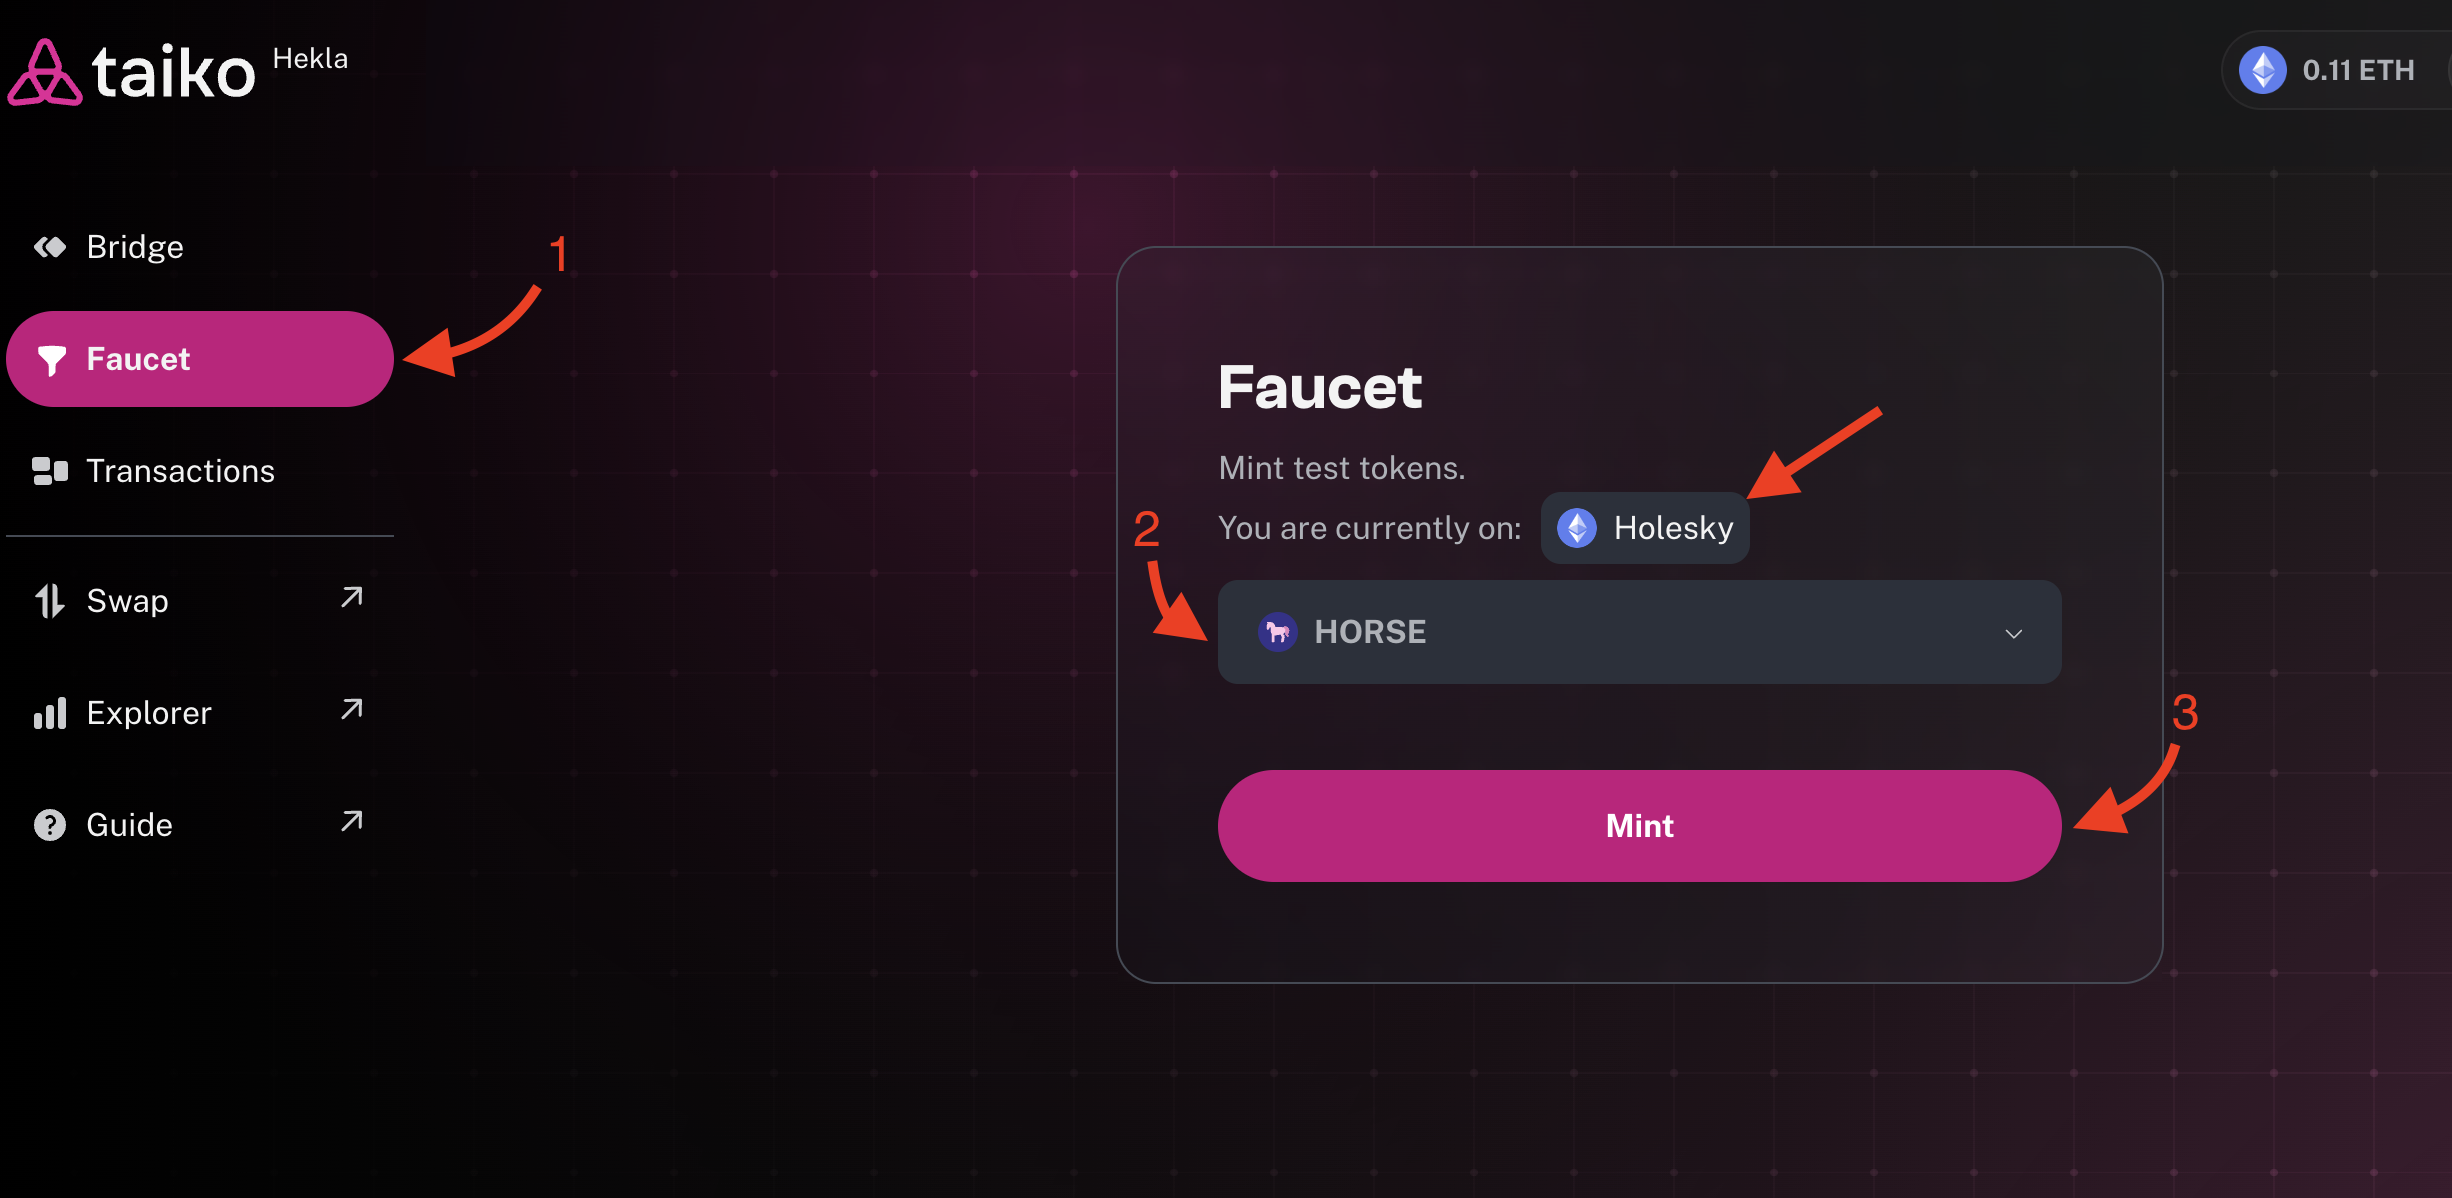
Step 3: Receive HORSE token on Holesky
Go to Taiko Hekla Faucet and mint HORSE test token in Holesky network.
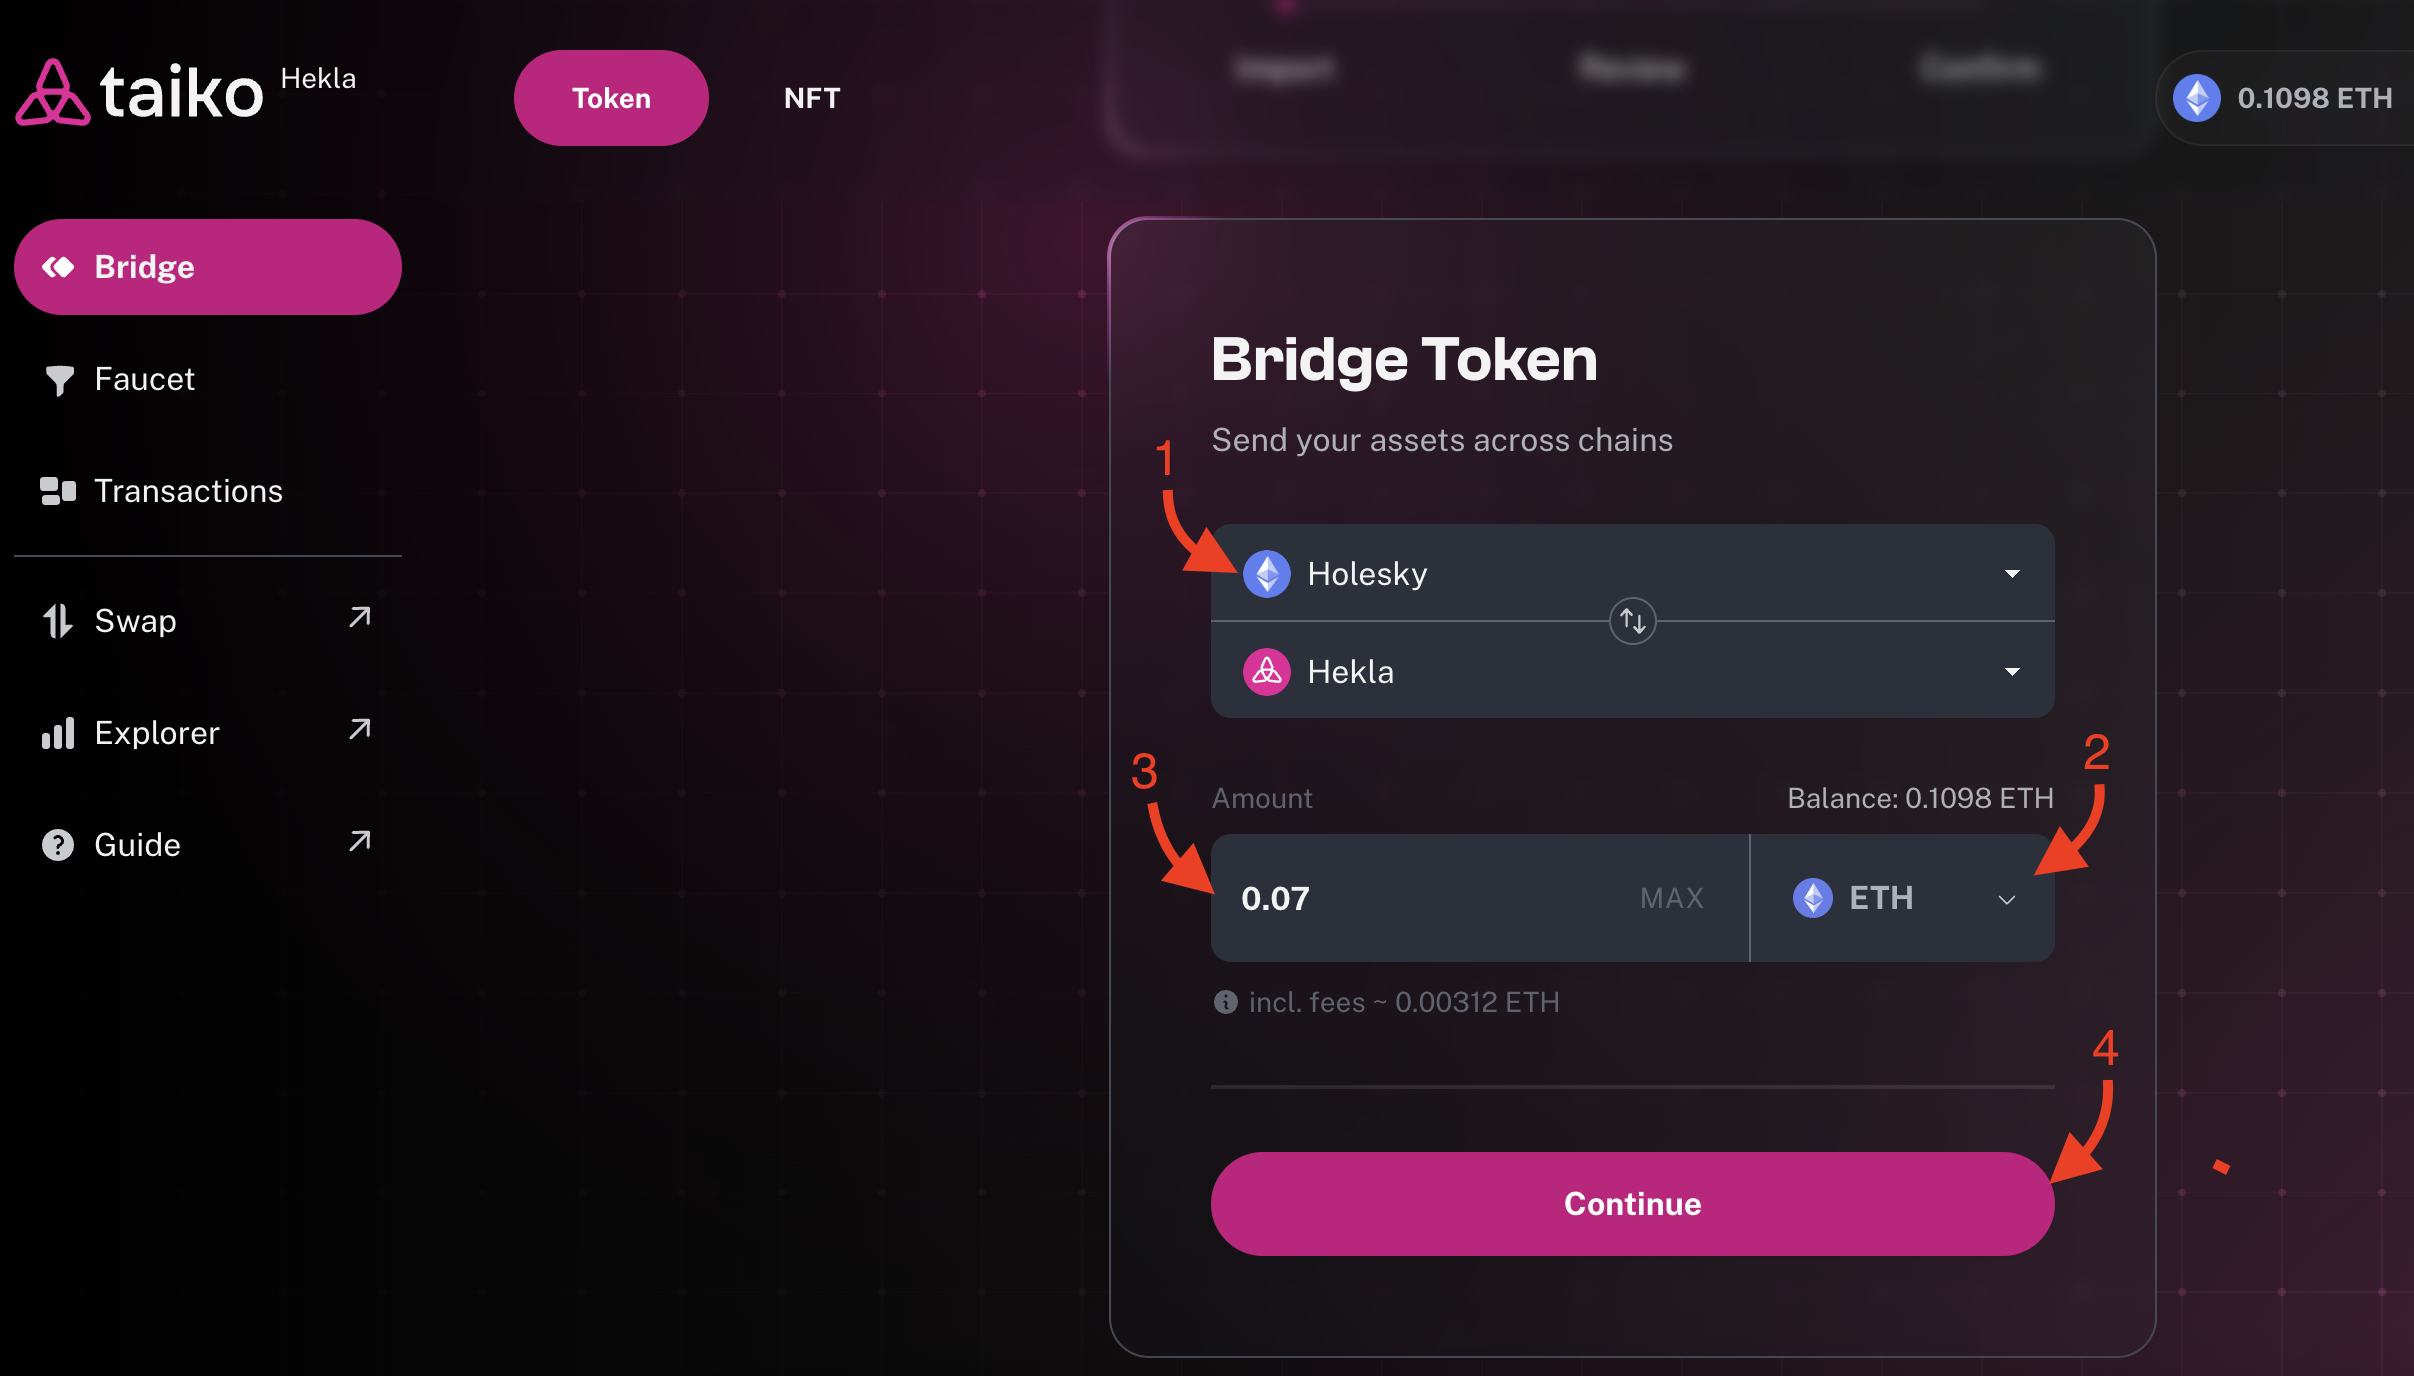
Step 4: Bridge ETH and HORSE from Holesky to Hekla
Go to the Taiko Hekla Bridge and bridge part of the ETH and HORSE tokens from the Holesky network to Taiko Hekla. First, you need ETH to pay transaction fees to Hekla and then send HORSE tokens.
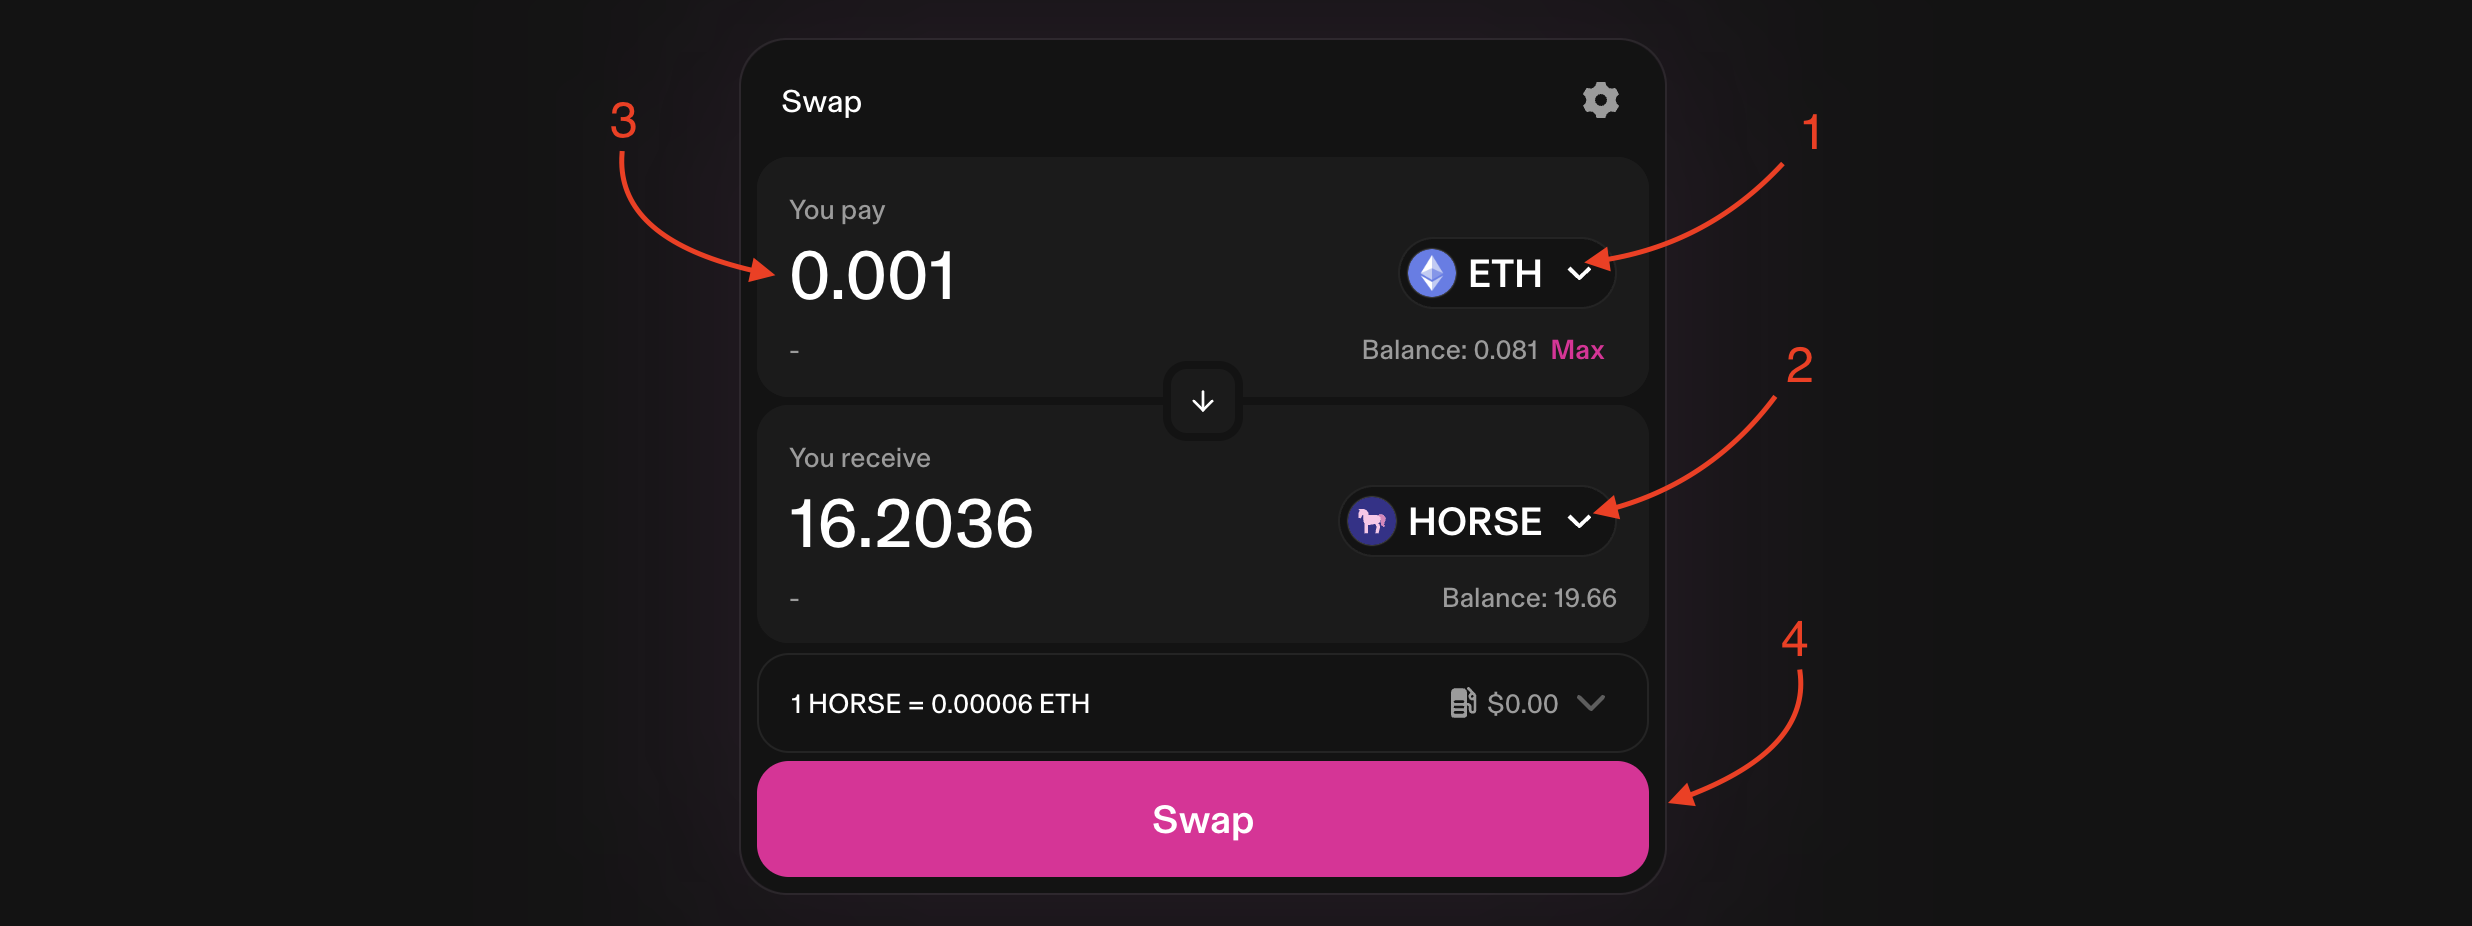
Step 5: Perform swaps in Hekla
After your test tokens are added to the Hekla network, go to Taiko Swap and perform swaps between different tokens. I recommend at least one swap between each token.
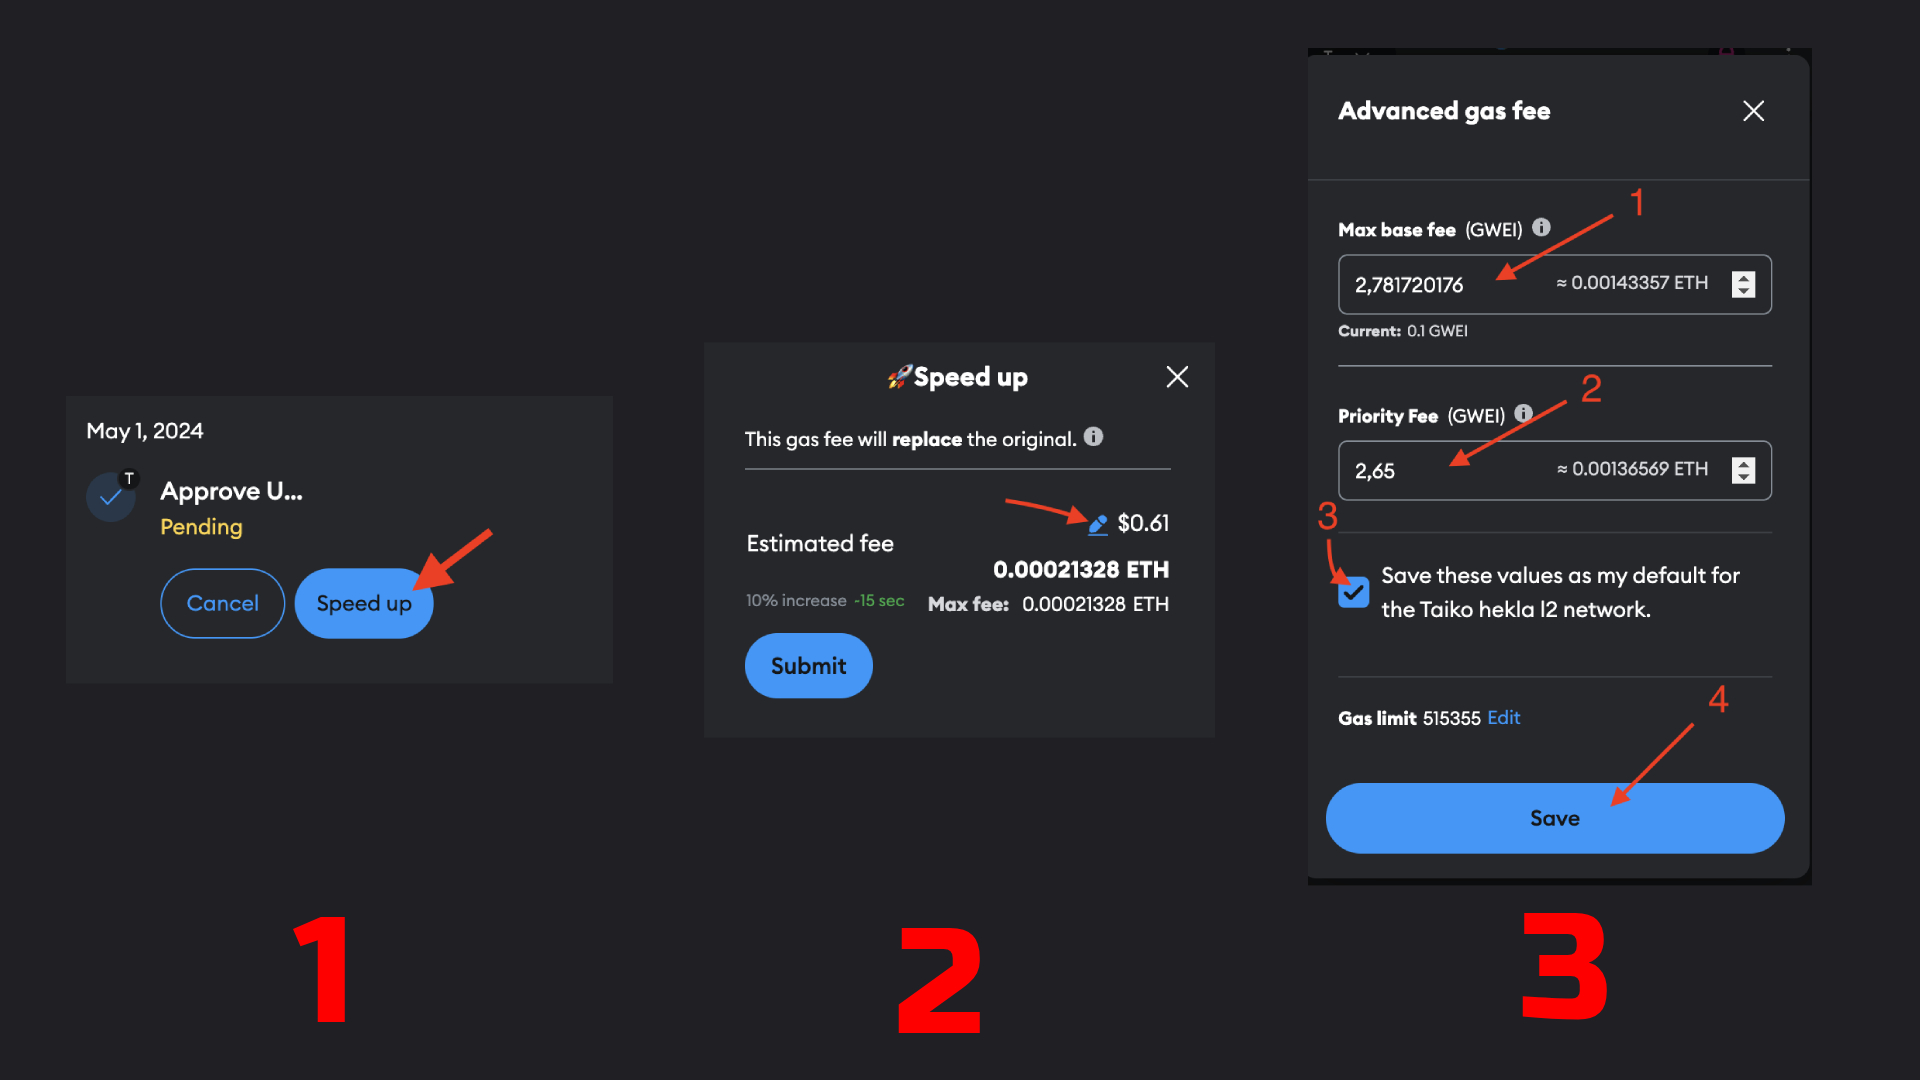
If you have to wait a long time for your transactions to execute, you can speed them up and change the static parameters for gwei or change to method to Aggressive.
Step 6: Interaction with the Liquidity Pool
Next, go to Pools management and click on [+ New Position].
Add liquidity pair
- Connect your wallet in Hekla network to website
- Then select tokens pair, for example ETH and USDC or HORSE
- Press on one of provided fee tiers depending on the selected pair, e.g. 0.05%
- Set Price Range by clicking on [Full range] or set it manually
- Next, in the Deposit Amounts section, enter some of your tokens in the field of one of the tokens. Just make sure that you have enough tokens from the other pair.
- At the bottom of the form click on [Approve USDC] and Approve transaction in your wallet

- After approving, click [Preview] button and [Add] and confirm transaction in wallet.
Remove part of liquidity
- Refresh [Pools] page and click on your added transaction in the list
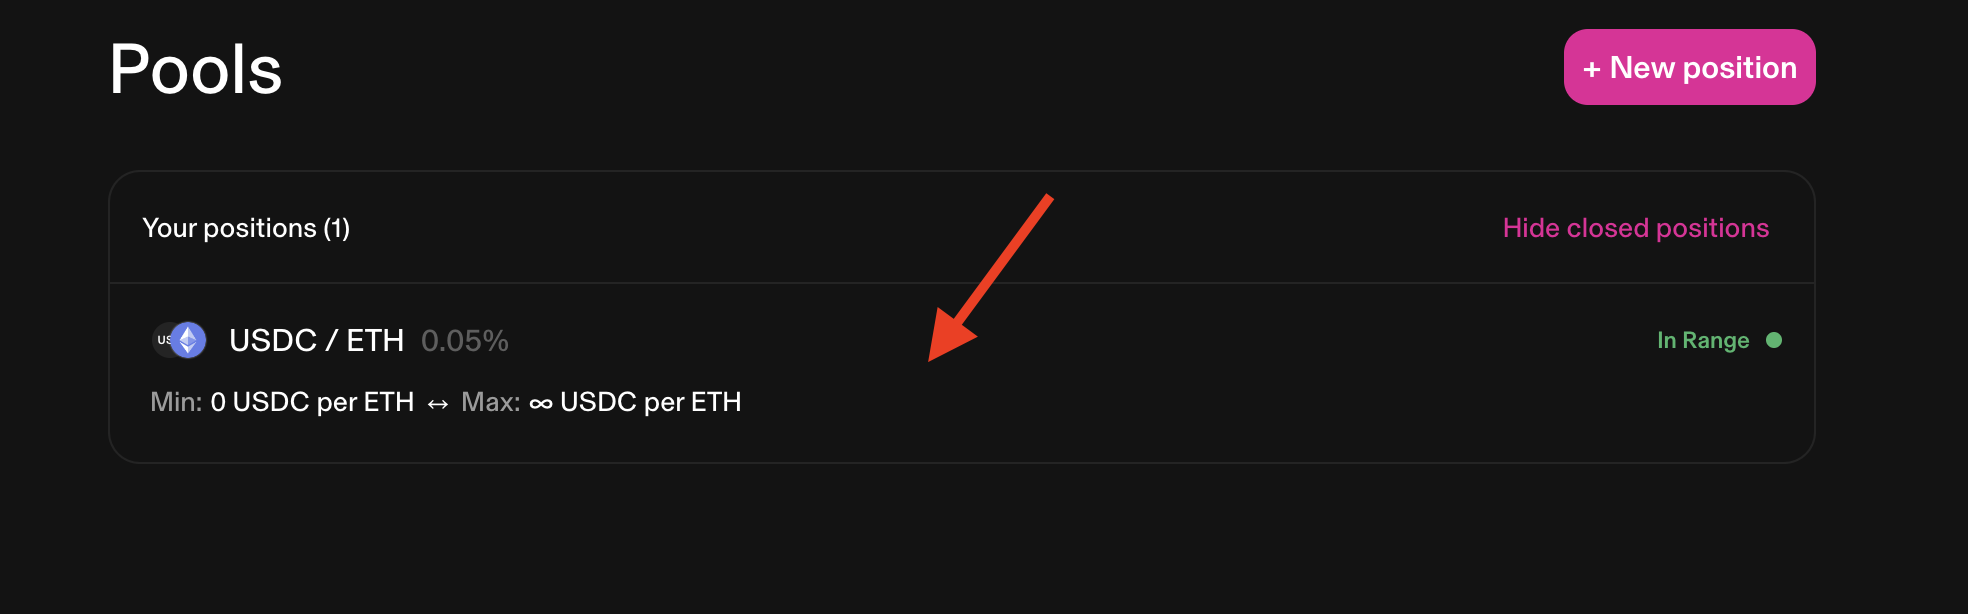
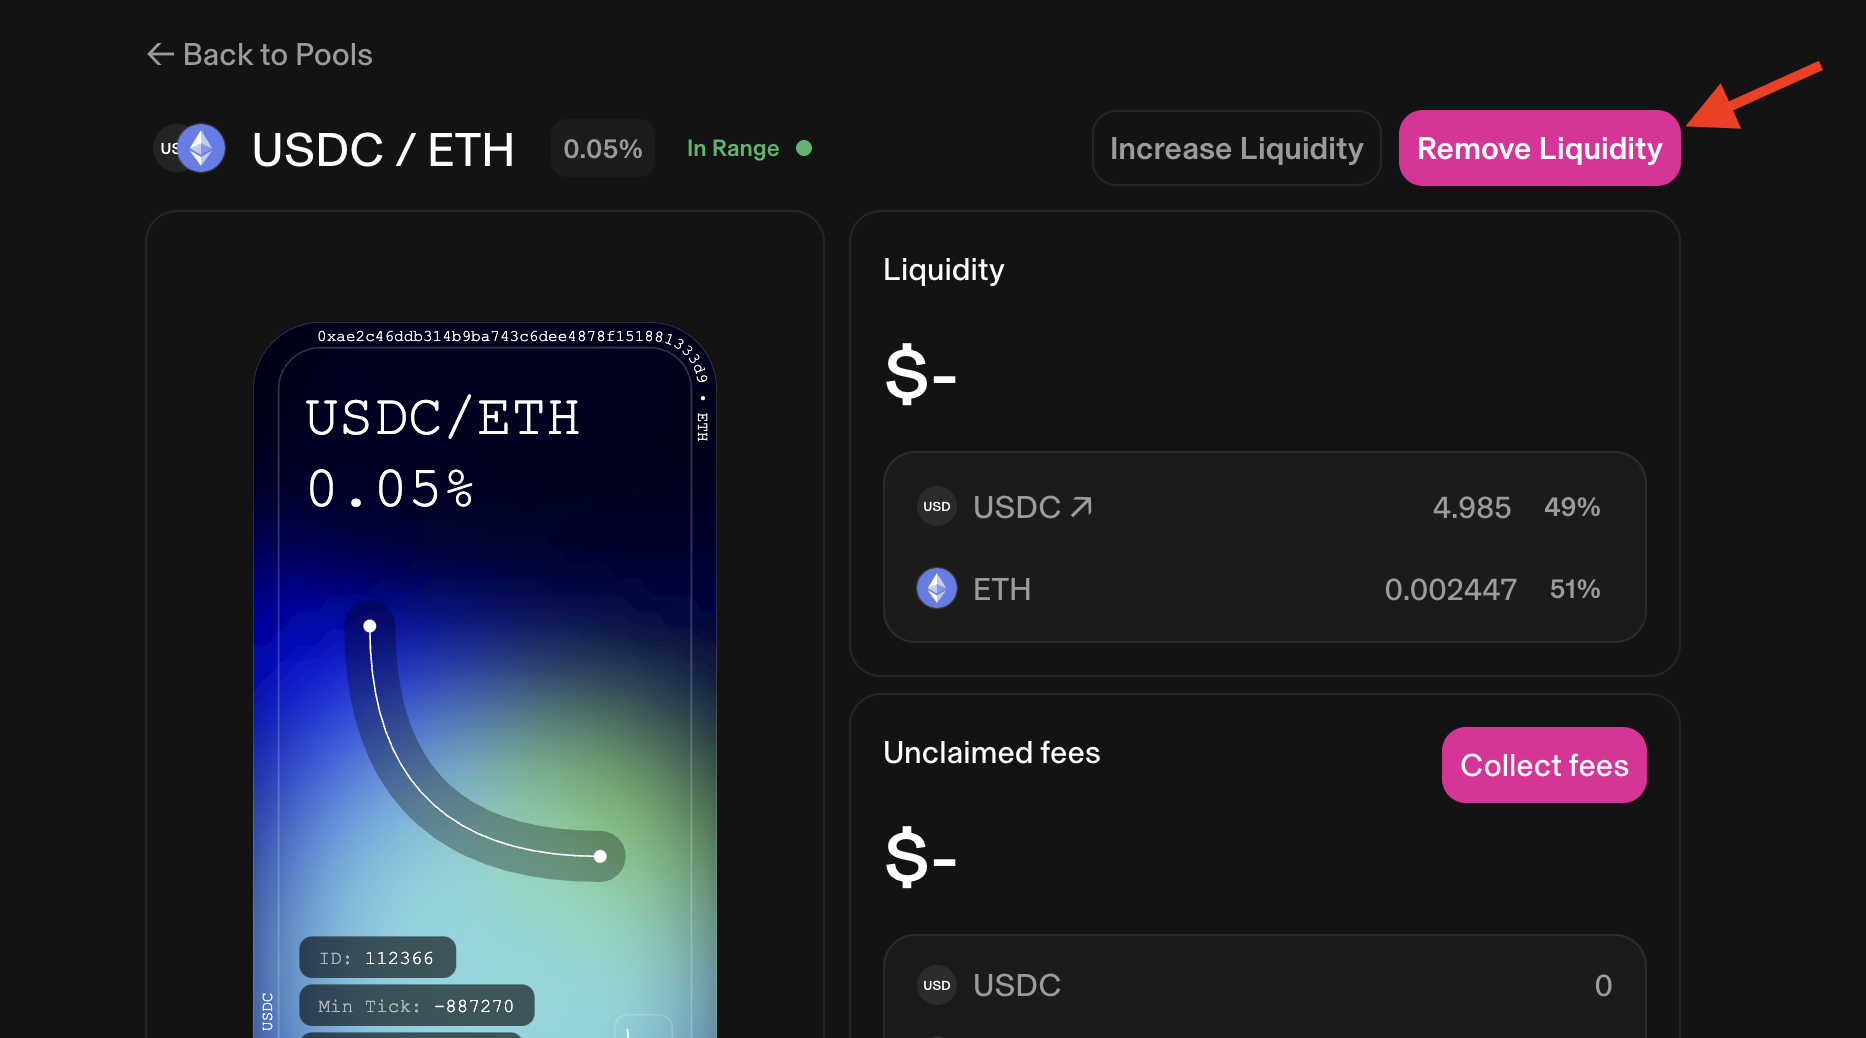
- And click on [Remove Liquidity] button
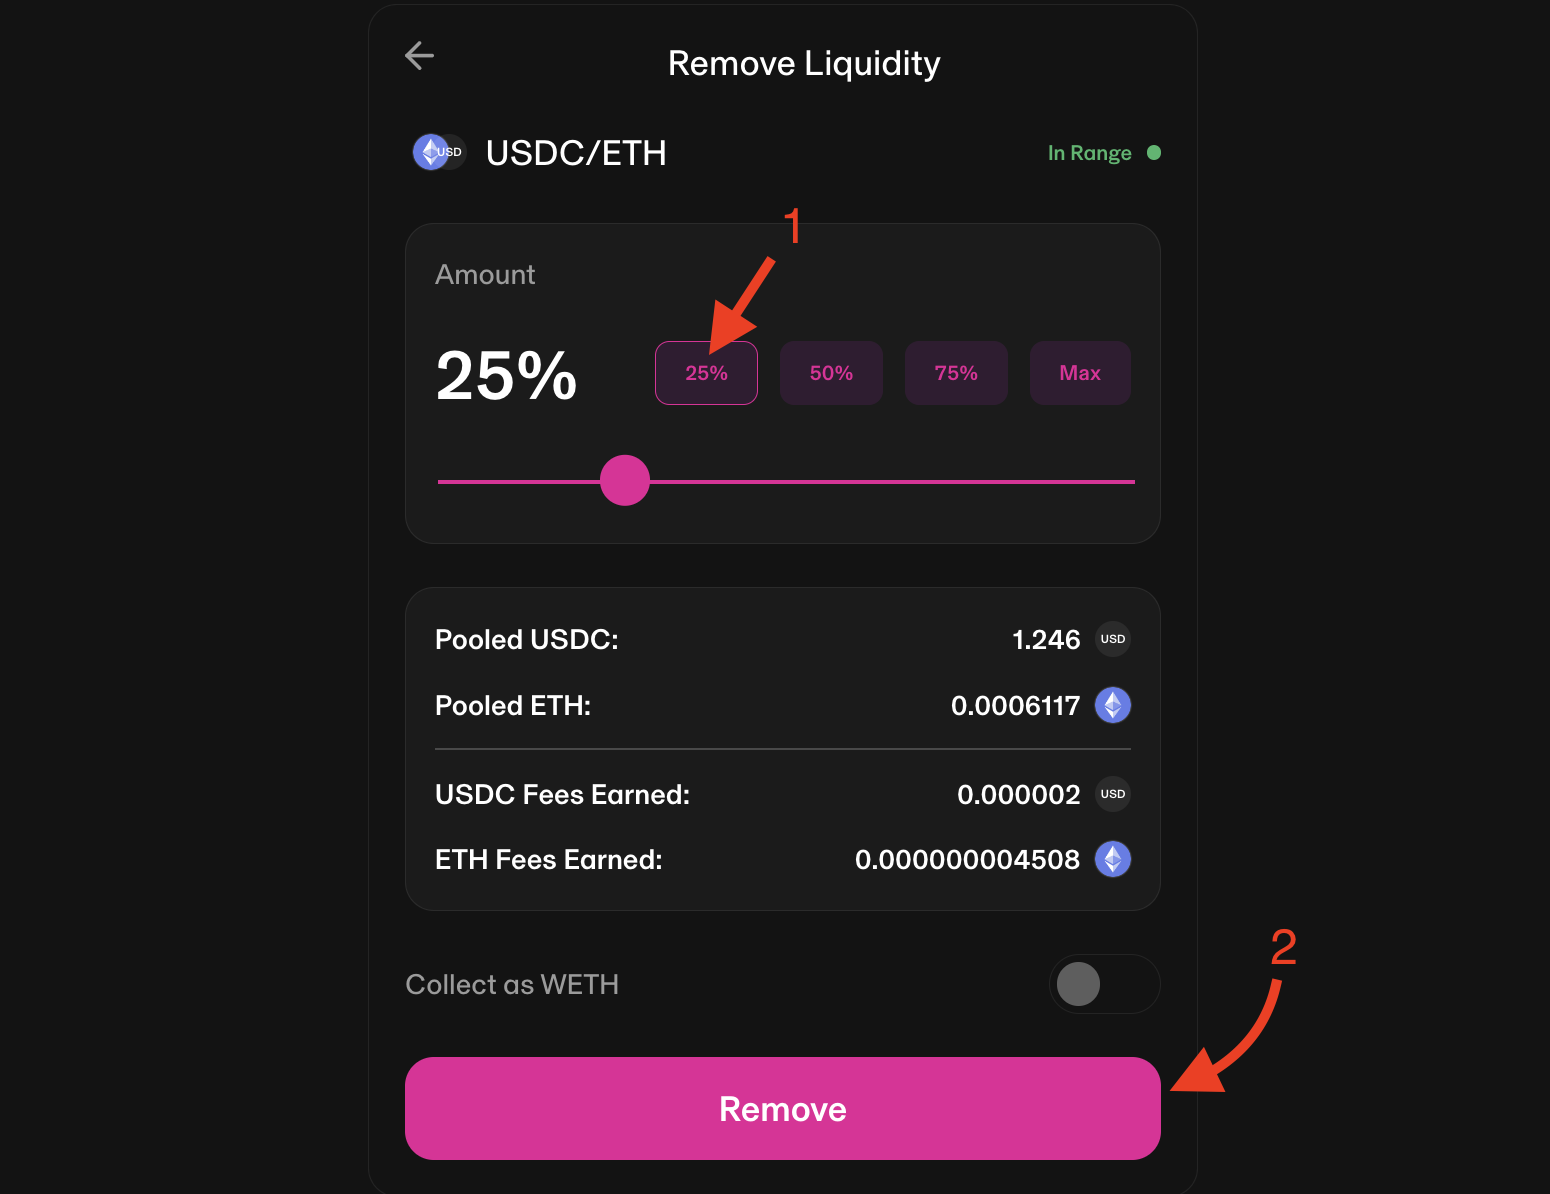
- Now, select the range of liquidity you want to remove. I recommend setting the value up to 50%. And press [Remove] button and again [Remove] in opened popup. Then confirm transaction in your wallet.
Step 7: Make swaps and add Liquidity on Henjin DEX
Make swaps and add liquidity in the same way as we did in the previous steps on the Henjin DEX.
I recommend doing an ETH to USDC swap right away. After that, go to [Pools] and add liquidity to the [ETH-USDC] pair. After that, remove some of the added liquidity from the pool and return to the swap and make several swaps between other pairs.
Step 8: Deploy Smart Contract
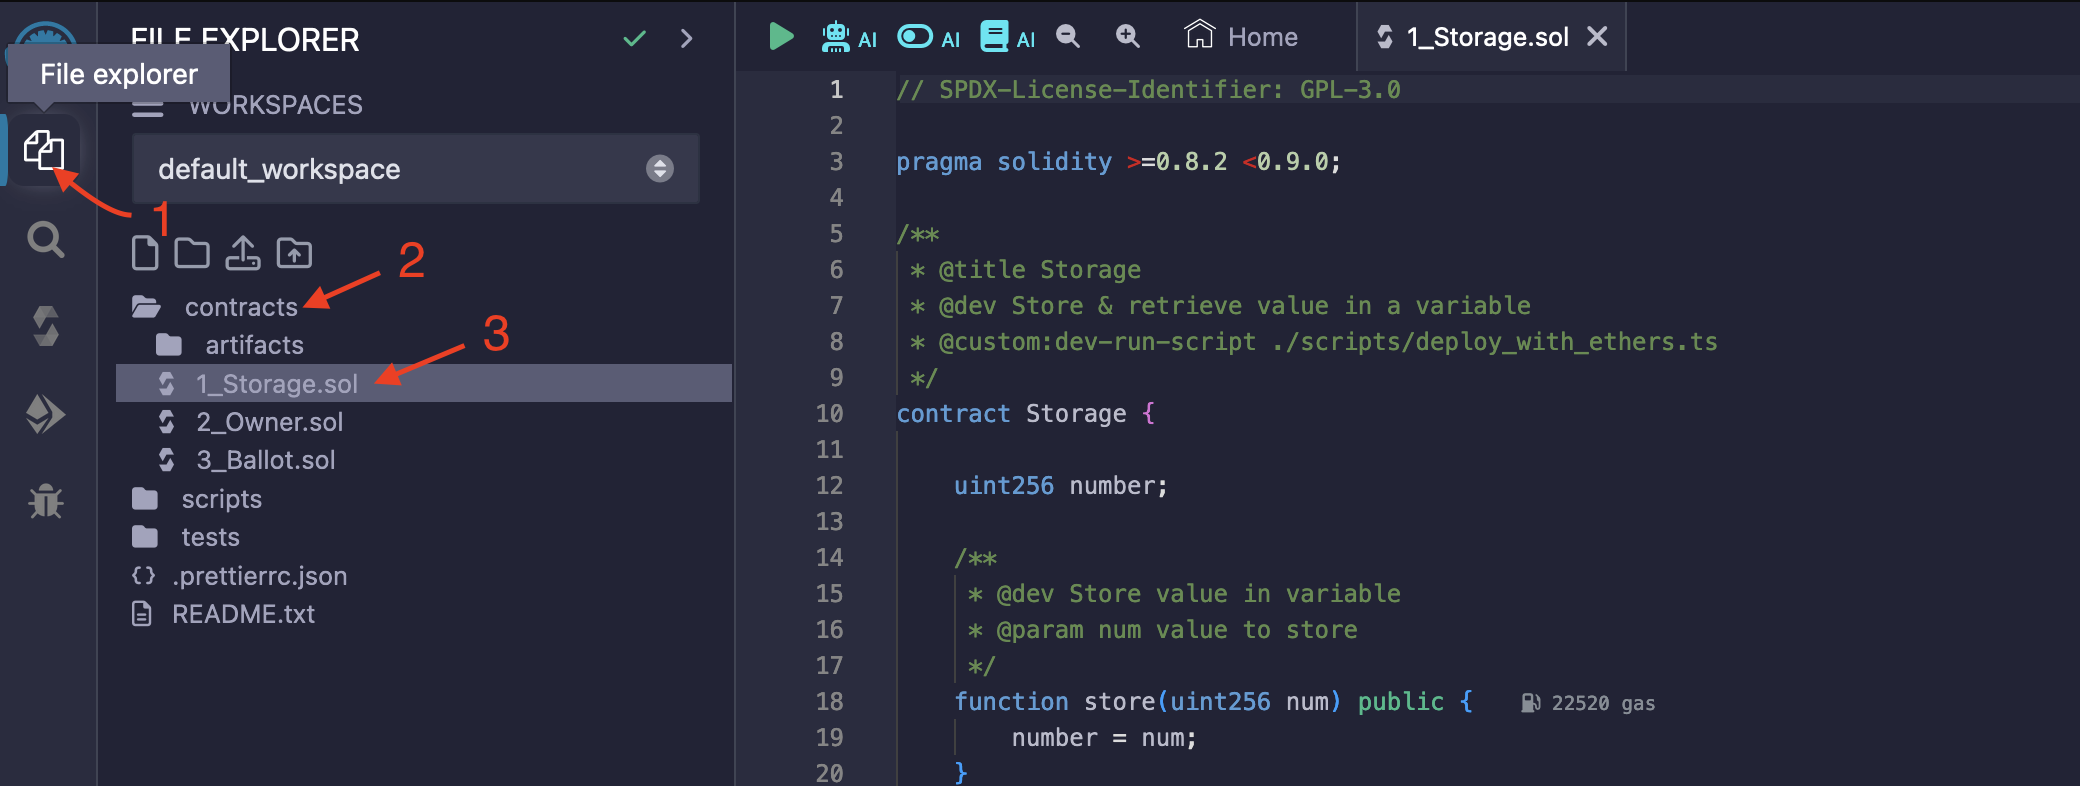
- Go to Remix IDE
- Now, click in side menu on [File explorer] and click on [contracts] directory to expand it. Then click on [1_Storage.sol]
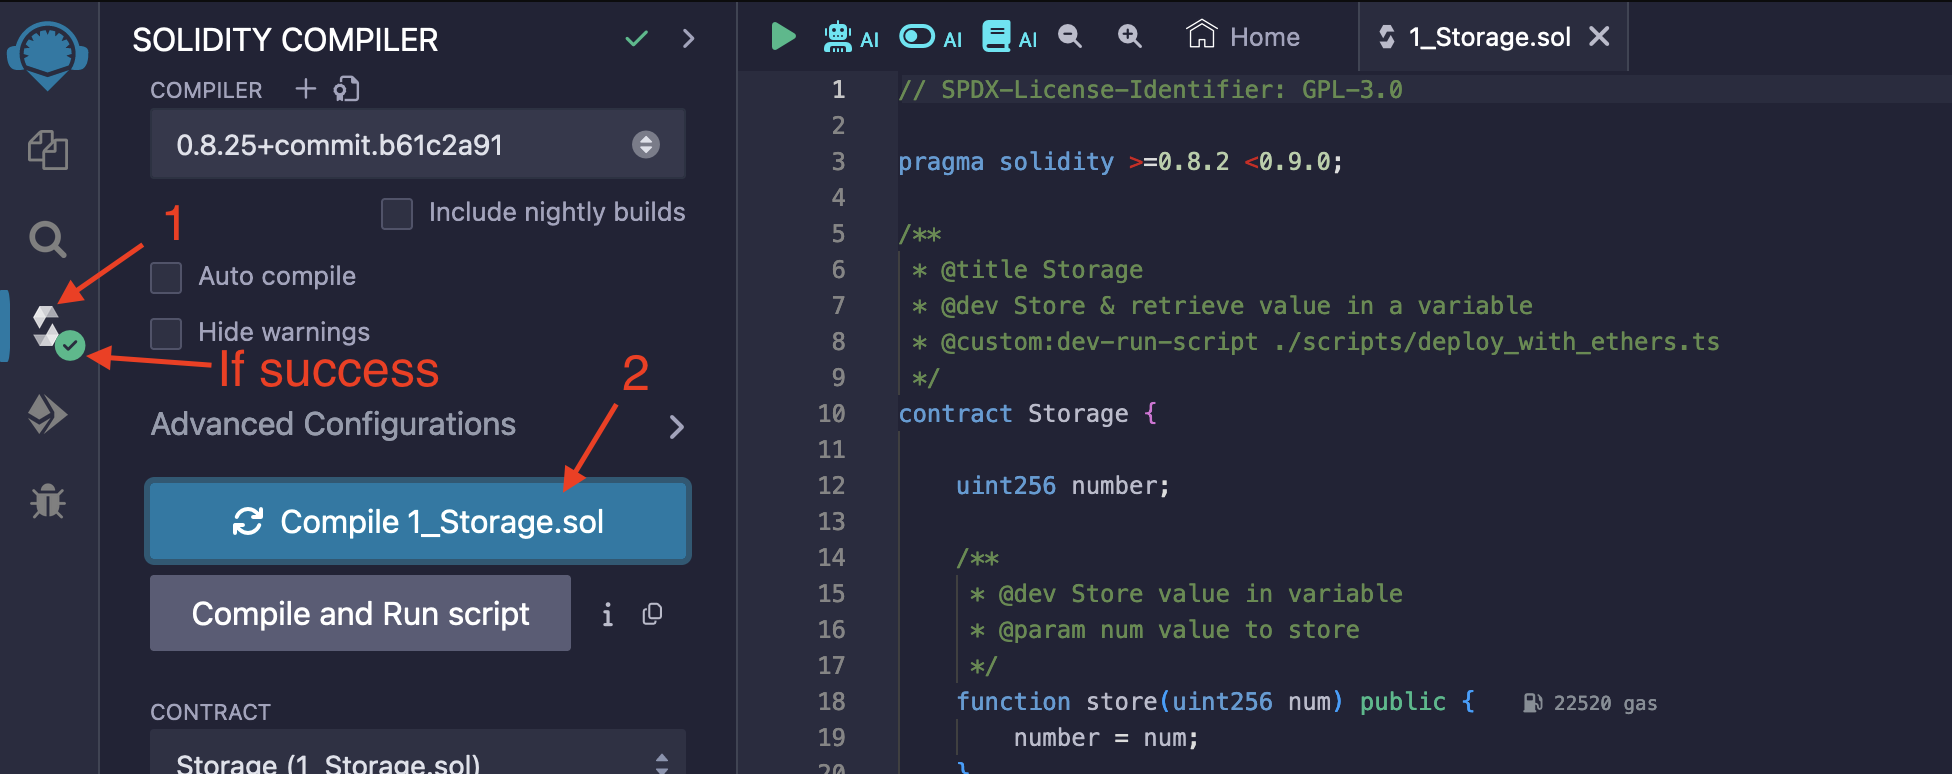
- Then click in side menu on [Solidity Compiler] and click [Compile 1_Storage.sol]. If everything went well, you will see a green checkmark in the side menu in this item with the message Compilation successfull
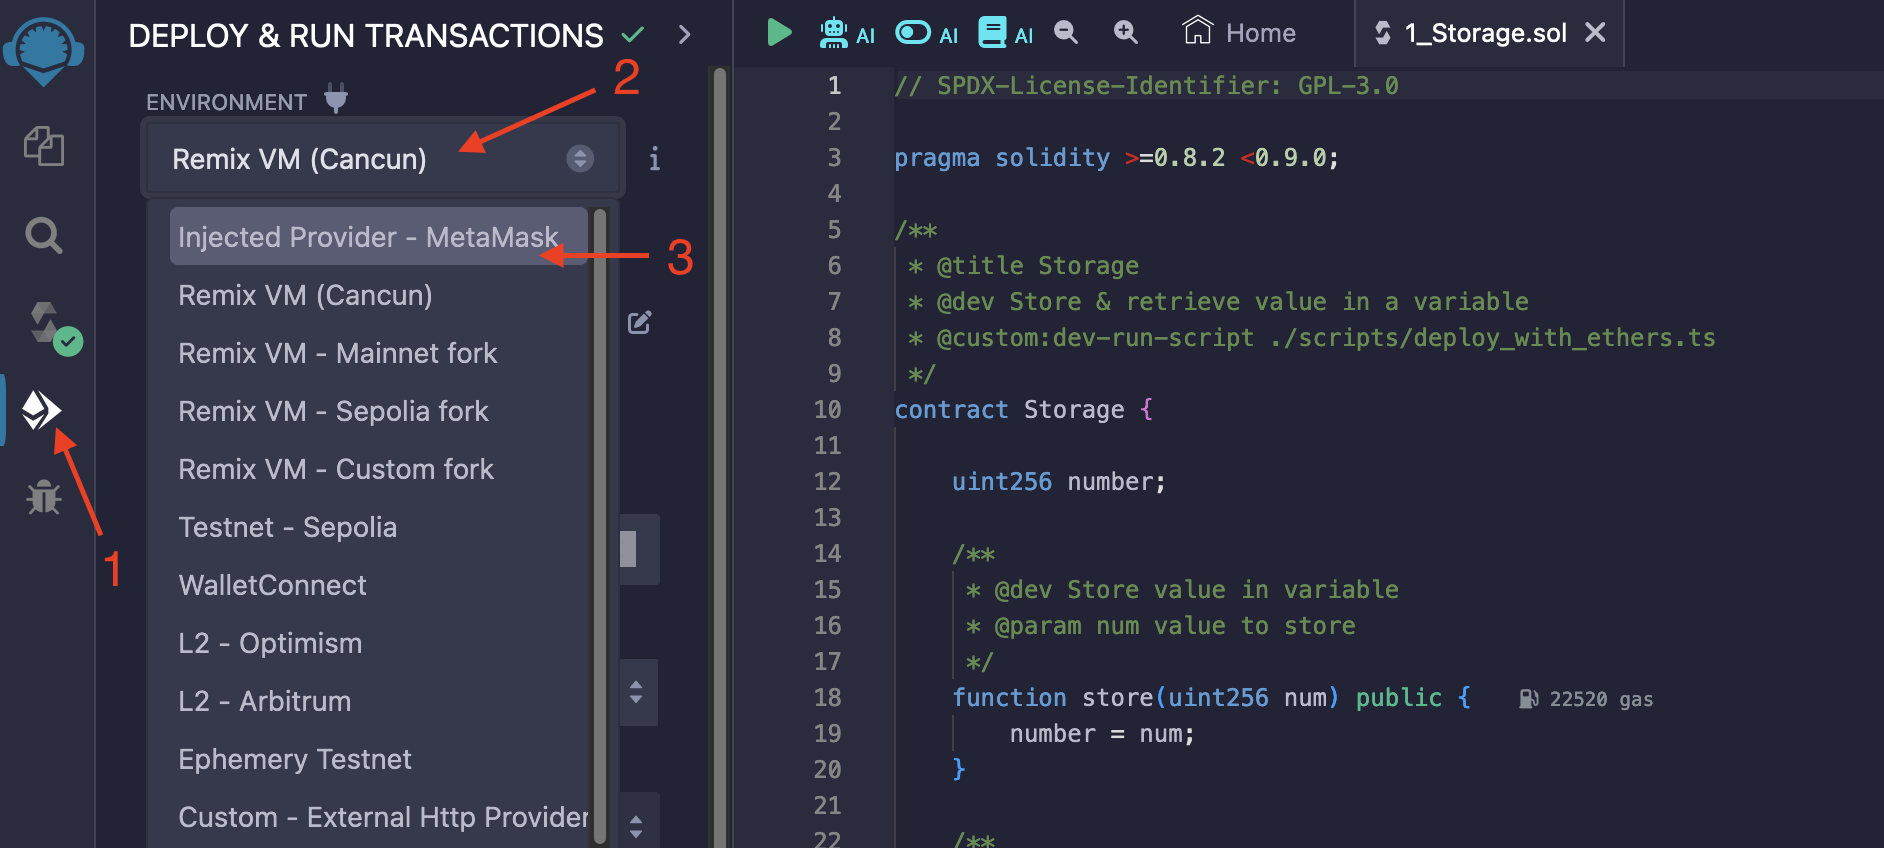
- Next press on [Deploy & run transactions] in side menu
- Click on the selection box in the [Environment] section and select [Injection provider – Metamask]. Your Metamask should then initiate a connection to your wallet. Select your address and click [Connect] in your wallet.
- After wallet connection check network in your wallet to make sure if current network is [Hekla] and press [Deploy] button and confirm transaction in your wallet.
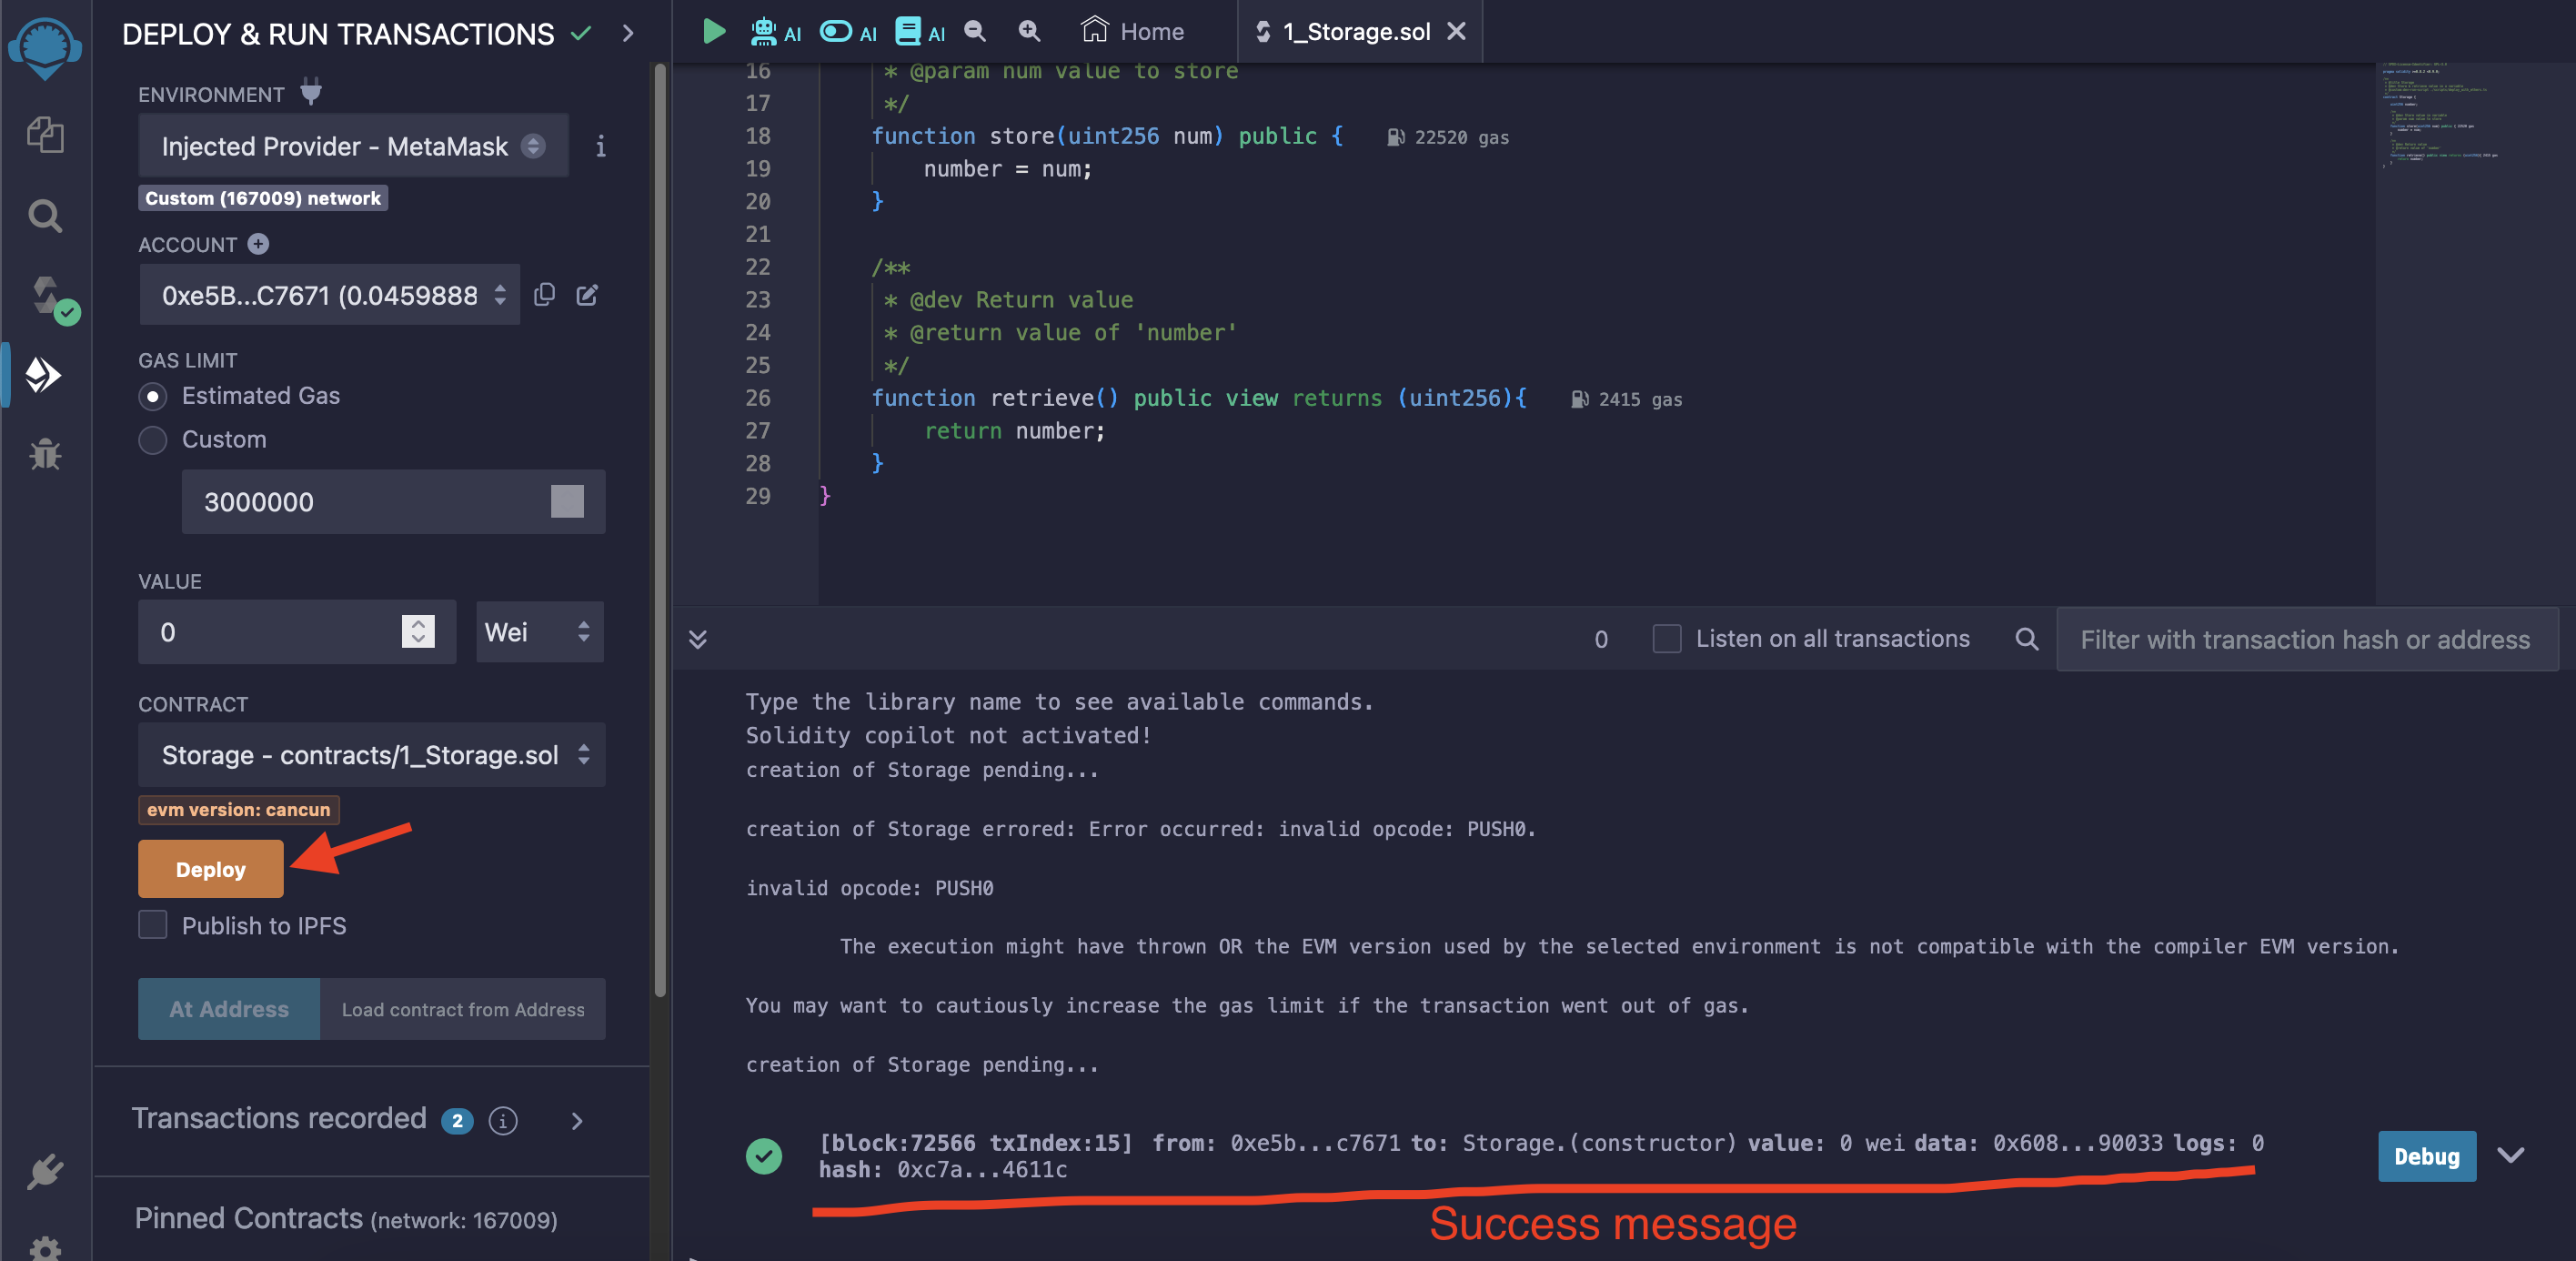
Congratulations, you have just deployed your own smart contract in the Taiko Hekla network.
Step 8: Create your own NFT collection
You have 2 ways to create your own collection.
The first one is to create it through Nfts2me, where the collection will be created through a project and you will have a convenient control panel for it. This option is suitable for beginners but it move expensive way.
The second one through the Thirdweb service, this option is suitable for advanced users, but you will have full control over the smart contract without third parties and cheap cost of contract deployment and interaction with it.
Way 1: Create NFT collection through Nfts2me [Entry level]
- Go to Nfts2me website and connect your wallet in Taiko Hekla network.
- And press on [Editions]
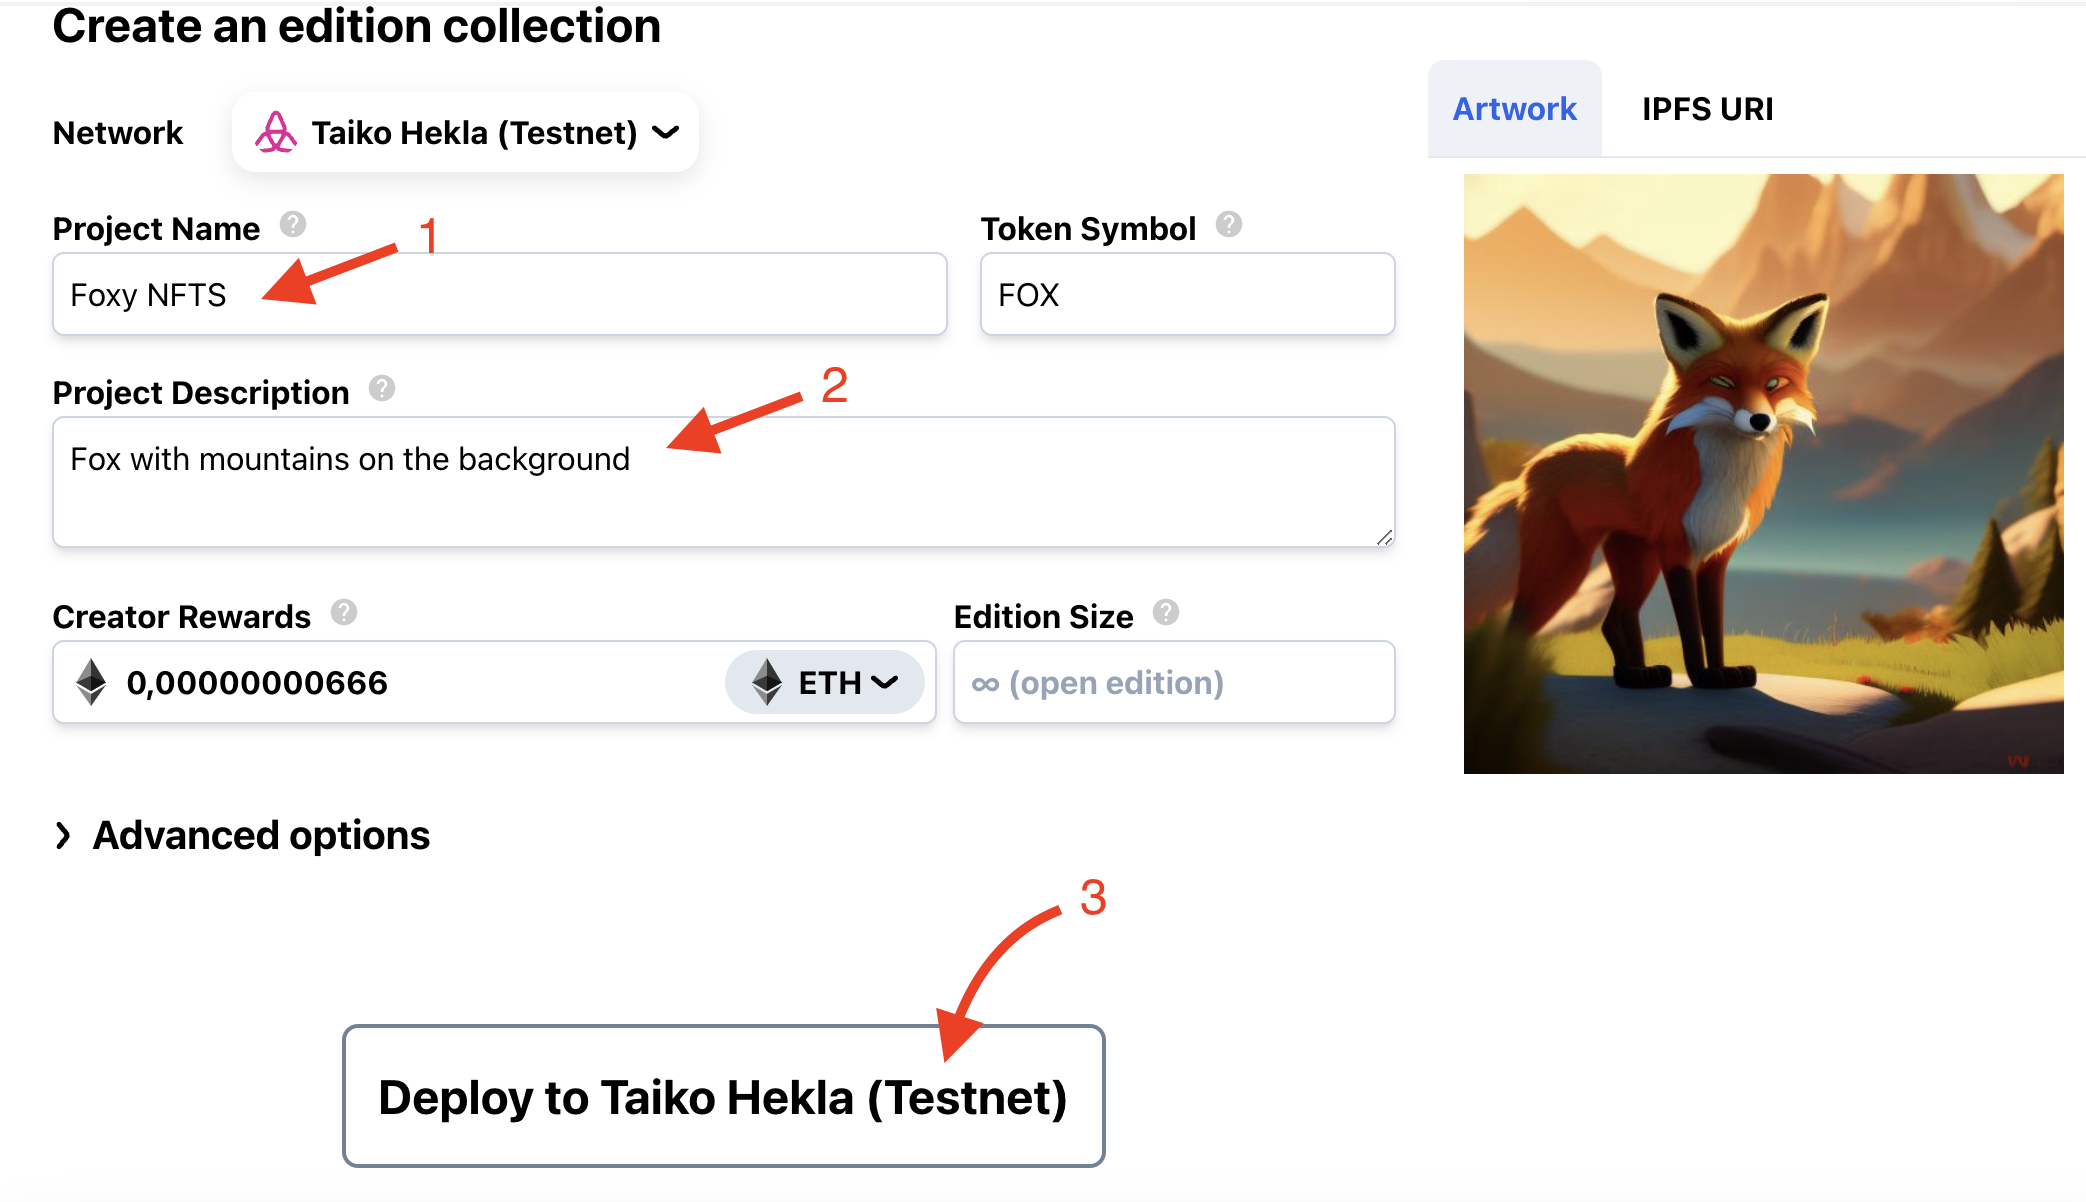
- Fill the form (Project name and Project description). After filling [Project Description] click [Generate Artwork using AI] or click on [Add token media] box and upload your own image for your NFTs.
- Press [Deploy to Taiko Hekla (Testnet)] and confirm transaction in your wallet.
- Next, you need to make an NFT mint from the created collection. To do it click on [Minting page] link of in [Dashboard] > [Overview] > [Collection Minting Page] link.
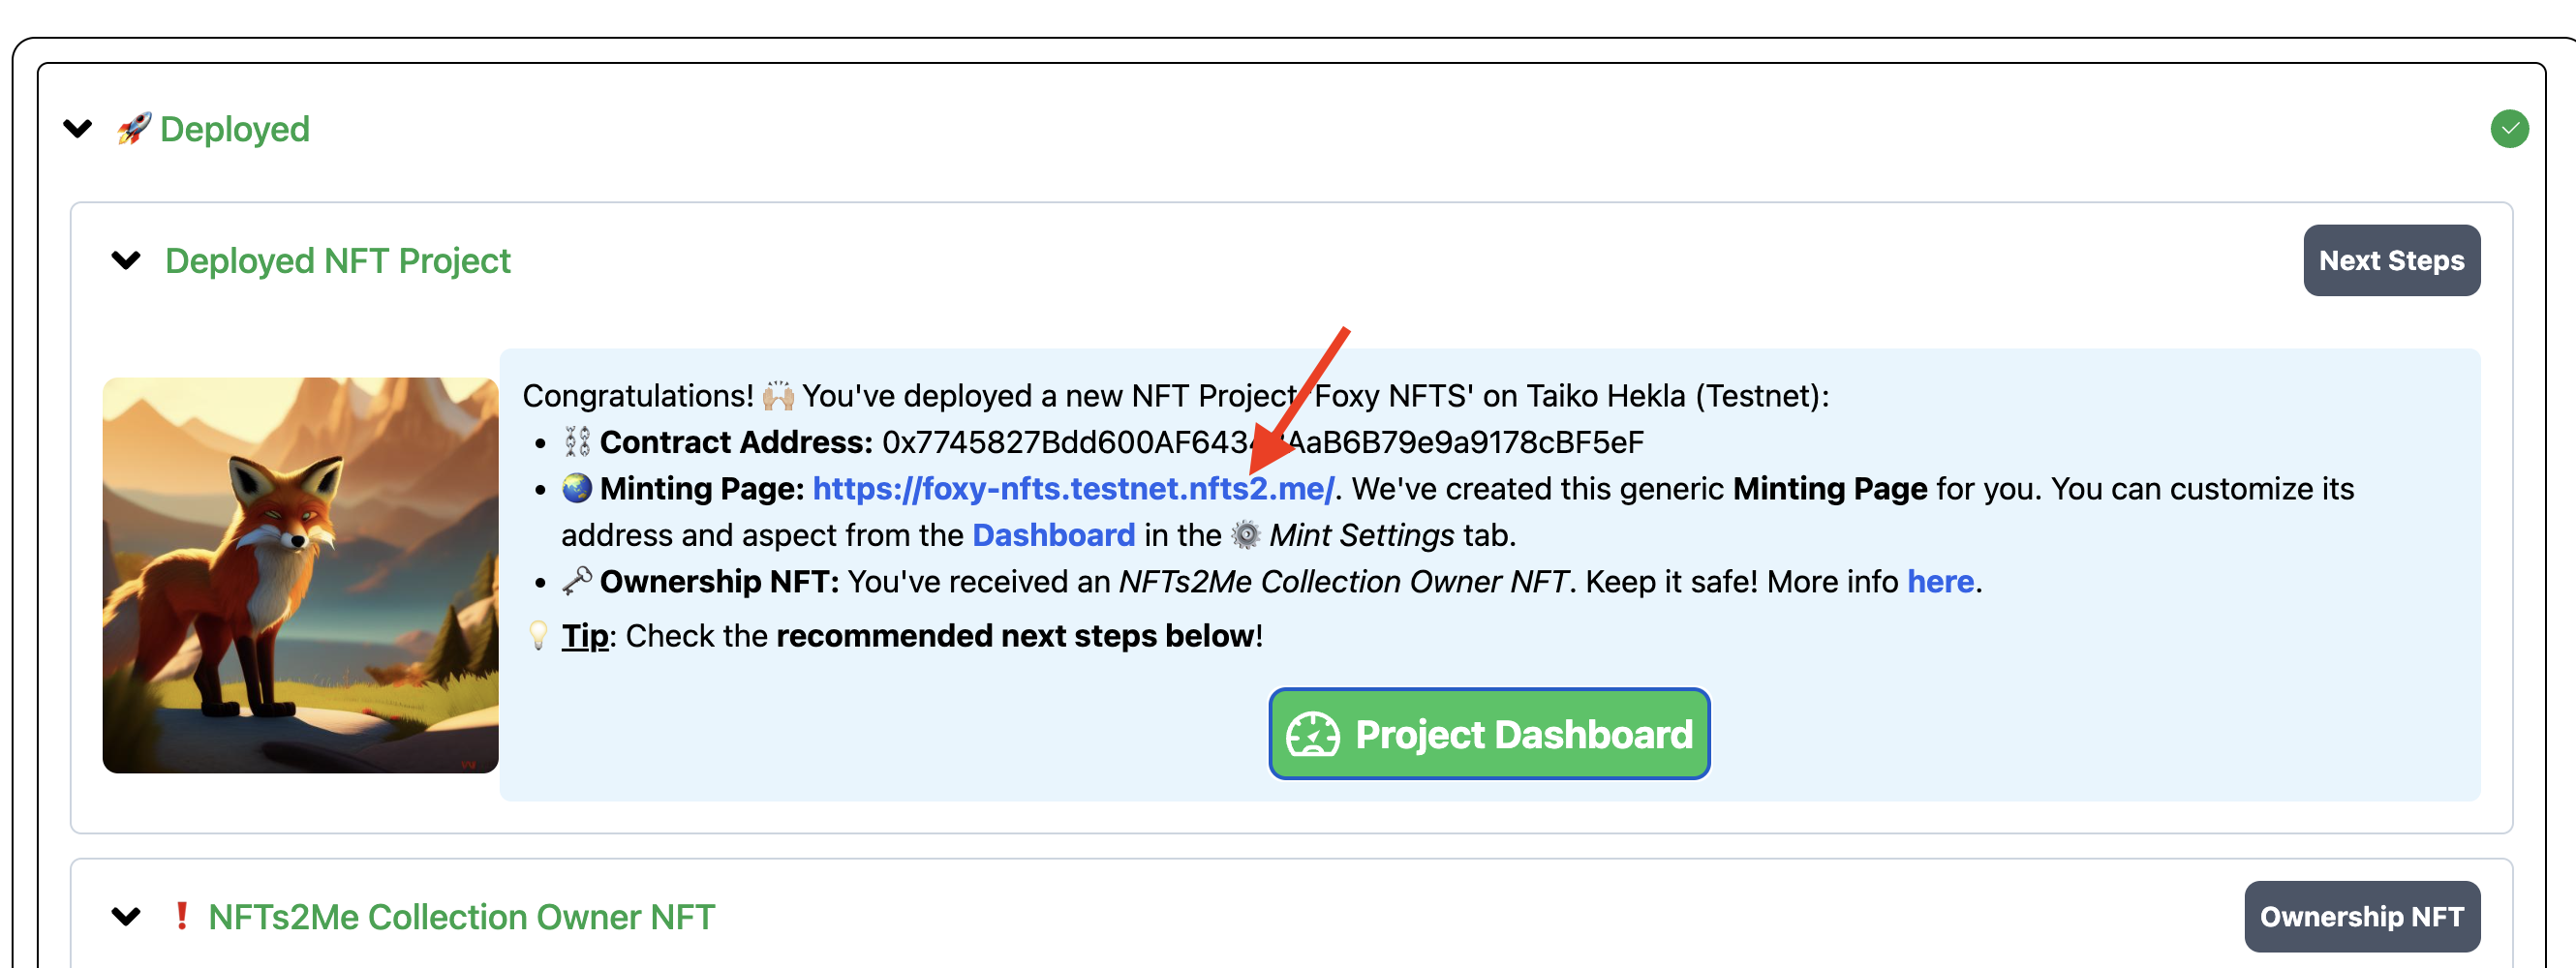
- After moving by your collection link, click [Connect Wallet] and [Mint] with transaction confirmation.
Way 2: Create NFT collection through Thirdweb [Advanced level]
- If you haven’t account yet on this service your will see modal form where you need enter your Email and Company name (Random name if you are not a company) and press [Get Started for Free];
- Next open your email account and find incoming message from Thirdweb. Copy it and enter in next form on the website;
- Now you’ll see the form [Add a payment method], press [I’ll do this later] link or add your payment info if you want to use this service for professional goals;
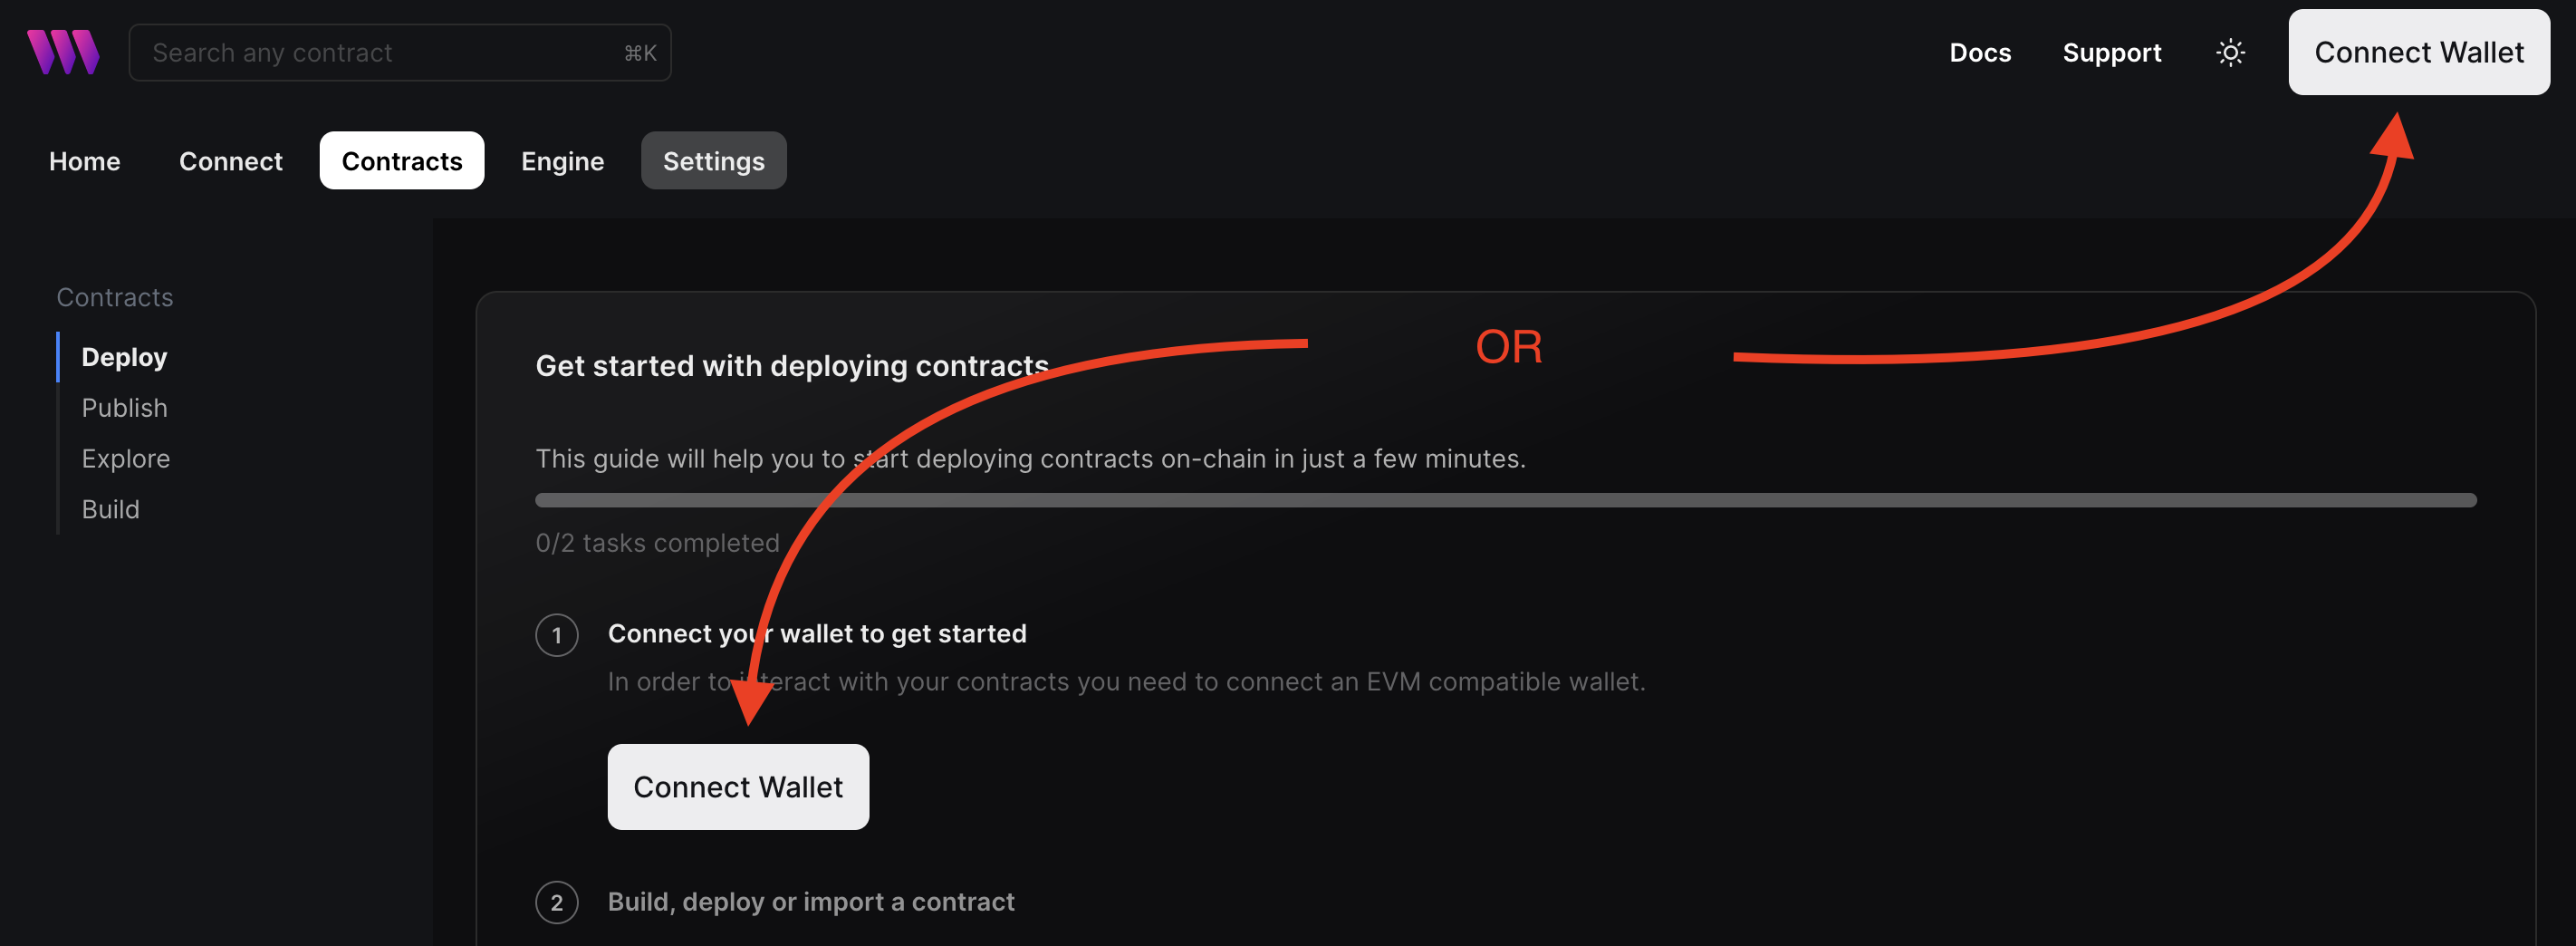
- Go to Thirdweb contact deployment dashboard and Connect wallet and change wallet network to Taiko Hekla L2;
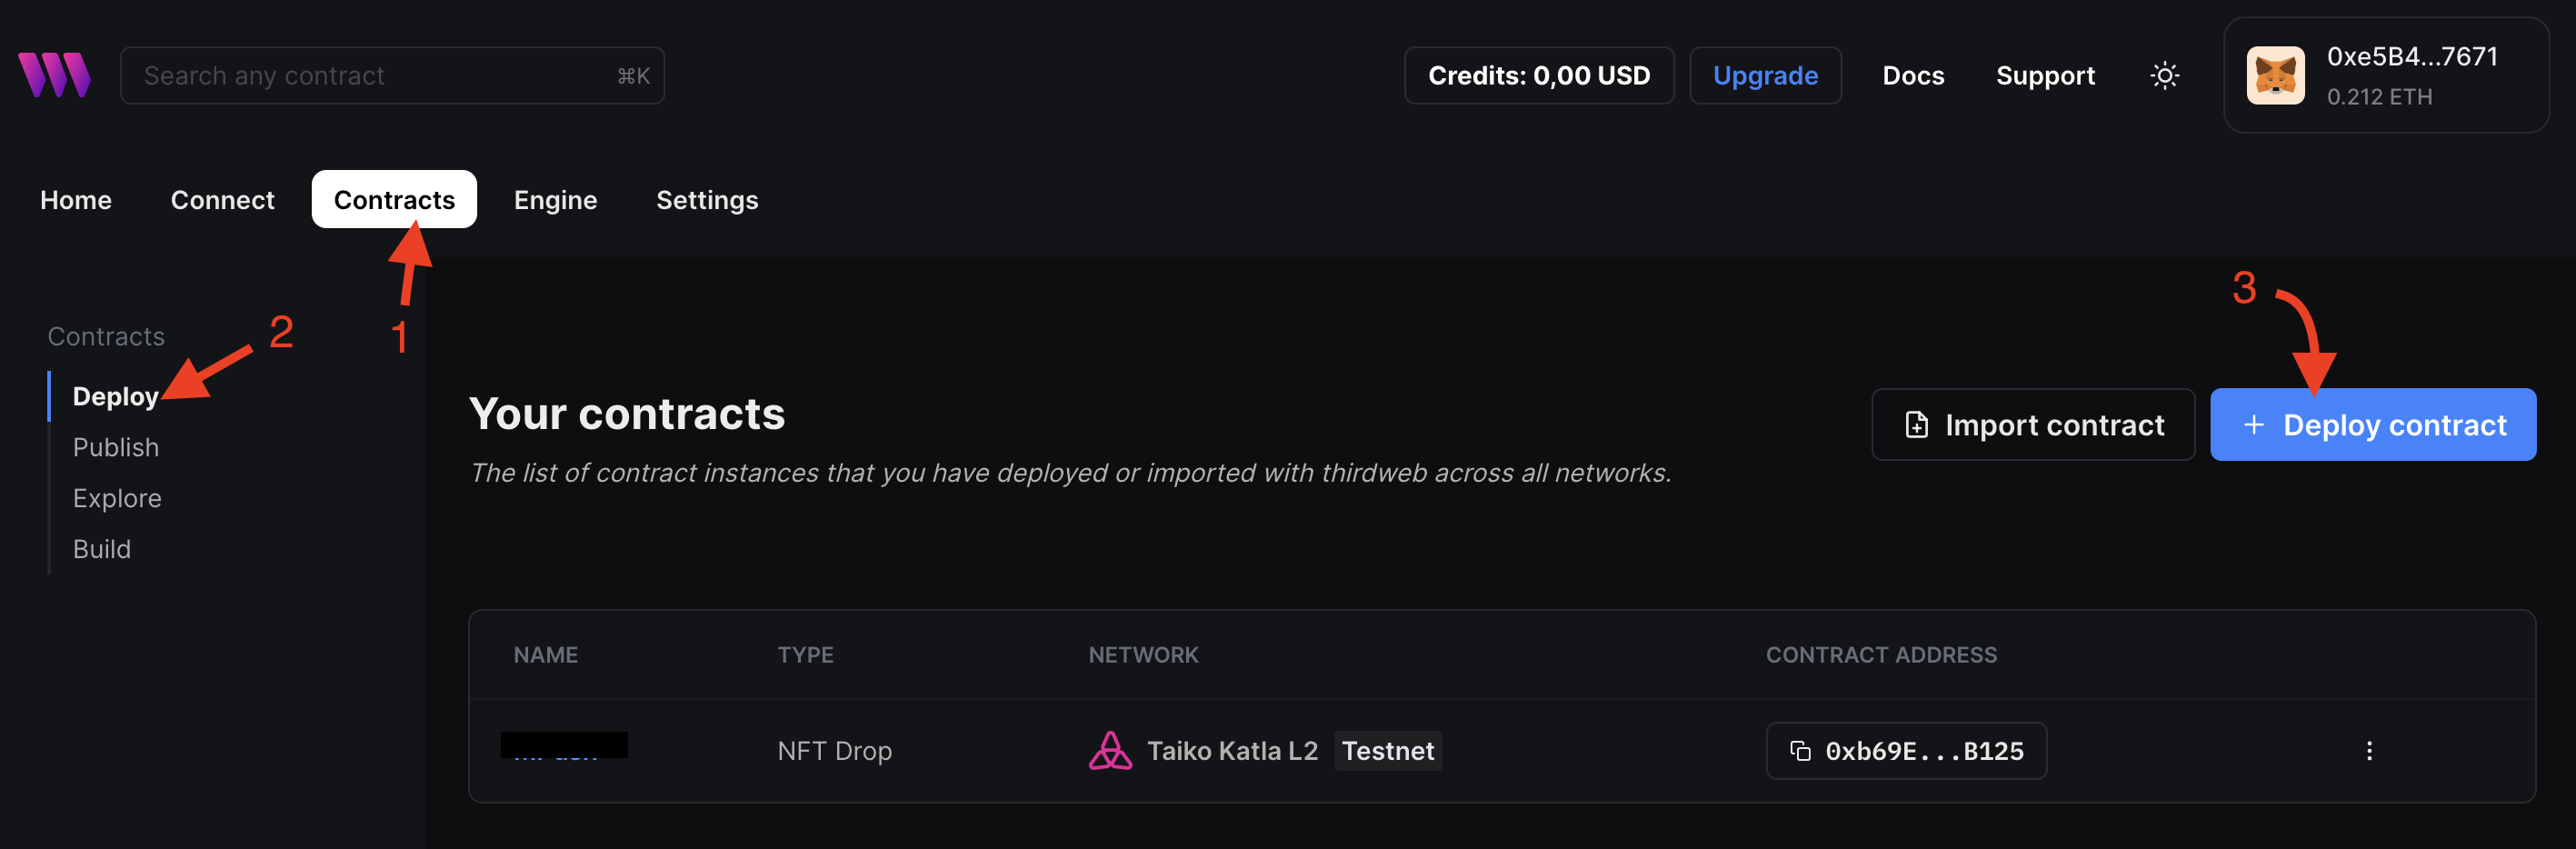
- Now in the dashboard, click [+ Deploy Contract];
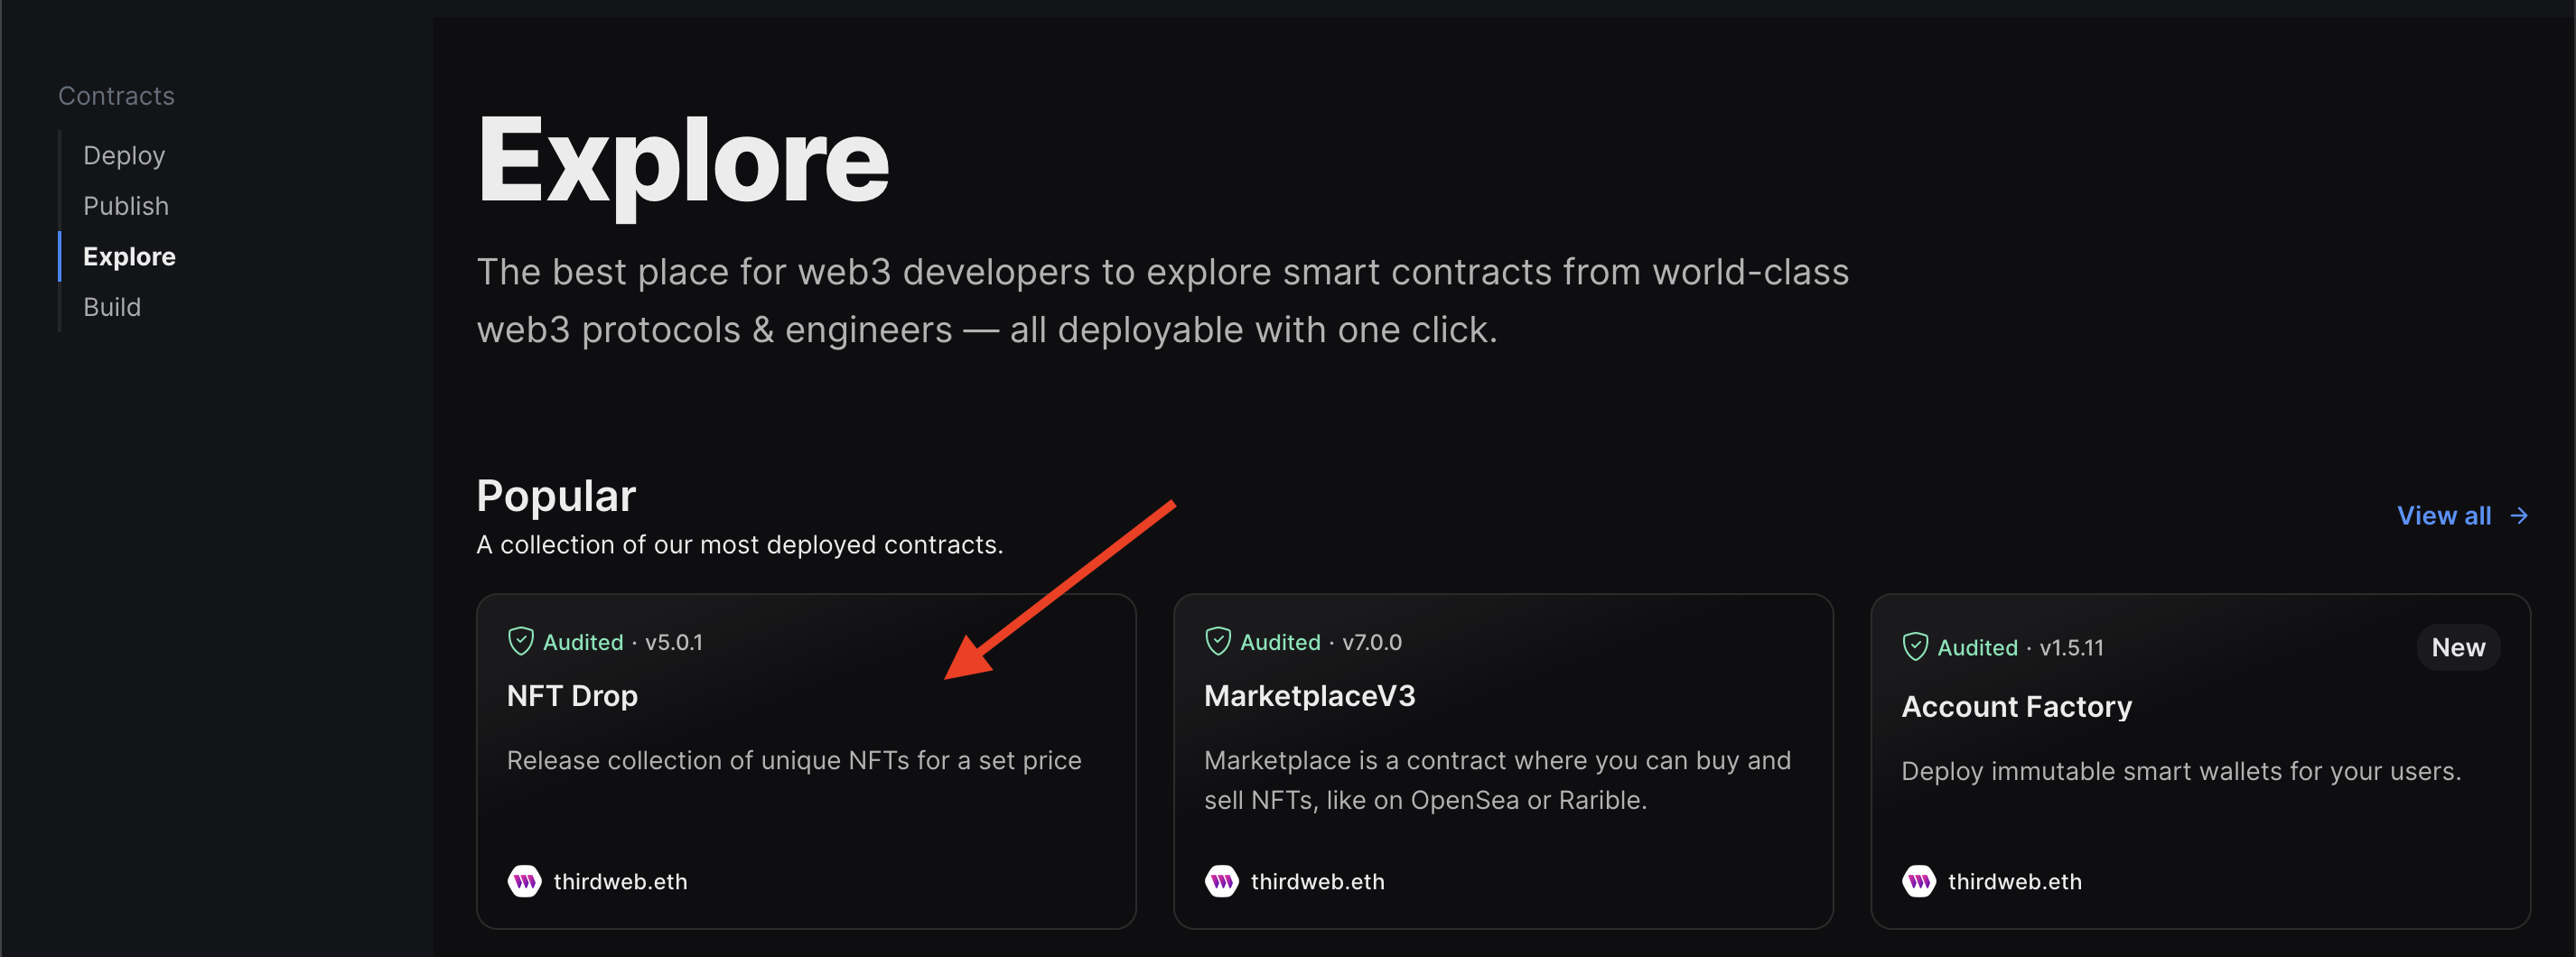
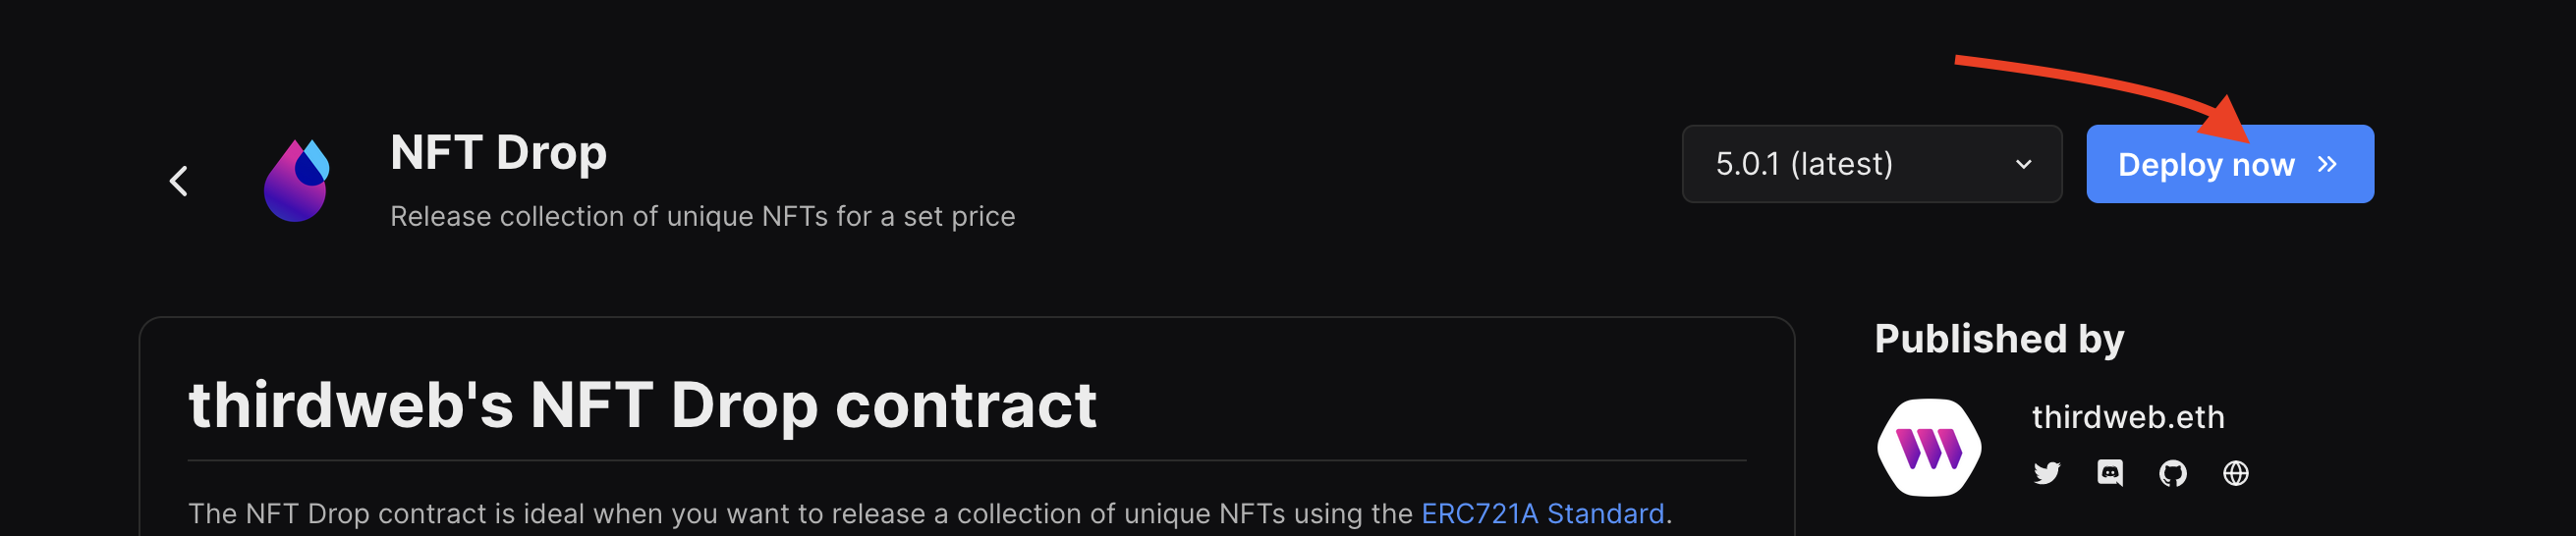
- Then click on [NFT Drop] item;
- And click [Deploy now];
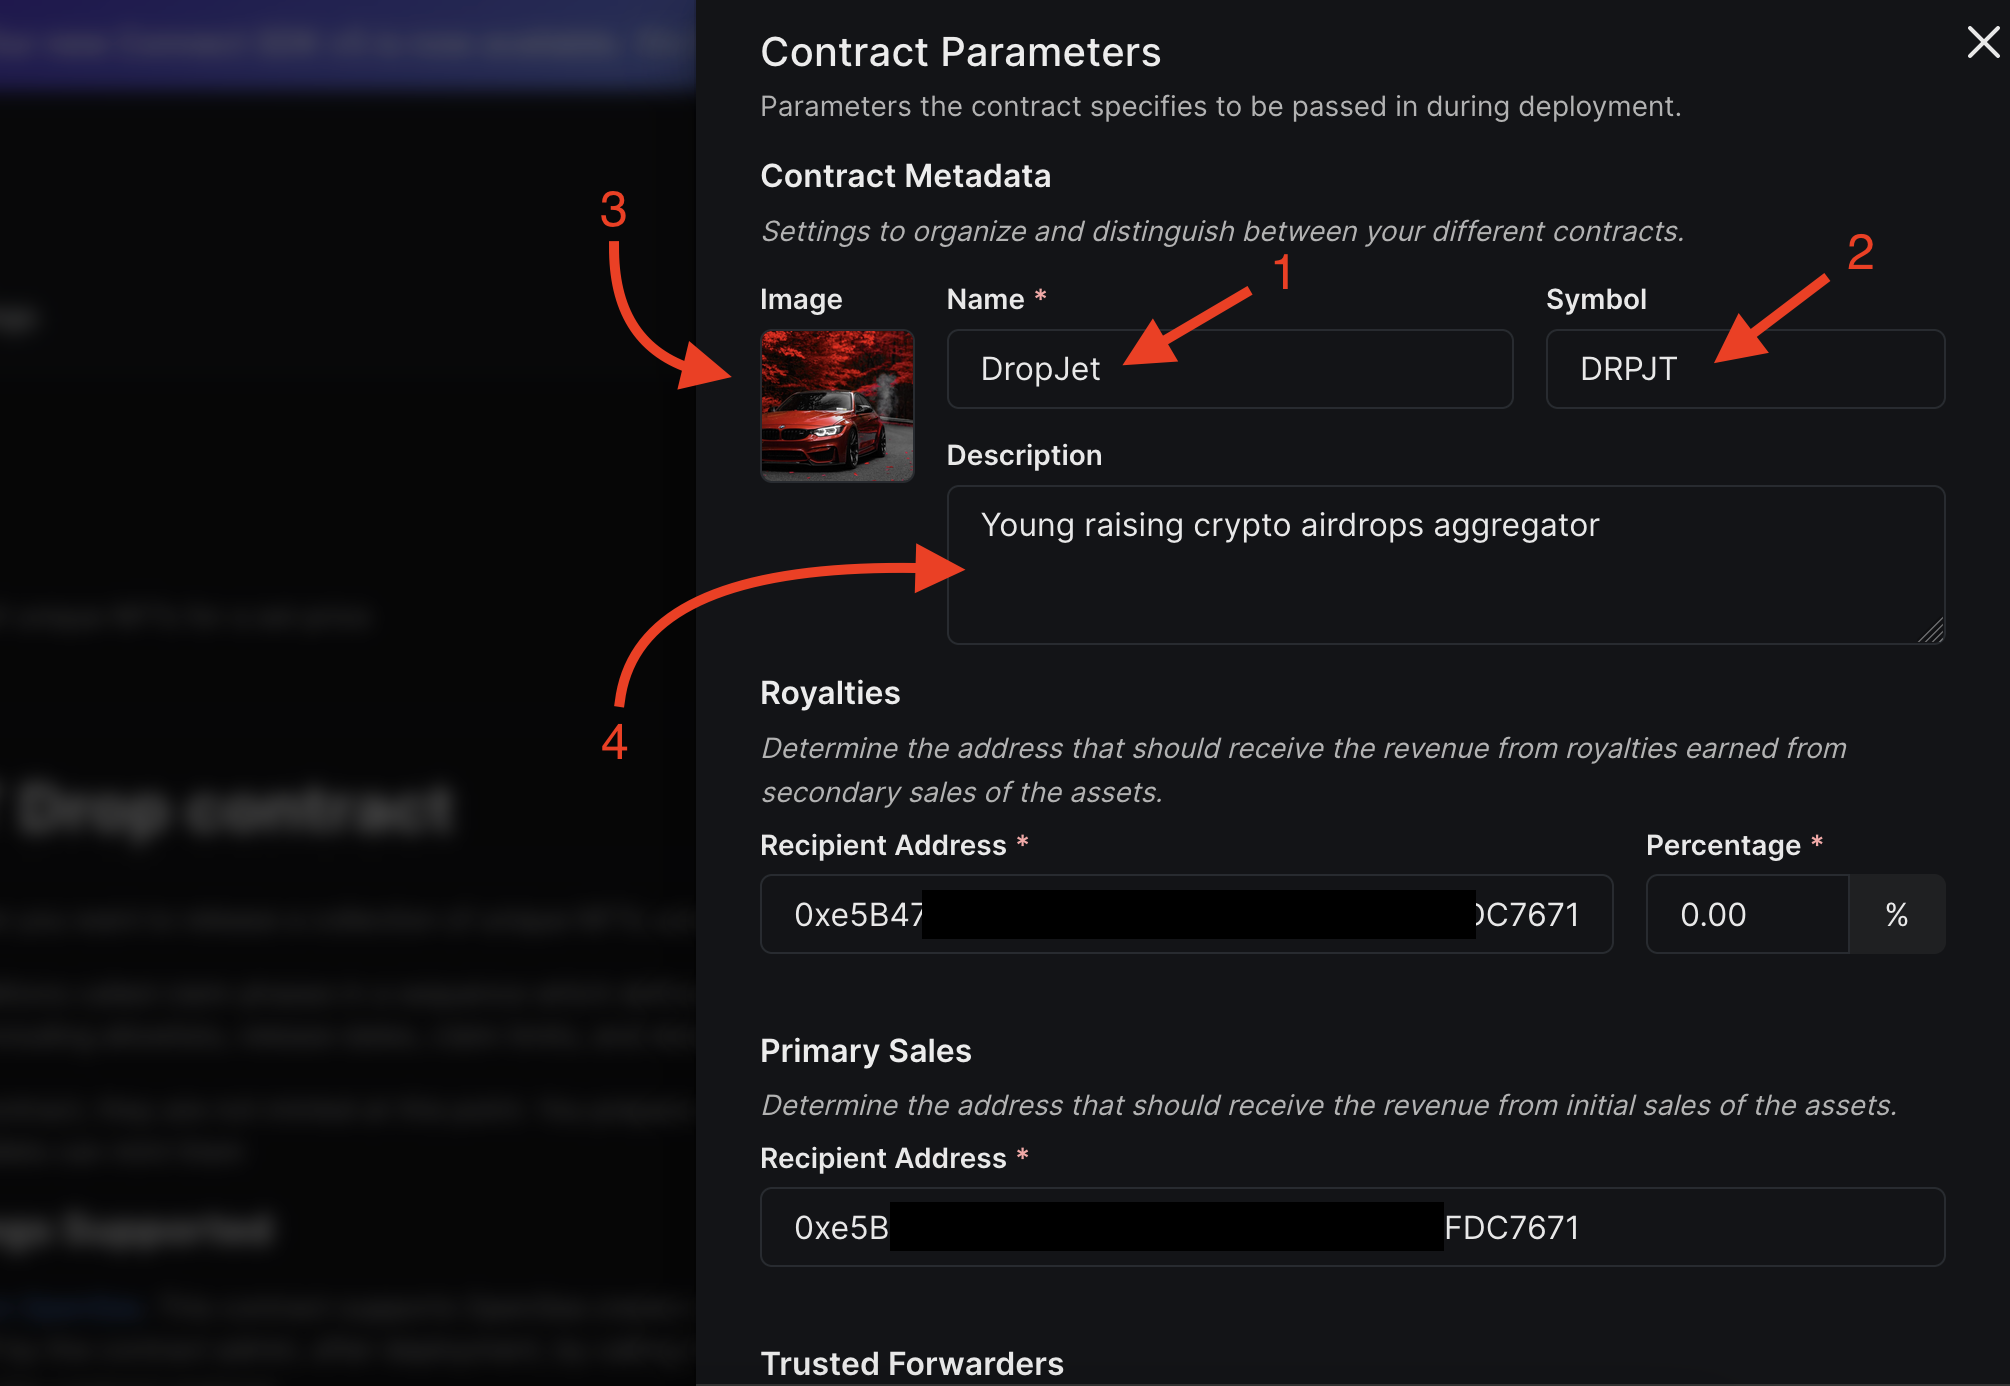
- Now in opened form add random smart contract values to following fields: Name, Symbol, Description and upload an image. Then scroll down and press [Deploy Now] button and Confirm transaction in your Metamask;
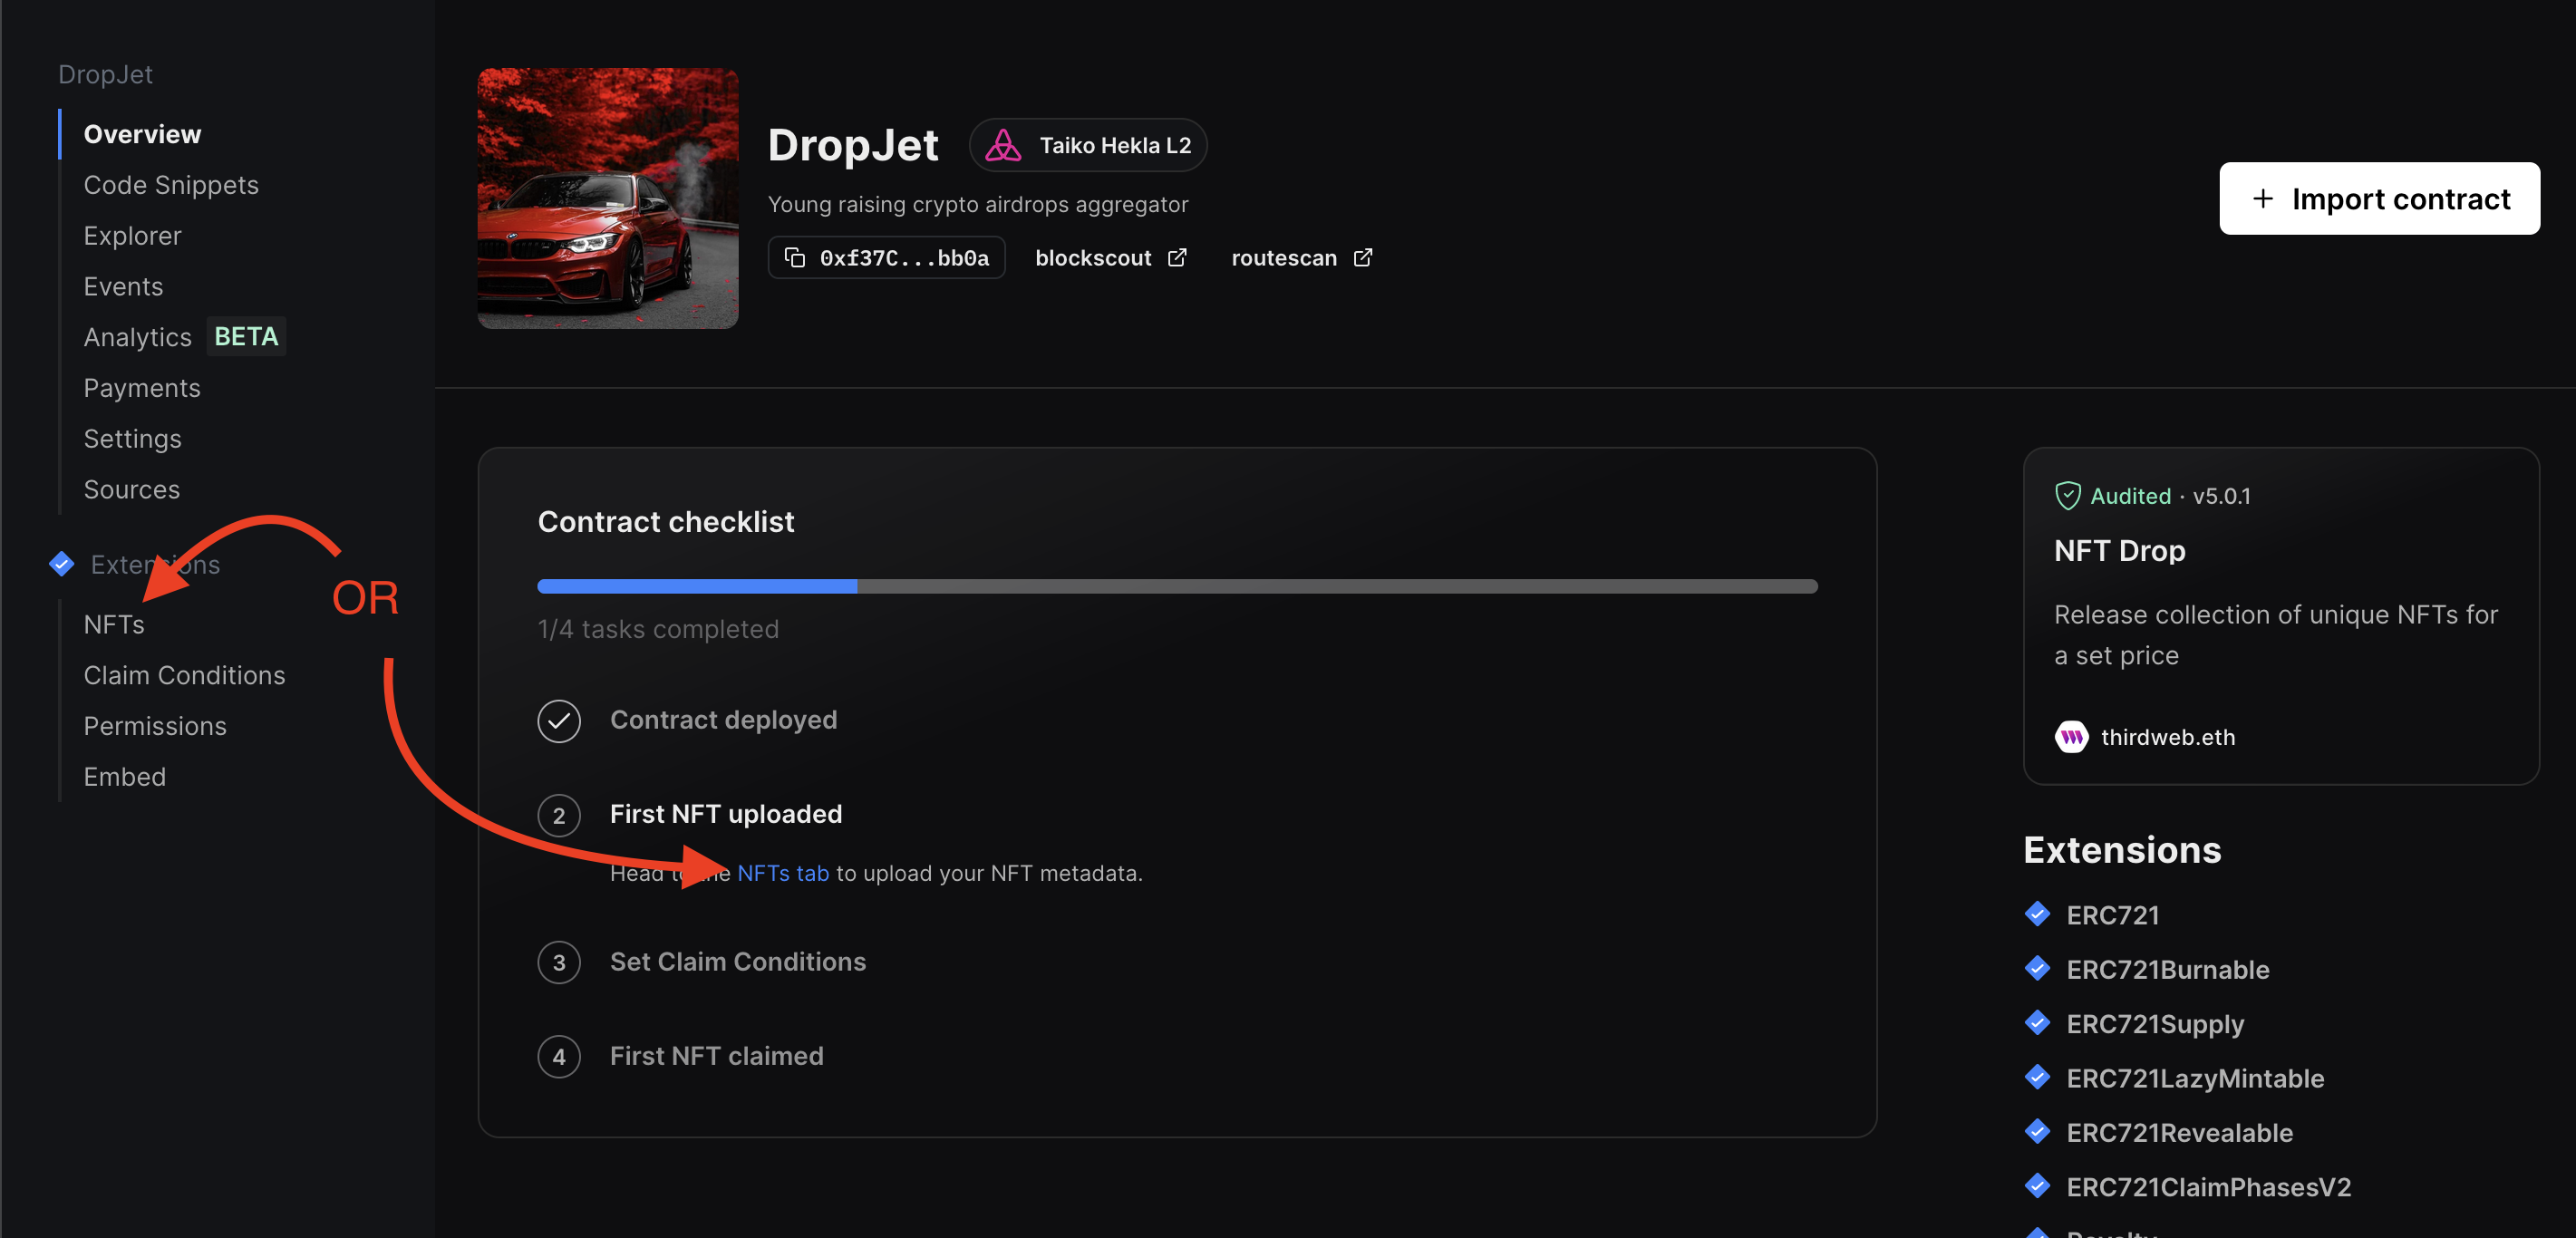
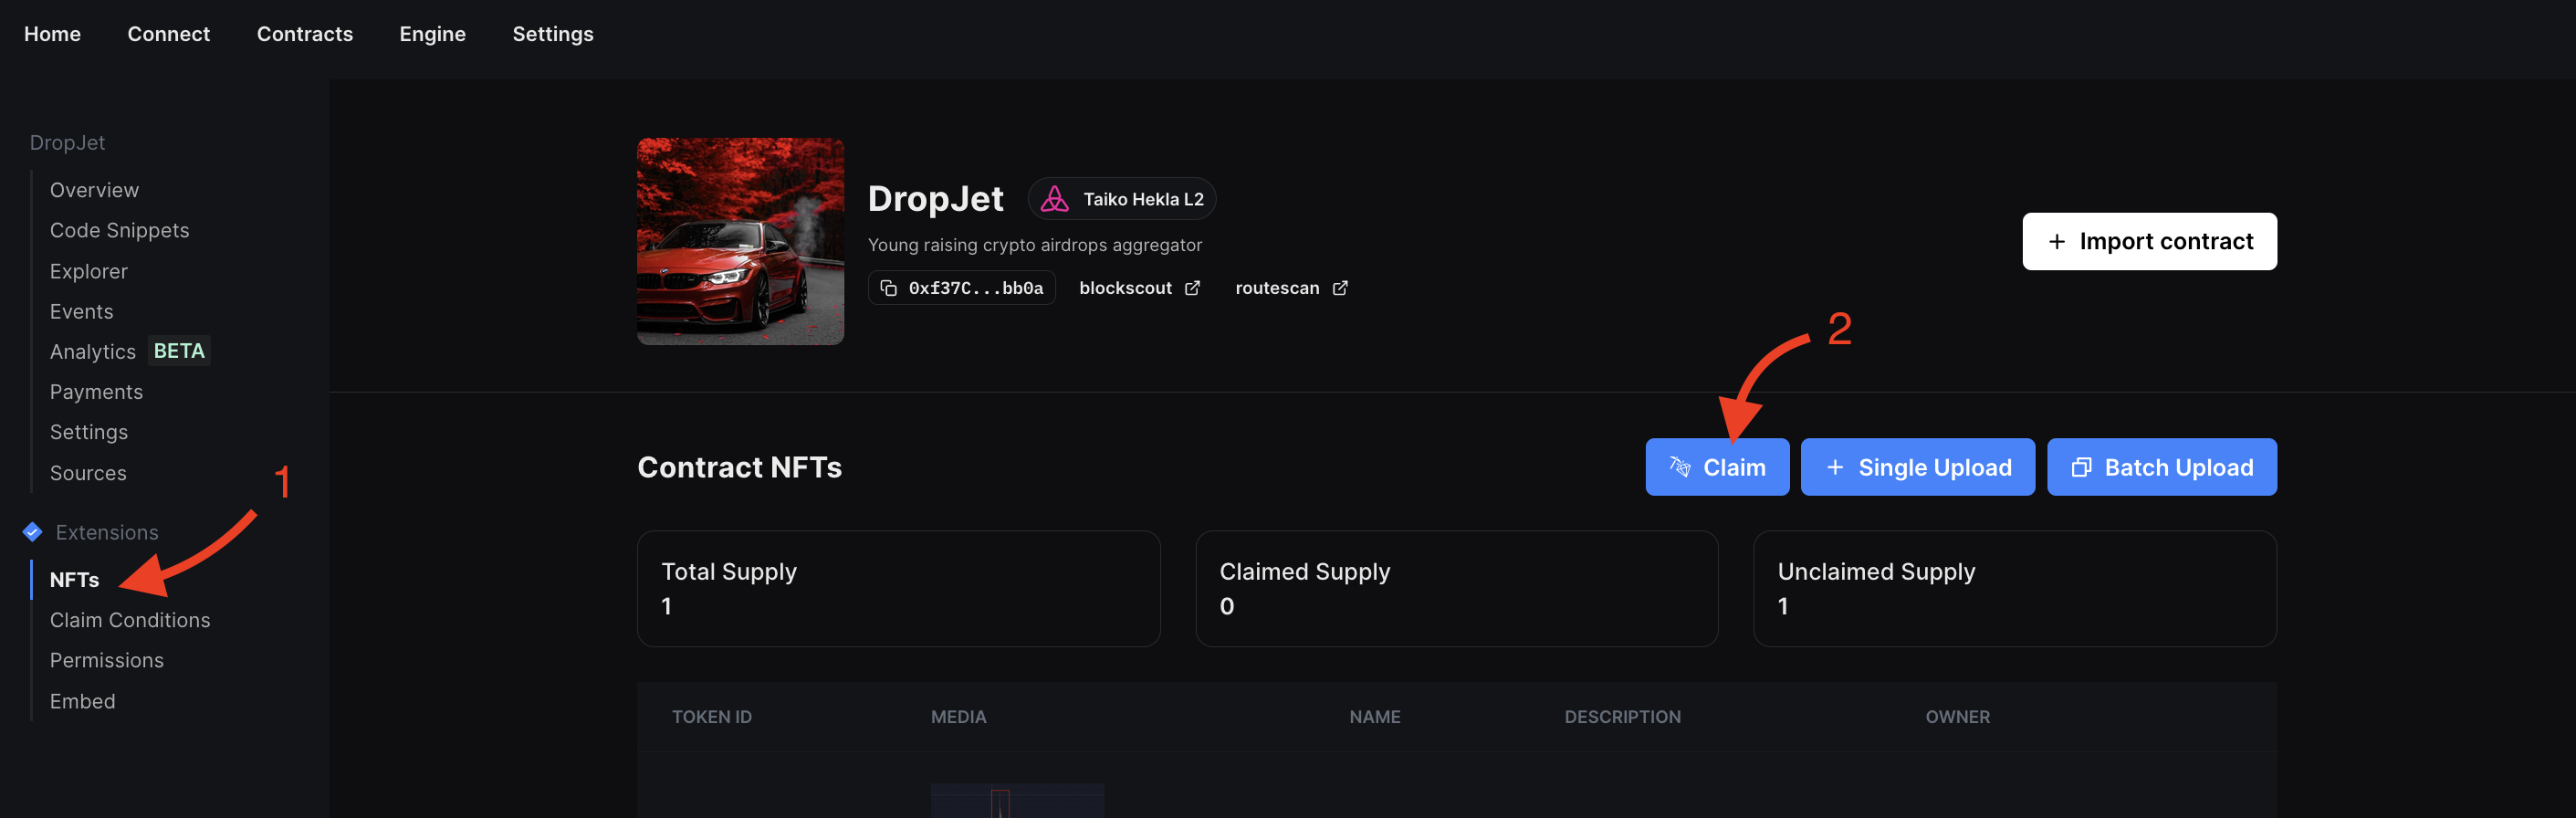
- After successfully creating a smart contract, you will be redirected to the next window of the created contract. Now you need to move on to upload an NFT for this contract. To do this, click on the [NFTs tab] link in [Contract checklist] or on the left sidebar in the [Extensions] section press [NFTs];
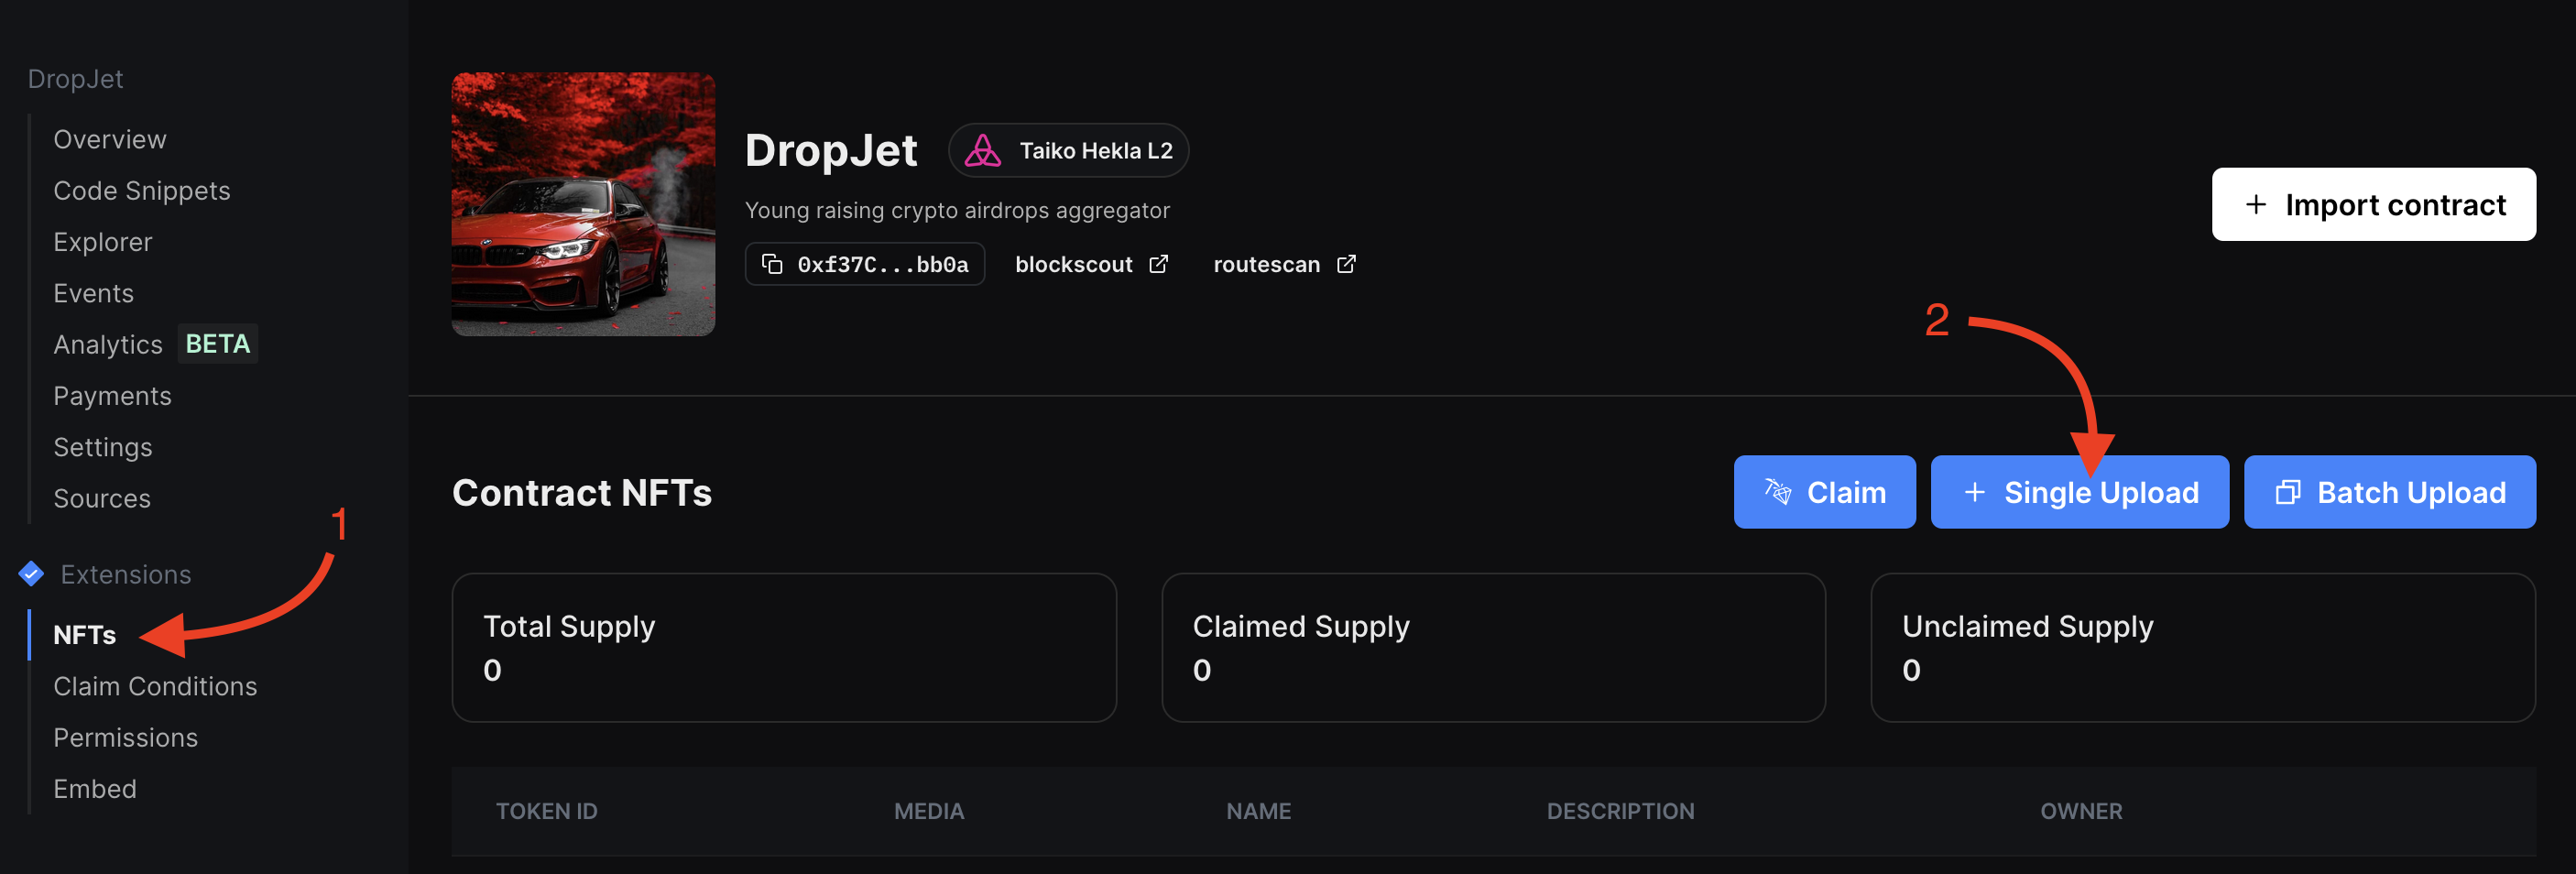
- And click [+ Single Upload]. In the opened form again Upload image and enter Name. Scroll down and click [Lazy Mint NFT] and Confirm transaction in your wallet (It’s similar to what we did when we created the smart contract, so I don’t see the point in showing it visually);
- After the NFT mint, you need move to [Claim Conditions] then click [+ Add Phase] and select [Public]:
- In section [How many NFTs will you drop in this phase?] change Unlimited to 1-5;
- In section [How many NFTs can be claimed per wallet?] change Unlimited to 1;
- And press [Save Phases] and Confirm transaction in Metamask;
- Now click again on [NFTs] in left sidebar then click [Claim] and in opened form click [Claim NFT] and Confirm transaction;
That’s all, it remains to bridge the created NFT to the Holesky network.
Step 9: Bridge NFT from Hekla to Holesky
- Go to Taiko Bridge and click [NFT]. Scroll to the form and click [Scan for NFT]
- Click on one of the found NFTs and press [Continue] then [Approve] and [Bridge]
Step 10: Additional activities
- Complete simple tasks and mint NFT from Morkie;
- Go to Galxe and complete quests from Blazpay, which will earn points in Galxe Taiko;
Conclusion
As far as we know, this is the final phase of the Taiko testnet, so don’t miss it. If you did not participate in the previous Katla phase, you still have the opportunity to do so. Just follow all the steps described above for Katla. I tried to cover all possible activities in Taiko at the moment with this guide, so I hope my guide was useful for you.
All the best and DYOR.
Yes, it’s free.
~20-30 minutes. Depending on the speed of the blockchain.
Enjoyed this article?
Click the like button below to show your support and let us know you found it helpful! Your feedback keeps us motivated to create more content like this.