Gasp is a crosschain protocol for transfers between L2 networks, built on EigenLayer.
They raised $10.6M from: Polychain Capital, IOSG, CMS Holdings, TRGC, Mapleblock Capital and others.
Gasp recently announced the integration of the Arbitrum network and the launch of testnet 2.0, in which we will also have to complete simple tasks and claim confirmed drops.
Request Test Tokens
- Request testnet $ETH to your wallet in the Arbitrum Sepolia network in any of the following faucets:
- (Optional) If you didn’t receive test tokens from the faucet, but you have $ETH in the Sepolia network. Then you can use the official Arbitrum bridge;
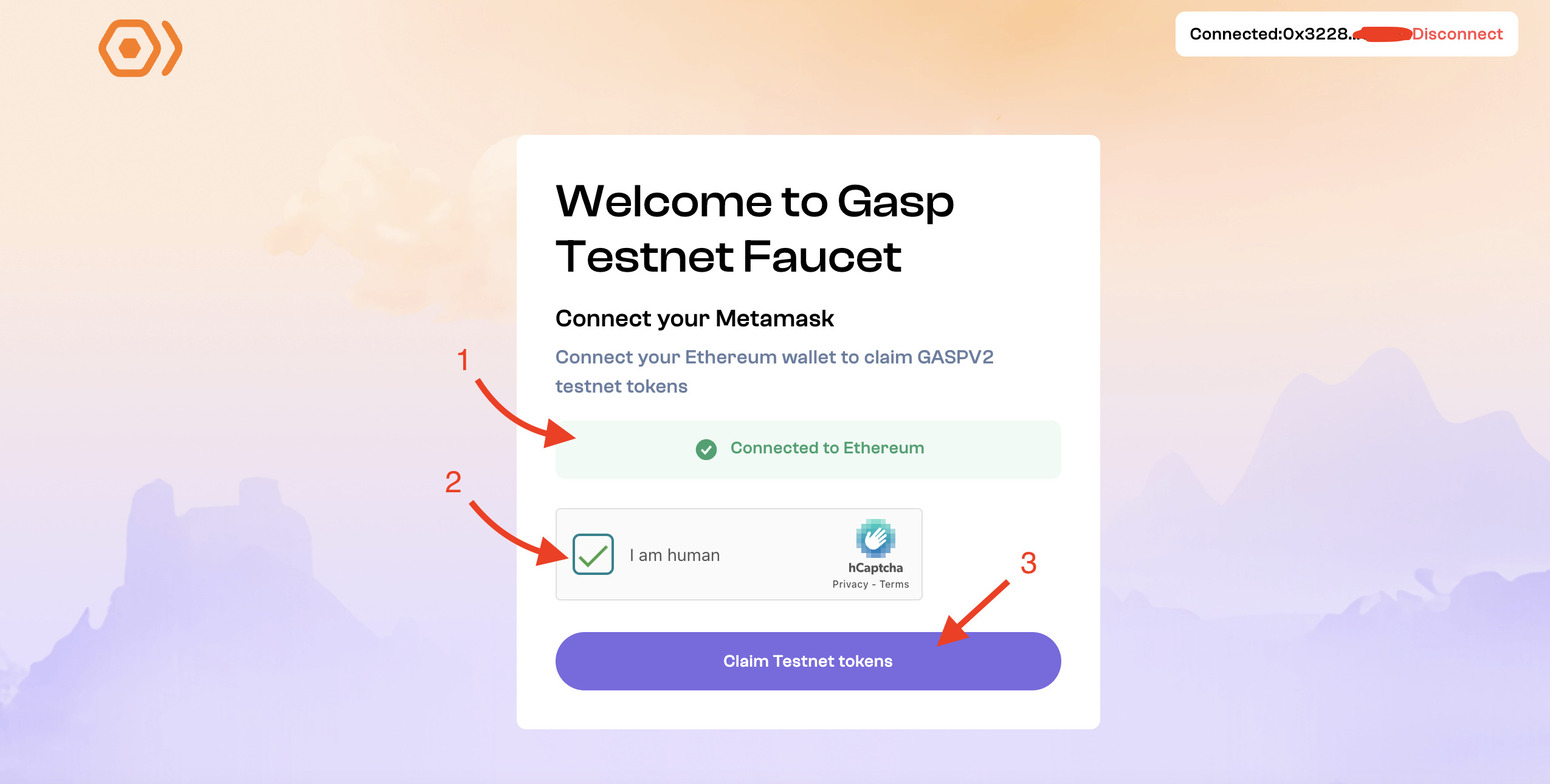
- Go to the Gasp faucet, connect your wallet and claim $GASPV2 (You may need to request several times for the receive tokens).
Make Deposit
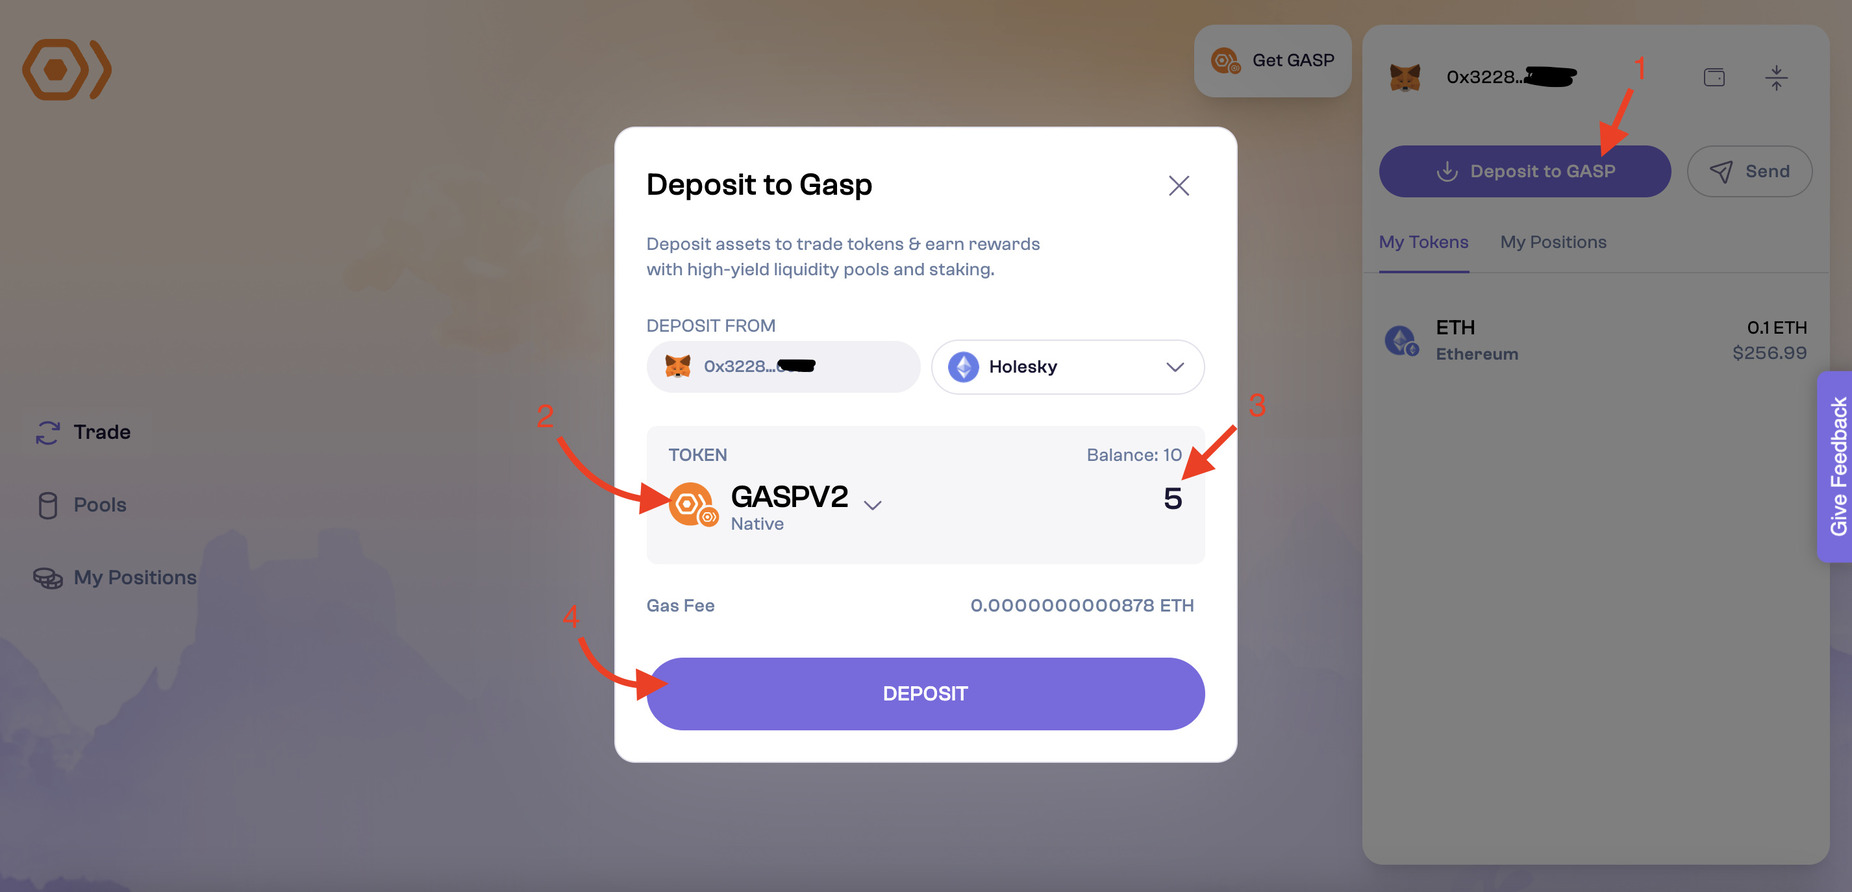
- Go to Gasp website and click [GET STARTED], then [Connect Wallet] in top right corner;
- Next, press [Deposit to GASP] and deposit any amount of $GASPV2 tokens;
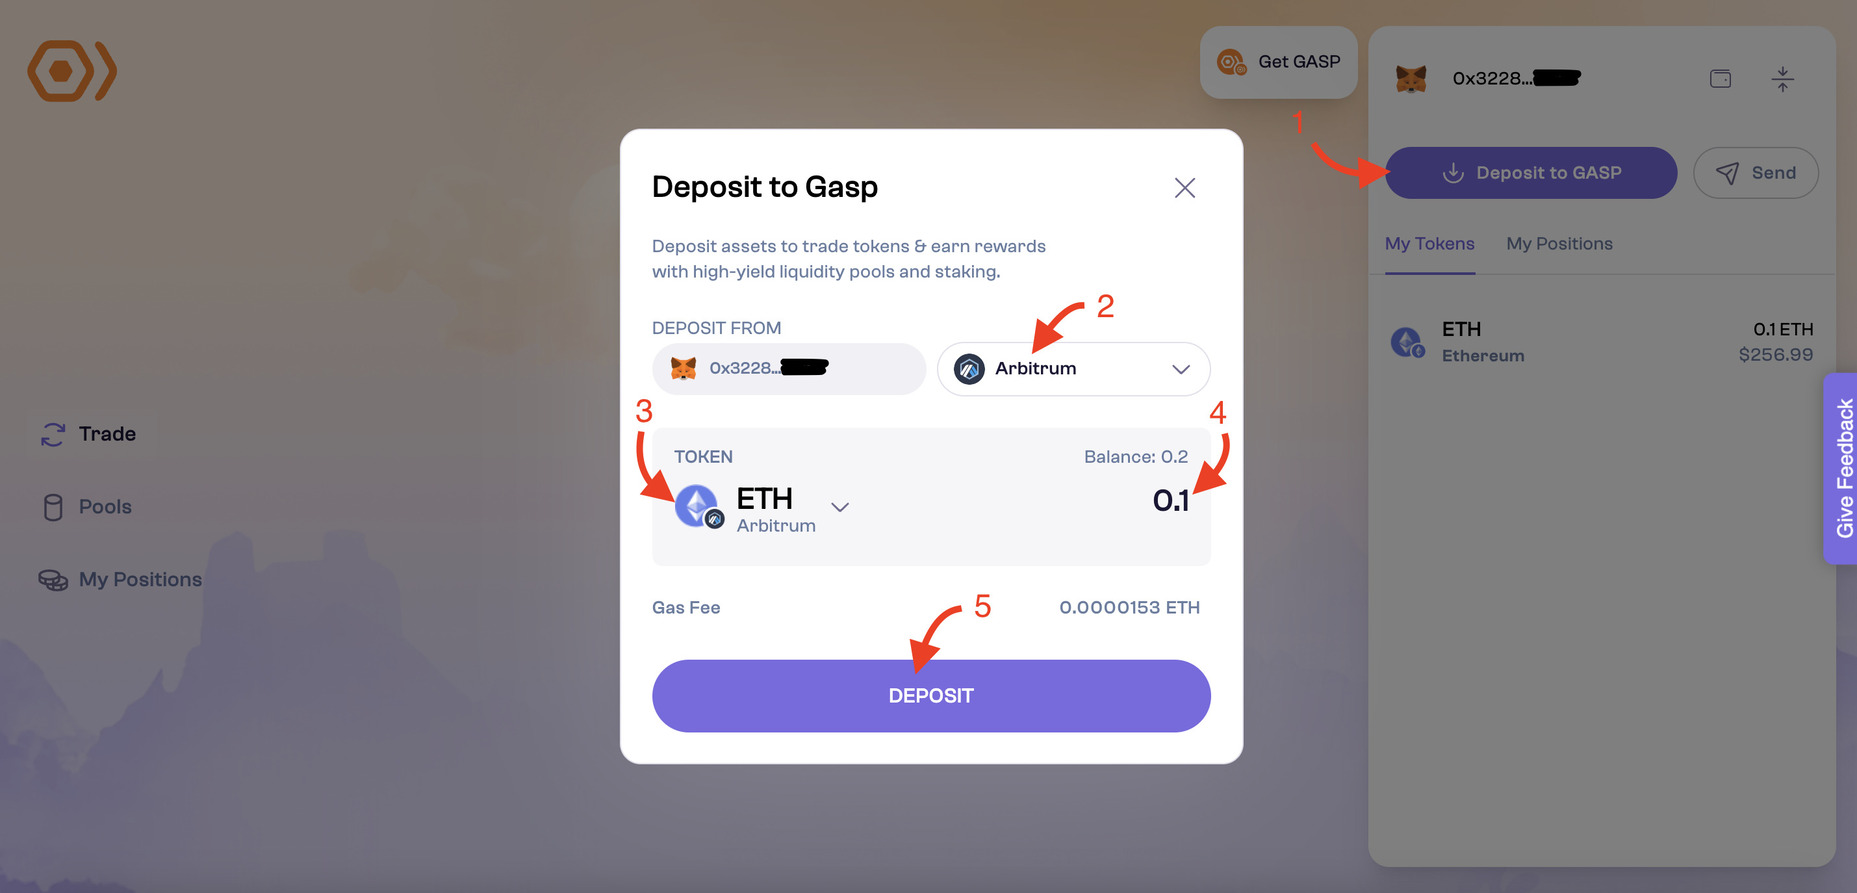
- Again press [Deposit to GASP] button, but now select Arbitrum network and $ETH token and deposit any amount of tokens.
Make Trades
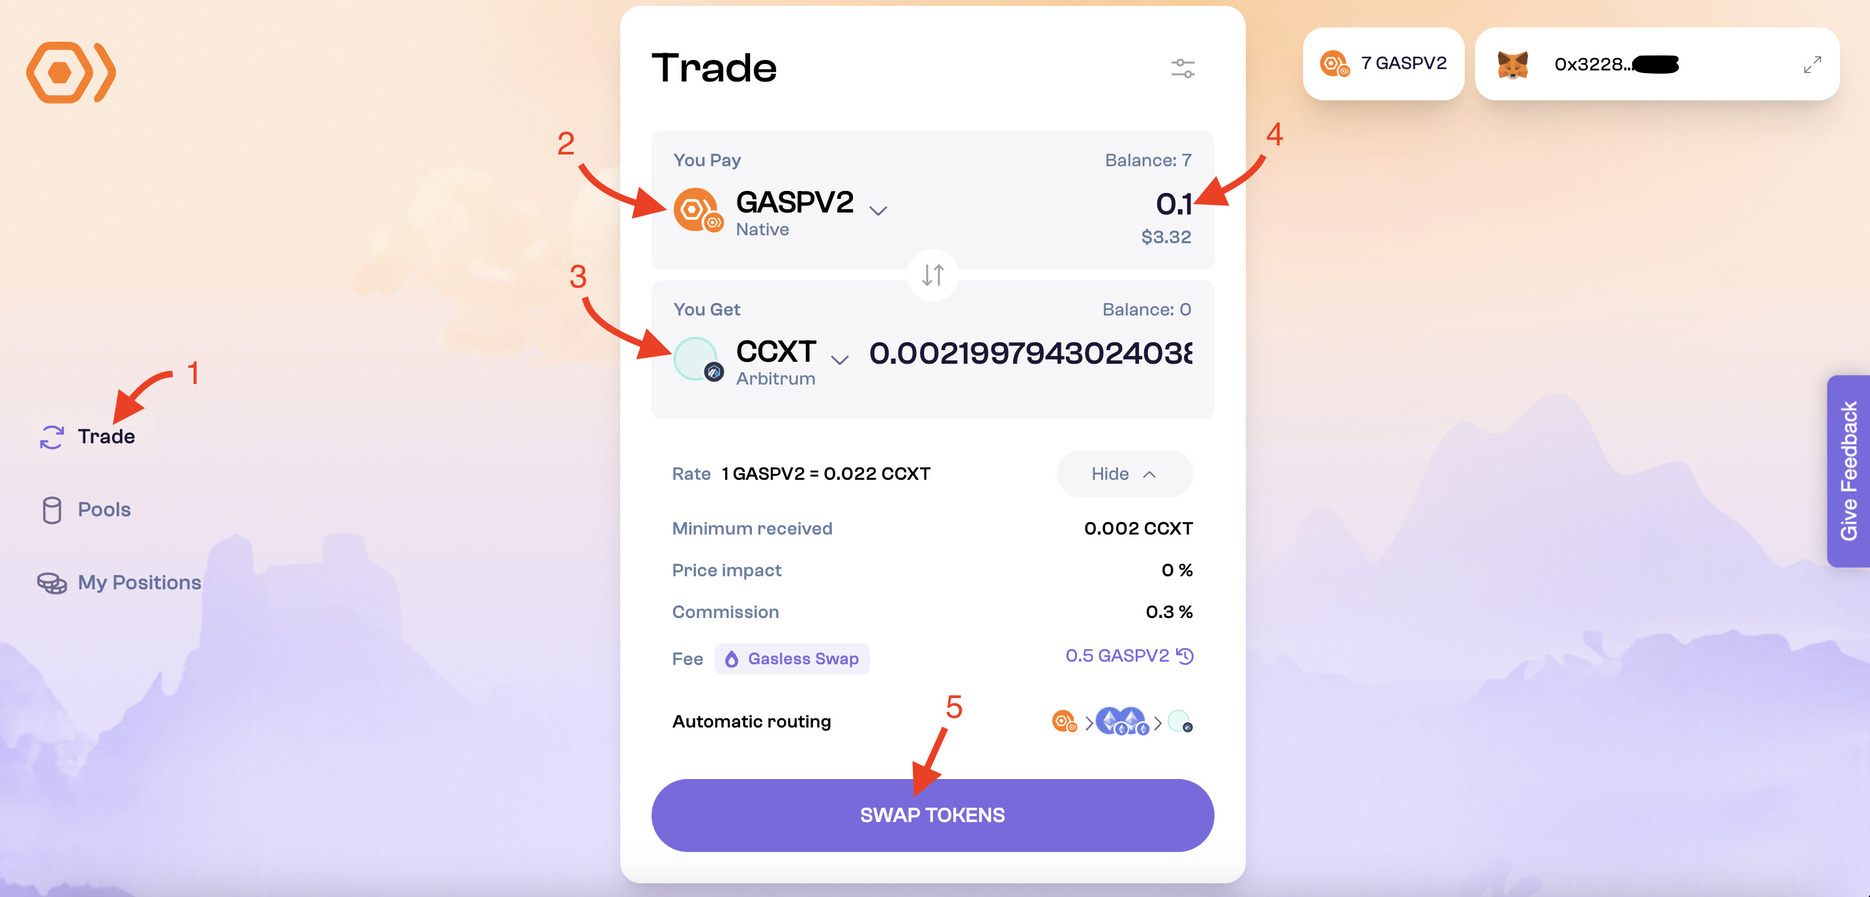
I recommend making at least 30-50 swaps for different periods of time and on different days.
Swap any amount of $GASPV2 to any available token.
Add Tokens to Liquidity Pool
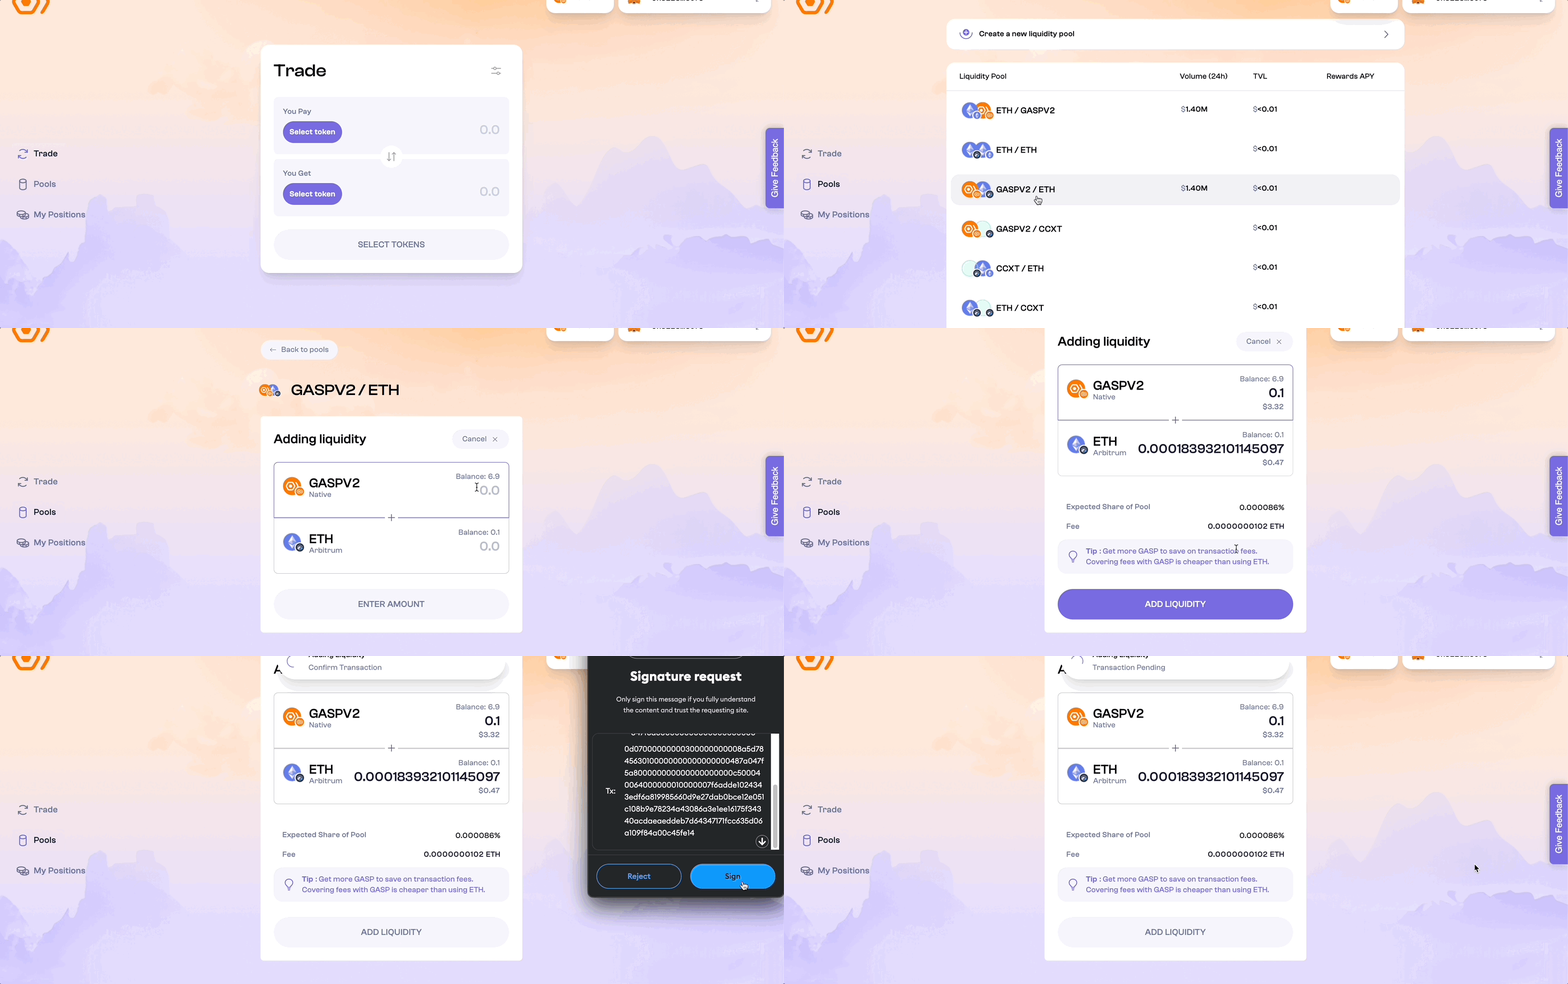
- Click on [Pools] menu item or visit this link to quick access;
- Select [GASPV2 / ETH] pair and add any amount of tokens;
- Then click [Add Liquidity] button and confirm transaction in your wallet.
Complete Galxe Tasks
Move to Gasp Galxe campaign and complete available tasks.
Conclusion
Testnet is easy and fast. The only delay that may occur is in the transfer of tokens between networks and the receipt of test tokens through faucets.
Yes, it’s still testnet phase.
It took me about 15 minutes.
As far as I have been able to gather information, yes.
Enjoyed this guide?
Click the like button below to show your support and let us know you found it helpful! Your feedback keeps us motivated to create more content like this.